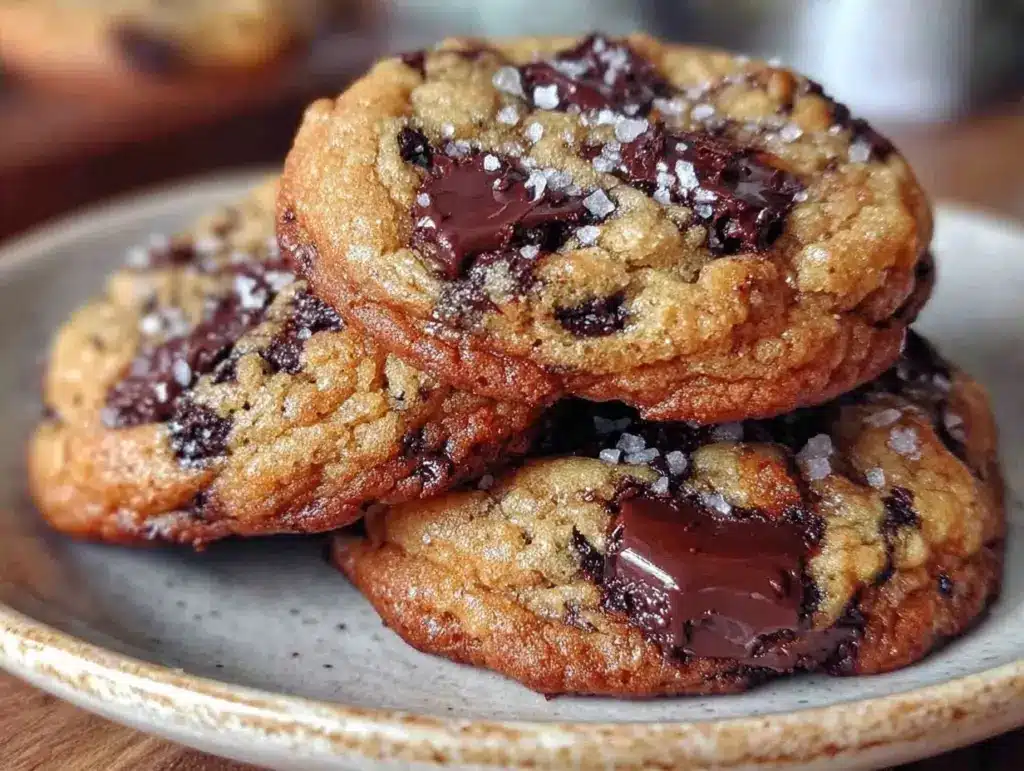
There was a Tuesday last month when I completely lost my mind in the kitchen. I had zero motivation for anything complicated, but I had a sudden, violent craving for something sweet. Not a salad. Not a complex casserole. Just a warm, gooey cookie with that specific nutty, toasty flavor that makes you close your eyes for a second.
I decided to make brown butter chocolate chip cookies. But not just any version. I wanted the kind with centers that stay chewy for days, edges that crisp up just enough, and a flavor depth that feels like you spent hours in the oven. I’ve made cookies since I was a teenager, and I’ve tried dozens of recipes that promise “perfect” results. Some are too cakey. Some spread into flat, crispy discs. Some taste like cardboard.
This one? It’s different. It’s hands-down the best cookie I’ve made in years. And the craziest part? It uses fewer ingredients than most standard chocolate chip cookie recipes. Seriously. You really can’t mess this up.
Here’s the secret: brown butter. It’s not a complicated technique, but it changes everything. By browning the butter, you toast the milk solids, which adds a deep, nutty, almost caramel-like flavor that regular melted butter just can’t compete with. Combined with a specific ratio of sugars and a chill time that actually matters, you get cookies that taste like they came from a high-end bakery but are simpler to make than no-bake chocolate peanut butter bars.
I’ve tested this recipe seven times. Yes, seven. I needed to be sure the chewy center wasn’t just a fluke. It’s not. It’s consistent. It’s reliable. And once you make these brown butter chocolate chip cookies, you’ll probably never go back to the standard recipe again. If you can only make one dessert this month, make these. You really can’t mess them up.
Why You’ll Love This Recipe
Look, I don’t bake often. When I do, I want it to be worth the effort. I want the result to be impressive without requiring a culinary degree. These cookies check every single box. Here’s why they’ve taken over my kitchen:
- Stupid Simple Ingredients — You need five main things. Butter, sugars, egg, flour, chocolate. That’s it. No weird extracts, no exotic flours, no fancy equipment. If you have these in your pantry, you’re good to go.
- Chewy Like Crazy — The texture is the star. The centers stay soft and chewy even two days later. The edges get crispy, but the middle stays tender. It’s the perfect contrast. I’ve made other cookies that turn into rocks by Wednesday. Not these.
- Deep, Complex Flavor — That brown butter step adds a toasty, nutty richness that elevates the whole cookie. It tastes more sophisticated than it has any right to. It’s the kind of flavor that makes people ask, “What’s in these?”
- Beginner-Proof — I’m serious. You can’t overmix these. You can’t under-bake them into raw dough (well, you can, but that’s your choice). The recipe is forgiving. If you’re nervous about baking, this is your confidence builder.
- Make-Ahead Friendly — The dough is great chilled. In fact, I prefer it chilled because it prevents spreading. But you can also freeze the dough balls for weeks. Need cookies for a party? Freeze the dough, bake them fresh. They taste just as good.
This is my go-to when I want to feel like a baking genius but don’t want to spend all day in the kitchen. It’s simple, it’s delicious, and it’s hard to beat.
Ingredients You’ll Need
Here’s the best part: you probably have most of this already. I’m keeping this list short because simplicity is the point. But I am particular about a few things, so pay attention to the details.
Unsalted Butter (1 cup / 226g) — You need to brown this. Use high-quality butter if you can afford it. It’s the main flavor driver here. I like using European-style butter because it has a higher fat content, which helps with the browning. Salted butter works, but you’ll need to adjust the added salt in the recipe.
Granulated Sugar (½ cup / 100g) — This helps with the crisp edges. Don’t skip it. It provides structure and that nice crunch on the outside.
Brown Sugar (1 cup / 200g) — Packed. This is what keeps the centers chewy. Dark brown sugar has more molasses, which adds extra moisture and flavor. I always use dark brown sugar for these. It’s non-negotiable.
Egg (1 large) — Room temperature is best, but it’s not a disaster if you’re lazy. Just make sure it’s not cold from the fridge. One egg binds everything together.
Egg Yolk (1 large) — This is the secret weapon. The extra yolk adds fat and richness, which contributes to that soft, chewy center. It’s what separates these from standard cookies.
Vanilla Extract (1 teaspoon) — Use real vanilla, not imitation. It makes a noticeable difference in flavor. If you’re using good vanilla bean paste, even better.
All-Purpose Flour (2 ¼ cups / 280g) — Spoon and level. Don’t scoop straight from the bag, or you’ll pack in too much flour and get dry cookies. Spoon it into the measuring cup and level it off with a knife.
Baking Soda (1 teaspoon) — This helps the cookies spread and brown. Make sure it’s fresh. If it’s been in your cabinet for years, replace it.
Salt (1 teaspoon) — Even though we’re using unsalted butter, you need salt to balance the sweetness. I use kosher salt. If you use table salt, use a bit less.
Chocolate Chips (2 cups / 340g) — I use semi-sweet chocolate chips. But honestly? Chopped chocolate bars are better. They create those gooey pockets of chocolate. If you use chips, they hold their shape nicely. If you use chunks, they melt more. I usually do a mix.
Flaky Sea Salt (for topping) — Optional but recommended. Sprinkle a little on top right after they come out of the oven. It adds a nice crunch and enhances the chocolate flavor.
Equipment Needed
You don’t need fancy gear for this. Here’s what I actually use:
- Large Saucepan — For browning the butter. A light-colored pan is best so you can see the color change. Stainless steel or aluminum works great.
- Large Mixing Bowl — For combining the dough. Glass or stainless steel is nice because it’s easy to clean.
- Whisk — For beating the butter and sugars. A regular whisk works fine.
- Spatula — For folding in the flour and chocolate. Silicone is best.
- Baking Sheets — Two large sheets. I use rimmed half-sheets. Light-colored aluminum is best for even baking.
- Parchment Paper — Lines the baking sheets. Prevents sticking and makes cleanup easy. Do not skip this.
- Cooling Rack — For cooling the cookies. Wire racks are standard.
- Measuring Cups and Spoons — Standard stuff. Dollar store versions work fine.
Optional but nice: An ice cream scoop for portioning the dough. It makes uniform cookies every time. But a spoon works too.
How to Make It: Step-by-Step
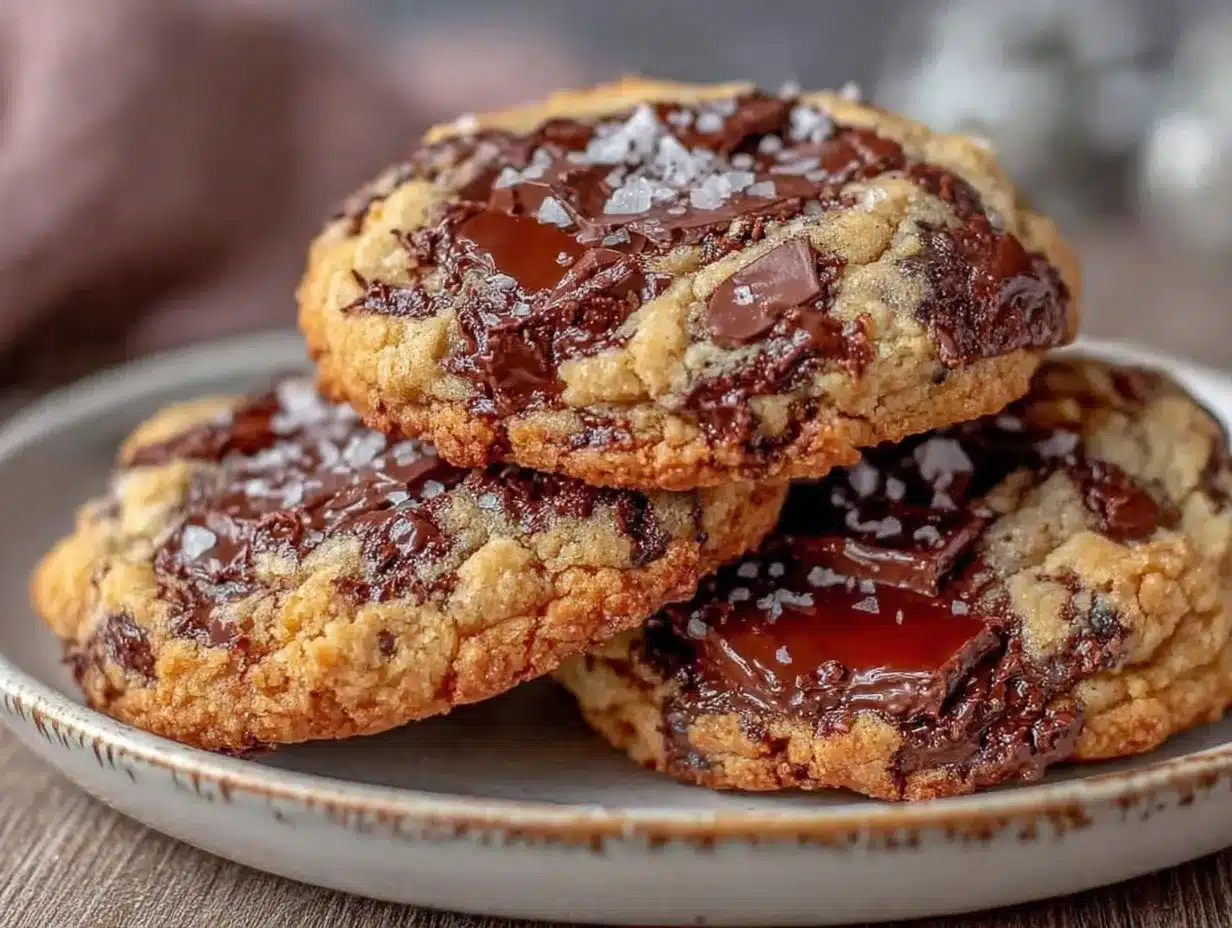
Alright, let’s make these brown butter chocolate chip cookies! I’m walking you through exactly how I do it, including the little tricks I’ve picked up.
Step 1: Brown the Butter (5-7 minutes)
This is the most important step. Pour your butter into a large saucepan and place it over medium heat. As it melts, it will start to foam and bubble. Keep stirring constantly with a wooden spoon. You’ll hear it sizzle. The foam will turn from white to a light tan, then to a deeper amber color. You’ll also smell it change—from creamy to nutty, like toasted almonds or hazelnuts. This usually takes 5-7 minutes.
Watch closely! Once it turns dark amber and smells amazing, remove it from the heat immediately. Pour it into a heatproof bowl to stop the cooking. Let it cool for 10-15 minutes until it’s still liquid but not hot. If it’s too hot, it will cook the egg when you mix it in.
Step 2: Mix the Wet Ingredients (2 minutes)
Once the butter has cooled slightly, add the granulated sugar and brown sugar to the bowl. Whisk vigorously for about 2 minutes. The mixture should look glossy and slightly thickened. This helps dissolve the sugar a bit, which contributes to the chewy texture.
Add the egg and egg yolk. Whisk again until fully combined. Add the vanilla extract and mix one more time. It should look smooth and uniform.
Step 3: Add the Dry Ingredients (2 minutes)
Sift the flour, baking soda, and salt into the wet mixture. If you don’t have a sifter, just whisk them together in a separate bowl first. Gently fold the dry ingredients into the wet using a spatula. Stop as soon as you no longer see streaks of flour. Overmixing develops gluten, which makes cookies tough. We want tender cookies, so be gentle.
Step 4: Fold in the Chocolate (1 minute)
Add your chocolate chips or chunks. Fold them in until evenly distributed. You’ll have a thick, sticky dough. It’s supposed to look like this. If it feels too dry, add a tablespoon of milk. If it’s too wet, add a tablespoon of flour. But usually, it’s perfect.
Step 5: Chill the Dough (30 minutes – 24 hours)
Here’s the thing about chilling: it’s optional but highly recommended. Chilling the dough prevents the cookies from spreading too much and allows the flavors to meld. I usually chill mine for at least 30 minutes. If I’m planning ahead, I chill it overnight. The flavors get even better.
Cover the bowl with plastic wrap or transfer the dough to an airtight container. Put it in the fridge.
Step 6: Scoop and Bake (12-14 minutes)
Preheat your oven to 350°F (175°C). Line two baking sheets with parchment paper. Scoop the dough into balls, about 2 tablespoons each. Place them on the baking sheets, leaving about 2 inches between them because they will spread.
Bake for 12-14 minutes. The edges should be golden brown, but the centers should still look slightly underbaked and soft. This is crucial! They will continue to cook on the hot baking sheet after you take them out. If you wait until the centers look fully set, they’ll be overbaked.
Step 7: Cool and Serve
Let the cookies cool on the baking sheet for 5 minutes. Then transfer them to a wire rack to cool completely. Or, if you’re like me, eat one warm. Sprinkle with flaky sea salt if you’re feeling fancy.
Expert Tips & Tricks
Here’s everything I’ve learned from making these dozens of times. These tips will save you from my mistakes.
Don’t Burn the Butter
Brown butter goes from perfect to burnt in seconds. Once you see the dark specks (those are the toasted milk solids), take it off the heat immediately. Those specks are flavor bombs, but if they turn black, the butter is bitter. Trust your nose—it should smell like toasted nuts.
Chill the Dough
I know you want to bake them now. But chilling makes a huge difference. It hydrates the flour, which leads to better texture. It also solidifies the fat, which prevents spreading. If you skip this, your cookies will be flatter and crispier. I don’t mind that, but for chewy centers, chill them.
Underbake Slightly
This is the #1 mistake people make. They wait until the cookies look done. They don’t. Take them out when the edges are set and the centers still look soft. They will firm up as they cool. If you bake them until the centers look set, they’ll be dry.
Use a Scale
If you have a kitchen scale, use it. Baking is science, and measuring by weight is more accurate than volume. 280g of flour is always 280g. 2 ¼ cups can vary wildly depending on how you scoop. If you don’t have a scale, spoon and level method is your best friend.
Room Temperature Ingredients
Make sure your egg and egg yolk are close to room temperature. Cold ingredients can cause the butter to seize up when you mix them, leading to a lumpy dough. Just leave the egg out for 30 minutes before you start.
Don’t Overcrowd the Pan
Leave space between the cookies. They need room to spread. If you pack them too close, they’ll merge into one giant cookie. I usually fit 6-8 cookies per standard baking sheet.
Variations & Substitutions
Once you’ve nailed the basic version, here’s how you can mix it up. I’ve tried all of these.
White Chocolate Macadamia
Swap the chocolate chips for white chocolate chips and add 1 cup of chopped macadamia nuts. It’s like a cookie from Hawaii. My kids love this version.
Double Chocolate
Add ¼ cup of cocoa powder to the dry ingredients. Use semi-sweet chips. It’s rich, fudgy, and intense. If you’re a chocolate lover, this is for you.
Peanut Butter Swirl
After scooping the dough balls, add a small dollop of peanut butter on top and swirl it in with a fork. It adds a salty, nutty contrast. It’s similar to the vibe of fudgy peanut butter swirl brownies.
Gluten-Free
Use a 1:1 gluten-free flour blend. Most brands work great in cookies. I’ve used Bob’s Red Mill and Cup4Cup with good results. Add ¼ teaspoon of xanthan gum if your blend doesn’t include it.
Dairy-Free
Use a dairy-free butter alternative. Not all brands brown the same way, so watch closely. Use dairy-free chocolate chips. The texture might be slightly different, but it’s still delicious.
Vegan
Replace the butter with vegan butter. Replace the egg with a flax egg (1 tablespoon ground flaxseed mixed with 3 tablespoons water). Use vegan chocolate chips. The texture will be chewier, but it works.
Serving & Storage
How to Serve:
I usually serve these warm, right off the baking sheet. They’re best with a cold glass of milk. But they’re also great at room temperature. I like to serve them on a nice platter for gatherings. They look rustic and homemade.
Side Dishes:
These are dessert, so they go with coffee, tea, or milk. If you’re having them after dinner, maybe pair them with a creamy coconut matcha latte for a cozy evening.
Storage Instructions:
Room Temperature: Store in an airtight container for up to 5 days. They stay chewy for days. If they start to dry out, add a slice of bread to the container. The bread releases moisture, which keeps the cookies soft.
Refrigerator: Not recommended. The fridge dries out baked goods. Stick to room temperature.
Freezer: You can freeze baked cookies for up to 3 months. Let them thaw at room temperature. Or, freeze the dough balls. Place them on a baking sheet, freeze until solid, then transfer to a freezer bag. Bake from frozen, adding 1-2 minutes to the bake time.
Reheating: Warm them in the microwave for 10-15 seconds. They’ll be soft and gooey again. Or warm them in a 300°F oven for 5 minutes.
Nutrition Information
I’m not a nutritionist, but here’s the breakdown if you’re tracking. This is per cookie, based on 24 cookies.
- Calories: 180
- Protein: 3g
- Carbs: 24g
- Fiber: 1g
- Sugar: 16g
- Fat: 10g
- Saturated Fat: 6g
- Cholesterol: 35mg
- Sodium: 120mg
Look, this is a cookie. It’s got butter and sugar. It’s not a health food. But it’s homemade, so you know what’s in it. And honestly, it’s way better than store-bought cookies, which are often full of preservatives and weird ingredients. When I make these, I enjoy them without guilt. They’re a treat, and that’s what they’re meant to be.
Final Thoughts
So that’s my go-to brown butter chocolate chip cookies recipe! I’ve talked your ear off, I know. But when you make a recipe this often, you have a lot to say about it.
This has saved my dessert game more times than I can count. It’s my answer to “I need something sweet” when I don’t want to order takeout or buy expensive bakery cookies. My family loves them, my friends ask for the recipe, and I love that I can make them with five ingredients.
Make it yours! Try different chocolates, add nuts, or play with the spices. The best recipes are the ones you adapt to your tastes. If you make these, drop a comment and let me know what you think! I love hearing how recipes turn out in your kitchen. And if something doesn’t work, tell me that too—I’m here to help troubleshoot.
Happy baking! And I hope your kitchen smells half as good as mine does right now.
Frequently Asked Questions
Can I use salted butter instead of unsalted?
You can, but you’ll need to reduce the added salt in the recipe. Salted butter varies in salt content, so start with ½ teaspoon of added salt and taste the dough. If it tastes salty enough, add more. If not, add a little more. It’s safer to start with less salt and add more than to start with too much.
Why did my cookies spread too much?
This usually happens for three reasons: the butter was too warm when you mixed it, you didn’t chill the dough, or the baking sheet was warm. Make sure your brown butter has cooled to room temperature before mixing. Chill the dough for at least 30 minutes. And let your baking sheets cool completely between batches. If the sheet is hot, the cookies will spread instantly.
Can I freeze the cookie dough?
Yes! This is one of my favorite tricks. Scoop the dough into balls, place them on a baking sheet, and freeze until solid. Then transfer them to a freezer bag. They’ll keep for up to 3 months. Bake them straight from frozen, adding 1-2 minutes to the bake time. It’s like having fresh cookies on demand.
Why did my cookies turn out cakey?
Cakey cookies usually mean you used too much flour or overmixed the dough. Make sure you’re spooning and leveling your flour, not scooping. And stop mixing as soon as the flour disappears. Also, check your baking soda. If it’s old, it won’t work properly, which can affect texture.
Can I use dark chocolate instead of semi-sweet?
Absolutely. Dark chocolate will make the cookies less sweet and more intense. I love using 60% dark chocolate chunks for a sophisticated flavor. Just adjust the sugar if you find it too bitter. Start with the original amount, taste the dough, and add more sugar if needed.
How do I know when the butter is browned?
Look for two signs: color and smell. The butter should turn a deep amber color, and you’ll see dark brown specks at the bottom of the pan. The smell should be nutty and toasty, like hazelnuts. If it smells burnt, it’s overdone. If it still smells like melted butter, it’s not done yet. Trust your nose—it’s the best indicator.
Can I make these cookies gluten-free?
Yes! Use a 1:1 gluten-free flour blend. Most brands work great in cookies. I’ve used Bob’s Red Mill and Cup4Cup with good results. Just make sure your blend includes xanthan gum, or add ¼ teaspoon yourself. The texture will be slightly more delicate, but still delicious.
Pin This Recipe!
Brown Butter Chocolate Chip Cookies: 5-Ingredient Chewy Centers
- Total Time: 32-34 minutes
- Yield: 24 cookies 1x
Description
These brown butter chocolate chip cookies feature chewy centers, crisp edges, and a deep, nutty flavor. Made with just a few simple ingredients and a chill time, they are beginner-proof and consistently delicious.
Ingredients
- 1 cup (226g) unsalted butter
- ½ cup (100g) granulated sugar
- 1 cup (200g) packed dark brown sugar
- 1 large egg, room temperature
- 1 large egg yolk, room temperature
- 1 teaspoon vanilla extract
- 2 ¼ cups (280g) all-purpose flour
- 1 teaspoon baking soda
- 1 teaspoon kosher salt
- 2 cups (340g) semi-sweet chocolate chips or chopped chocolate
- Flaky sea salt, for topping (optional)
Instructions
- Brown the butter: Melt butter in a large saucepan over medium heat, stirring constantly until it turns dark amber and smells nutty (5-7 minutes). Pour into a heatproof bowl and cool for 10-15 minutes.
- Mix wet ingredients: Whisk granulated sugar and brown sugar into the cooled brown butter until glossy. Whisk in the egg, egg yolk, and vanilla extract until smooth.
- Add dry ingredients: Sift flour, baking soda, and salt into the wet mixture. Gently fold with a spatula until no streaks of flour remain.
- Fold in chocolate: Add chocolate chips or chunks and fold until evenly distributed.
- Chill dough: Cover and refrigerate dough for at least 30 minutes (or up to 24 hours).
- Preheat oven: Preheat oven to 350°F (175°C) and line baking sheets with parchment paper.
- Scoop and bake: Scoop dough into 2-tablespoon balls, spacing them 2 inches apart. Bake for 12-14 minutes until edges are golden but centers look soft.
- Cool: Let cookies cool on the baking sheet for 5 minutes, then transfer to a wire rack. Sprinkle with flaky sea salt if desired.
Notes
Ensure brown butter is cooled before mixing to avoid cooking the egg. Chill dough to prevent spreading and enhance flavor. Underbake slightly for chewy centers. Use a scale for accurate flour measurement.
- Prep Time: 20 minutes
- Cook Time: 12-14 minutes
- Category: Dessert
- Cuisine: American
Nutrition
- Serving Size: 1 cookie
- Calories: 180
- Sugar: 16
- Sodium: 120
- Fat: 10
- Saturated Fat: 6
- Carbohydrates: 24
- Fiber: 1
- Protein: 3
Keywords: brown butter cookies, chocolate chip cookies, chewy cookies, easy dessert, baking, homemade cookies


