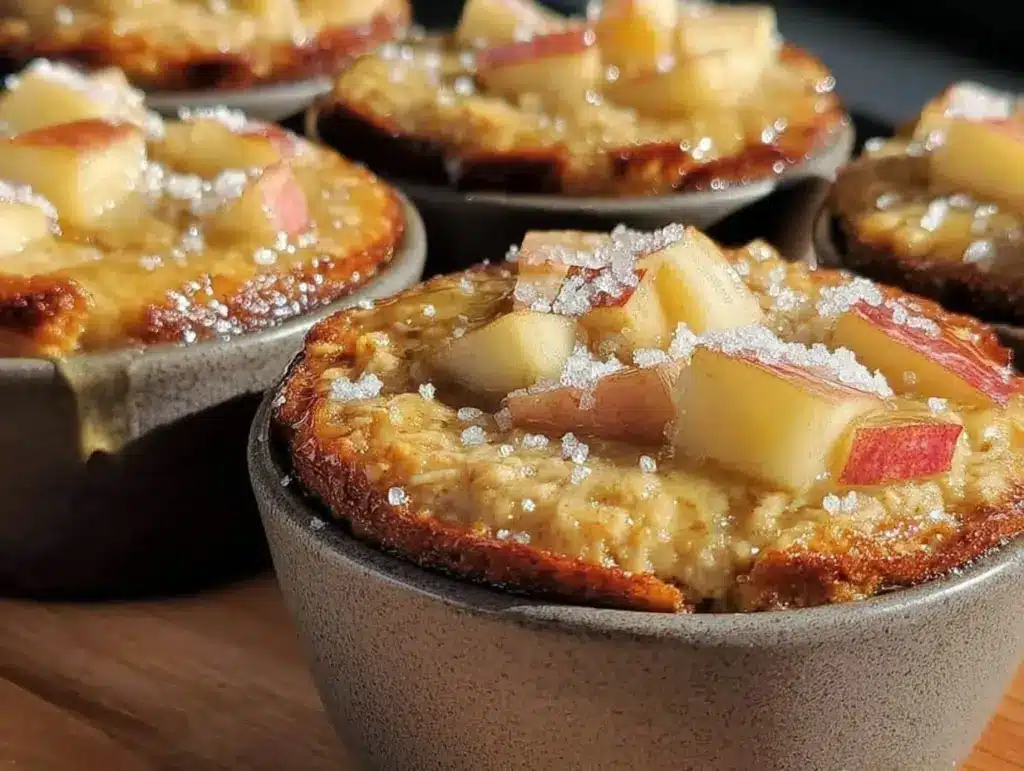
I have a confession to make. For years, I was the person who thought “breakfast” meant something complicated, time-consuming, and usually involving a stand mixer. I believed that if you wanted good oatmeal, you had to stand over the stove, stirring constantly, worrying about it boiling over, and then dealing with the inevitable sticky pot.
Then came the back-to-school season. You know the one. The mornings become a blur of missing bus times, forgotten permission slips, and trying to find a left shoe that isn’t under the couch. I needed something that tasted like homemade comfort but required zero active effort while I was trying to get three people out the door. That’s when I stopped trying to be a gourmet chef at 6:30 AM and started making these Back to School Baked Apple Cinnamon Oatmeal Cups.
I first whipped up a batch on a Tuesday morning because I was running late and had half a bag of oats and some bruised apples in the fridge. I threw them together while brushing my teeth. The result? Soft, cakey, cinnamon-spiced oat cups that tasted like autumn morning. My kids ate them standing up by the car door. No fuss. No mess. Just good food.
Since then, I’ve made this recipe at least a dozen times. It’s become my go-to when I want to feel like I’m feeding my family something wholesome and special, even on the chaotic days. It’s not just about convenience, though. It’s about the fact that you really can’t mess this up. If you can mix ingredients in a bowl, you can make these. Seriously. It’s that simple.
What I love most is how versatile they are. They’re not just a breakfast. They’re a snack. They’re a post-school treat. They’re even a decent dessert if you add a little extra drizzle. But mostly, they’re my peace of mind during the school rush. And if you’re looking for other simple, no-fail recipes to keep in your rotation, you might also enjoy trying my creamy strawberry banana smoothie—it’s another five-ingredient win for busy mornings.
Why You’ll Love This Recipe
There are about ten reasons I keep making these oatmeal cups, but let’s be real about the ones that actually matter for your daily life.
Minimal Cleanup — This is the biggest selling point for me. You mix everything in one bowl, spoon it into the muffin tin, and bake. That’s it. No standing over a stove. No washing a large pot later. I love a good recipe, but I love a clean kitchen even more. Compare this to my make-ahead sausage and cheese breakfast casserole—both are great, but these cups are faster to throw together and easier to portion.
Actually Tastes Good — I know, I know. “Healthy” breakfasts often taste like cardboard. These don’t. The cinnamon and apple combo is classic for a reason. They taste like a baked good, but they’re packed with fiber and whole grains. My kids think they’re getting a treat, and I feel good knowing they’re starting the day with real food.
Freezer Friendly — This is the game-changer. I make a double batch on Sunday. I freeze half of them in a ziplock bag. On Wednesday morning, when I’m feeling lazy, I just grab two, pop them in the microwave for 30 seconds, and we’re good to go. They thaw and reheat beautifully. You really can’t mess up a recipe that forgives your forgetfulness.
Customizable — Hate raisins? Leave them out. Love nuts? Throw in some walnuts. Want it sweeter? Add a drizzle of honey. This recipe is a blank canvas. I’ve made them with just apple and cinnamon, and I’ve made them with added chocolate chips for the weekends. It’s your kitchen, your rules.
Beginner Proof — I’m not exaggerating. There are no techniques here. No whipping egg whites. No tempering chocolate. Just mix, scoop, bake. If you can use a spoon, you can make these. It’s the perfect recipe to build confidence in the kitchen.
Ingredients You’ll Need
Here’s the best part: you probably have most of this already. I’m not asking you to run to the store for anything exotic. This is pantry-friendly cooking at its finest.
Rolled Oats (2 cups / 160g) — I use old-fashioned rolled oats, not instant. Instant oats get too mushy. Rolled oats give you that nice, chewy texture. You can use quick oats in a pinch, but the texture will be softer, more like a cake than a cup. I stick with rolled because I like the bite.
Milk (1 ½ cups / 360ml) — Any milk works. I use 2% dairy milk because it’s what we drink, but almond, oat, or soy milk work just as well. This hydrates the oats so they soften in the oven. Don’t use water unless you have to; milk adds richness.
Eggs (2 large / ~100g) — These bind everything together. They’re the glue. Room temperature eggs mix in easier, but cold eggs work fine too. I don’t stress about this one.
Honey or Maple Syrup (⅓ cup / 100ml) — I prefer honey for that floral sweetness, but pure maple syrup is great too. If you’re avoiding sugar, you can use a sugar-free alternative, but the texture might be slightly different. I keep it simple with honey.
Applesauce (½ cup / 120g) — This is my secret weapon. It adds moisture and keeps the cups from drying out, especially if you’re using less sugar. Unsweetened applesauce is best so you control the sweetness. I buy the little cups for my kids and use the rest for baking.
Apple (1 medium, diced / ~150g) — I use Gala or Fuji apples. They hold their shape well and are naturally sweet. I dice them into small cubes—about ¼ inch. If you chop them too big, you get huge chunks of apple in every bite. Too small, and they disappear. Just right is the sweet spot.
Cinnamon (1 teaspoon / 2g) — The star of the show. Don’t skip it. If you don’t like cinnamon, you can use pumpkin pie spice, but it won’t taste the same. I always check my cinnamon expiration date because old cinnamon loses its punch.
Baking Powder (1 teaspoon / 2g) — Just a little bit to help them rise. You want them fluffy, not dense. Make sure it’s fresh for best results.
Pinch of Salt — This balances the sweetness. It’s easy to skip, but I promise, it makes the cinnamon flavor pop more.
Optional Add-ins:
Chopped Walnuts (¼ cup / 30g) — Adds crunch.
Dark Chocolate Chips (¼ cup / 40g) — For the weekend treat version.
Chopped Pecans (¼ cup / 30g) — Great alternative to walnuts.
Equipment Needed
You don’t need fancy gadgets for this. Here’s what I actually use.
Large Mixing Bowl — I use a 4-quart stainless steel bowl. It needs to be big enough to mix everything without spilling. Any bowl works, just make sure it’s big.
Muffin Tin — Standard 12-cup muffin tin. I use a non-stick one. If yours isn’t non-stick, you’ll need to grease it or use liners.
Cupcake Liners — Paper liners make cleanup instant. I use them because I hate scrubbing muffin tins. If you’re trying to reduce waste, you can grease the tin with butter or oil, but liners are easier.
Measuring Cups and Spoons — Standard stuff. I use the nested measuring cups for dry ingredients and the spoons for spices. Accuracy doesn’t matter too much here, but it helps.
Spoon or Ice Cream Scoop — To portion the batter into the tin. A small ice cream scoop makes them all the same size, which helps them bake evenly. But a spoon works fine if you’re eyeballing it.
Wire Rack — For cooling. If you don’t have one, just let them cool in the pan for 5 minutes, then move them to a plate. They’re sturdy enough to handle it.
How to Make It: Step-by-Step

Alright, let’s make this! I’m walking you through exactly how I do it. It’s straightforward, so don’t overthink it.
Step 1: Prep Your Oven and Pan (2 minutes)
Preheat your oven to 350°F (175°C). Line your muffin tin with paper liners. If you’re not using liners, lightly grease each cup with butter or cooking spray. I line them because I’m lazy, and it works perfectly.
Step 2: Mix the Wet Ingredients (2 minutes)
In your large bowl, whisk together the milk, eggs, honey, and applesauce. Whisk until it’s all combined. It doesn’t need to be frothy, just mixed. This ensures the sweeteners and liquids are evenly distributed so every bite tastes the same.
Step 3: Add the Dry Ingredients (1 minute)
Add the rolled oats, cinnamon, baking powder, and salt to the wet mixture. Stir with a sturdy spoon or spatula. Mix until the oats are fully coated. You’ll see the oats start to absorb the liquid. It’s okay if it looks a little thick at this stage.
Step 4: Fold in the Apples (1 minute)
Add the diced apples (and nuts or chocolate chips if using). Gently fold them in. Be careful not to break up the apple cubes too much. You want distinct pieces of apple in each cup.
Step 5: Fill the Muffin Tin (2 minutes)
Spoon the batter into the prepared muffin cups. Fill them about ¾ full. Don’t overfill, or they’ll spill over in the oven. I use a small ice cream scoop to get even portions, but a tablespoon works too. Aim for about ¼ cup of batter per cup.
Step 6: Bake (20-25 minutes)
Place the tin in the preheated oven. Bake for 20-25 minutes. They’re done when the tops are golden brown and a toothpick inserted into the center comes out clean. If you insert it and it comes out with wet batter, give them 2-3 more minutes. Every oven is different, so keep an eye on them around the 20-minute mark.
Step 7: Cool and Serve (10 minutes)
Let them cool in the pan for 5 minutes. They’re fragile when hot. Then, move them to a wire rack to cool completely. This stops the cooking process and sets the texture. You can eat them warm, but they’re better once they’ve cooled down a bit.
Total Time: About 35 minutes (5 minutes prep, 25 minutes bake, 10 minutes cool).
Expert Tips & Tricks
Here’s everything I’ve learned from making these dozens of times. These tips will save you from my mistakes.
Don’t Skip the Rest Time
If you eat them right out of the oven, they might feel a bit gummy. Letting them cool allows the oats to fully hydrate and the structure to set. It makes a huge difference in texture.
Dice Apples Uniformly
If your apple pieces are different sizes, some will cook faster than others. Try to get them all roughly the same size—about ¼ inch cubes. This ensures even baking.
Check Your Cinnamon
I once made these with a jar of cinnamon that was two years old. They tasted flat. Fresh cinnamon makes a world of difference. If your cinnamon smells faint, replace it. It’s cheap insurance for flavor.
Freezing Strategy
Cool them completely before freezing. If you freeze them warm, you’ll get ice crystals and soggy oats. Store them in a single layer in the freezer for the first hour, then transfer to a bag. This prevents them from sticking together.
Reheating Hack
Microwave for 30 seconds. That’s it. If you’re in a rush, 30 seconds brings them back to life. If you have time, toast them in a toaster oven for 3-4 minutes for a crispier edge.
Variations & Substitutions
Once you’ve nailed the basic version, here’s how you can mix it up. I’ve tried all of these.
Banana Nut Version
Swap the apples for mashed ripe bananas (½ cup) and add ½ cup chopped walnuts. It tastes like banana bread. My kids love this version.
Pumpkin Spice Version
Swap the apples for ½ cup pumpkin puree. Use pumpkin pie spice instead of cinnamon. It’s perfect for fall.
Chocolate Chip Version
Add ½ cup mini chocolate chips. It’s basically an oatmeal cookie in cup form. Great for dessert or a sweet breakfast.
Gluten-Free
Use certified gluten-free rolled oats. The rest of the ingredients are naturally gluten-free, so this works easily. I’ve used Bob’s Red Mill GF oats with great results.
Dairy-Free
Use almond milk or oat milk instead of dairy milk. Use maple syrup instead of honey. Everything else is dairy-free. My lactose-intolerant friend enjoys these too.
Sugar-Free
Use unsweetened applesauce and no added sweetener. The apples provide natural sweetness. It’s less sweet, but still tasty. Good for those watching sugar intake.
Serving & Storage
How to Serve:
I usually serve these straight from the container. They’re handheld, which is perfect for kids. You can drizzle them with a little extra honey or top with yogurt if you want to make it fancier. I also like them with a side of fresh fruit.
Storage Instructions:
Refrigerator: Store in an airtight container for up to 5 days. They actually get softer in the fridge, which some people prefer.
Freezer: Store in a freezer-safe bag for up to 3 months. They freeze beautifully. Just thaw in the fridge or microwave directly from frozen.
Reheating:
Microwave for 30-60 seconds. Or toast in a toaster oven for 3-4 minutes. Avoid the microwave if you want a crispy texture; the toaster oven is better for that.
Pro Tip:
If you’re meal prepping, make a double batch. Freeze half immediately. You’ll thank yourself on those mornings when you don’t want to think about breakfast.
Nutrition Information
I’m not a nutritionist, but here’s the breakdown if you’re tracking.
Per Serving (based on 12 cups, 1 cup each):
Calories: 180
Protein: 5g
Carbs: 32g
Fiber: 3g
Sugar: 12g
Fat: 4g
Saturated Fat: 1g
Cholesterol: 35mg
Sodium: 100mg
Calcium: 60mg
What’s Good:
High in fiber from the oats. Good source of whole grains. Natural sugars from apples and honey. Low in fat.
What to Know:
Contains dairy (if using milk) and gluten (unless using GF oats). Moderate sugar content depending on added sweetener.
My Take:
Look, these are oatmeal cups with apples and honey. They’re not a diet food, but they’re not a dessert either. They’re a wholesome, balanced breakfast. When I want to make it lighter, I use less honey and more applesauce. But usually? I just eat one or two and enjoy it.
Final Thoughts
So that’s my Back to School Baked Apple Cinnamon Oatmeal Cups recipe! I’ve probably talked your ear off at this point, but when you make a recipe this often, you have a lot to say about it.
This has saved my mornings more times than I can count. It’s my answer to “what’s for breakfast” when I’m tired, don’t want to cook, and still want something that tastes really good. My kids are happy, I’m happy because I’m not stressed, and we’re all fed.
Make it yours! Try different add-ins, swap in your favorite fruit, adjust the sweetness. The best recipes are the ones you adapt to your family’s tastes. And if you need more easy, beginner-friendly recipes, check out my homemade no-bake chocolate peanut butter bars—another simple treat that’s hard to mess up.
If you make this, drop a comment and let me know what you think! I love hearing how recipes turn out in your kitchen. And if something doesn’t work, tell me that too—I’m here to help troubleshoot.
Happy cooking! And I hope your kitchen smells half as good as mine does right now.
Frequently Asked Questions
Can I use instant oats instead of rolled oats?
You can, but the texture will be different. Instant oats are thinner and cook faster, so they’ll make the cups softer and more cake-like. Rolled oats give you that chewy, hearty texture that I prefer. If you use instant oats, you might need to reduce the baking time by 2-3 minutes to prevent them from drying out.
Why did my oatmeal cups turn out dry?
This usually happens if you overbake them or use too little liquid. Make sure you’re using the full amount of milk and applesauce. Also, check your oven temperature with a thermometer—ovens can run hot. Remove them from the oven when the toothpick comes out with just a few moist crumbs, not completely clean.
Can I make these ahead for the week?
Yes! This is exactly what they’re designed for. Make them on Sunday, store them in the fridge, and grab one or two each morning. They stay fresh for up to 5 days in the fridge. For longer storage, freeze half of the batch.
Can I use fresh apples instead of dried?
I highly recommend fresh apples. Dried apples can be chewy and might not release enough moisture. Fresh apples add natural sweetness and moisture. I use Gala or Fuji because they’re sweet and hold their shape well. Avoid apples like Granny Smith unless you like tartness, as they can be too sharp.
How do I reheat frozen oatmeal cups?
You can reheat them directly from frozen in the microwave for 1-2 minutes. Or, let them thaw in the fridge overnight and reheat for 30-60 seconds. For a crispier texture, toast them in a toaster oven at 350°F for 5-7 minutes.
Can I substitute honey with something else?
Yes! Maple syrup is the best substitute. Use the same amount. You can also use agave nectar or brown rice syrup. If you want to avoid added sugar entirely, increase the applesauce to ¾ cup and use a sugar-free sweetener, but the flavor will be less sweet.
Are these suitable for kids with allergies?
They’re naturally nut-free if you don’t add nuts. They’re dairy-free if you use plant-based milk. They’re gluten-free if you use certified GF oats. Always check your specific ingredient labels to ensure they meet your family’s dietary needs.
Pin This Recipe!
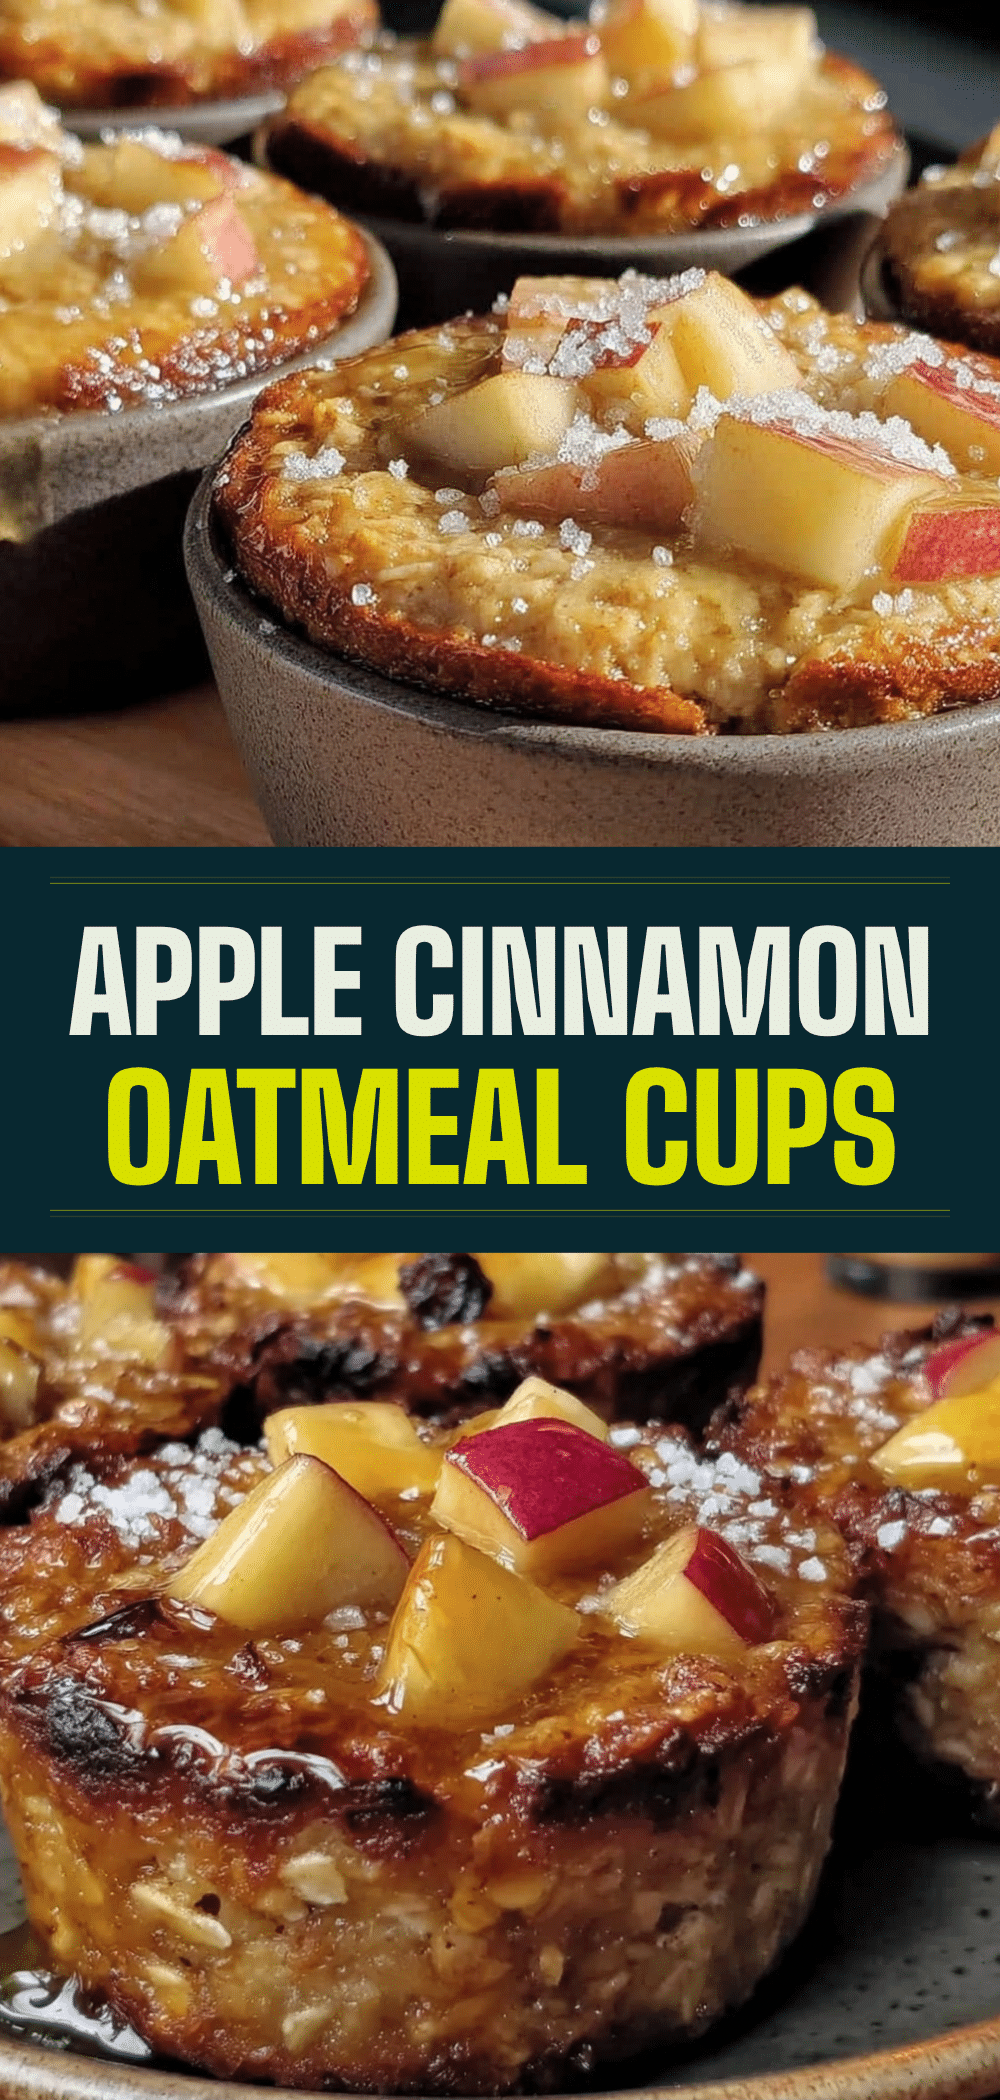

Back to School Baked Apple Cinnamon Oatmeal Cups
- Total Time: 35 minutes
- Yield: 12 servings 1x
Description
Easy, beginner-friendly baked oatmeal cups packed with apples and cinnamon. Perfect for busy mornings, these cups are freezer-friendly, customizable, and require minimal cleanup.
Ingredients
- 2 cups (160g) rolled oats
- 1 ½ cups (360ml) milk (dairy or plant-based)
- 2 large eggs
- ⅓ cup (100ml) honey or maple syrup
- ½ cup (120g) unsweetened applesauce
- 1 medium apple, diced (Gala or Fuji)
- 1 teaspoon cinnamon
- 1 teaspoon baking powder
- Pinch of salt
- Optional: ¼ cup chopped walnuts, pecans, or dark chocolate chips
Instructions
- Preheat oven to 350°F (175°C). Line a standard 12-cup muffin tin with paper liners or grease lightly.
- In a large mixing bowl, whisk together the milk, eggs, honey (or maple syrup), and applesauce until combined.
- Add the rolled oats, cinnamon, baking powder, and salt to the wet mixture. Stir until the oats are fully coated.
- Gently fold in the diced apples (and optional nuts or chocolate chips).
- Spoon the batter into the prepared muffin cups, filling each about ¾ full (approx. ¼ cup per cup).
- Bake for 20-25 minutes, or until the tops are golden brown and a toothpick inserted into the center comes out clean.
- Let the cups cool in the pan for 5 minutes, then transfer to a wire rack to cool completely before serving.
Notes
For best texture, let the cups cool completely before eating to allow the oats to hydrate. They can be stored in the refrigerator for up to 5 days or frozen for up to 3 months. Reheat in the microwave for 30-60 seconds or in a toaster oven for a crispier edge.
- Prep Time: 5 minutes
- Cook Time: 25 minutes
- Category: Breakfast
- Cuisine: American
Nutrition
- Serving Size: 1 oatmeal cup
- Calories: 180
- Sugar: 12
- Sodium: 100
- Fat: 4
- Saturated Fat: 1
- Carbohydrates: 32
- Fiber: 3
- Protein: 5
Keywords: baked oatmeal, apple cinnamon, breakfast cups, easy breakfast, meal prep, freezer friendly, gluten-free option, dairy-free option, healthy breakfast, beginner recipe


