
Last Tuesday, the rain was hitting my kitchen window with that specific, relentless rhythm that makes you want to hibernate until spring. My husband had just walked in, shaking off his wet umbrella, and asked the question that haunts every parent: “What’s for dinner?” I stared into my pantry. We were out of chicken. The vegetables were wilting. And I was too tired to do anything complicated. That’s when I spotted a head of cauliflower, a bag of onions, and a whole head of garlic that needed using before it went soft.
I threw everything into a roasting pan with some olive oil, salt, and pepper, and put it in the oven. Twenty minutes later, the smell hit me. It wasn’t just “cooking”—it was warm, nutty, and deeply comforting. When I blended it all together, I got this velvety, golden soup that tasted like a hug. We ate it straight from the bowls, no bread needed (though we had some buttery garlic herb dinner rolls on the side, because, well, it’s fall).
This roasted garlic cauliflower soup has since become my official “I don’t have energy to cook but I still want something amazing” recipe. It’s the kind of meal that smells like a high-end restaurant but takes less effort than ordering takeout. I’ve made it at least a dozen times since that rainy Tuesday, tweaking the spices and the cheese until it was perfect. If you’re looking for a way to warm up your kitchen and your soul, this is it. It’s creamy, it’s rich, and it’s ridiculously easy.
Why You’ll Love This Recipe
There are a lot of cauliflower soup recipes out there. Some are watery. Some taste like cardboard. But this roasted garlic cauliflower soup? It’s the real deal. Here’s why it’s now permanently in my rotation:
The Roasting Changes Everything — Raw cauliflower soup can taste a bit… vegetal. But roasting it first? That caramelizes the natural sugars and adds a deep, nutty flavor that you just can’t get by boiling. It’s the difference between a good soup and a great one. I learned this the hard way on my first attempt, which I ended up dumping (sorry, compost bin).
Actually Creamy (Without Heavy Cream) — You don’t need a pound of heavy cream to make this soup luxurious. The roasted cauliflower blends into a silky puree on its own. I use a little bit of milk or broth to thin it out, but the body comes from the vegetable itself. It’s rich without being heavy, which means you can eat a big bowl without feeling like a stuffed turkey.
Garlic Lover’s Dream — I’m not talking about a hint of garlic. I’m talking about a whole head of it. When you roast a whole head of garlic, the cloves become sweet, jammy, and spreadable. You can squeeze them right into the pot, and they melt into the background, adding depth without the sharp bite. If you love creamy garlic mashed potatoes, you’re going to love this. Same vibe, different vessel.
One Pan Wonder — Seriously. You roast the veggies on one sheet pan, then blend them in one pot. That’s it. No sautéing onions in three different pans. No complicated techniques. Just roast, blend, eat. I can make this while helping my kids with homework or watching a show. It’s the ultimate low-effort, high-reward dinner.
Perfect Leftovers — This soup actually tastes better the next day. The flavors have time to meld together, and it thickens up nicely in the fridge. I deliberately make a double batch on Sunday so I have lunch sorted for three days. It reheats beautifully too.
This is my go-to when the weather turns chilly and I need dinner to just work. It’s comforting, it’s healthy-ish (okay, it’s pretty healthy), and it makes my house smell like heaven.
Ingredients You’ll Need
Here’s the best part: you probably have most of this already. This isn’t a recipe that requires a trip to three different specialty stores. It’s simple, wholesome ingredients that come together to create something magical.
For the Roast
Large head of cauliflower (about 2.5 lbs / 1.1 kg) — Cut into florets. Don’t use the tiny, pre-cut bags if you can avoid it; they’re often older and have a stronger smell. A fresh head from the produce section is best. Remove the core, but keep the leaves if they’re fresh—they can be tossed in too for extra flavor.
Whole head of garlic (1 large) — Yes, the whole head. Cut off the top to expose the cloves, drizzle with oil, wrap in foil, and roast. This makes the garlic sweet and mellow. You’ll squeeze the soft cloves right out of their skins later.
Yellow onion (1 large, chopped / about 300g) — Gives the soup a sweet, savory base. White onion works too, but yellow has better depth for roasting. Chop it into large chunks so it doesn’t burn.
Extra virgin olive oil (3 tablespoons) — Use a good quality one here. It’s going to roast with the veggies, so you want it to taste good. I keep a bottle of my favorite on the counter for this.
Sea salt and black pepper — Generous amounts. Roasting concentrates flavor, so you need enough salt to season the veggies properly. I use about 1 teaspoon of salt total for the roasting step.
Thyme (2-3 fresh sprigs or 1 teaspoon dried) — Fresh thyme pairs beautifully with cauliflower. If you use dried, add it before roasting. If fresh, you can add it during roasting or at the end.
For the Soup Base

Vegetable or chicken broth (3-4 cups / 720-960ml) — I use low-sodium broth so I can control the saltiness. Vegetable broth keeps it vegetarian; chicken broth adds a bit more savory depth. Either works.
Heavy cream or half-and-half (½ cup / 120ml) — Optional, but I recommend it for extra richness. If you want to keep it lighter, skip this or use a splash of milk. The cauliflower is already creamy, so you don’t strictly need it.
Butter (1 tablespoon) — For finishing. Swirling in a bit of cold butter at the end makes the soup glossy and adds a rich mouthfeel.
White pepper (½ teaspoon) — This is my secret weapon. It adds a subtle heat that you can’t taste directly but adds warmth. Black pepper works too, but white pepper is more traditional in creamy soups.
Optional Add-ins — I love adding a pinch of nutmeg (just a tiny pinch, it’s strong!) or some red pepper flakes for a kick. For texture, I often top it with crispy bacon bits, toasted pumpkin seeds, or even a drizzle of truffle oil if I’m feeling fancy.
For Serving — I usually serve this with crusty bread or those buttery garlic herb dinner rolls I mentioned earlier. A dollop of sour cream or Greek yogurt is also amazing on top.
Equipment Needed
You don’t need fancy equipment for this. Here’s what I actually use:
Large sheet pan — I use a rimmed baking sheet. Make sure it’s big enough to hold the cauliflower and onions in a single layer. If your pan is too small, the veggies will steam instead of roast, and you won’t get that nice caramelization.
Aluminum foil — For wrapping the garlic head. Standard foil works fine.
Large pot or Dutch oven — Something with a capacity of at least 6 quarts. You need room to blend the soup and simmer it.
Immersion blender or standard blender — An immersion blender is easiest because you can blend right in the pot. Less cleanup. If you use a standard blender, be careful: hot soup expands and can explode out of the blender if you’re not careful. Blend in batches and vent the lid.
Sharp knife and cutting board — For chopping the cauliflower and onions.
Measuring cups and spoons — Standard stuff.
Wooden spoon or silicone spatula — For stirring.
Colander — Optional, if you want to drain the broth after blending, but I usually just add it directly.
How to Make It: Step-by-Step
Alright, let’s make this! I’m walking you through exactly how I do it, including the little tricks I’ve picked up.
Step 1: Prep the Oven and Veggies (10 minutes)
Preheat your oven to 400°F (200°C). Line your large sheet pan with parchment paper or foil for easy cleanup. Cut the cauliflower into florets, aiming for uniform sizes so they roast evenly. Chop the onion into large chunks.
Step 2: Roast the Garlic (20-25 minutes)
Take the whole head of garlic and cut off the top inch, exposing the cloves. Place it on a small piece of foil, drizzle with a little olive oil, and wrap it up tightly. Put it on the sheet pan with the cauliflower and onions. Drizzle the veggies with the rest of the olive oil, sprinkle with salt, pepper, and thyme. Toss everything to coat.
Step 3: Roast Everything (35-40 minutes)
Roast in the preheated oven for 35-40 minutes. You want the cauliflower to be tender when pierced with a fork and browned in spots. The edges should be slightly crispy. The garlic will be soft and golden. Remove from the oven. Let it cool for a few minutes so you can handle it.
Step 4: Squeeze the Garlic
Once the garlic is cool enough to touch, squeeze the base of the head. The roasted cloves should slide right out. Discard the skins. Add the soft, sweet garlic cloves to the pot.
Step 5: Blend the Soup (5 minutes)
Transfer the roasted cauliflower, onions, and garlic into your large pot. Pour in the broth. Bring to a simmer over medium heat for 5 minutes to let the flavors meld. Then, use your immersion blender to puree everything until smooth. If you’re using a standard blender, blend in batches until smooth.
Step 6: Season and Finish (5 minutes)
Taste the soup. Add salt and pepper as needed. Stir in the cream (if using) and the butter. Let it simmer for another 2-3 minutes until heated through and glossy. If it’s too thick, add more broth a little at a time. If it’s too thin, let it simmer uncovered to reduce.
Step 7: Serve
Ladle into bowls. Top with crispy bacon, toasted seeds, fresh herbs, or a drizzle of olive oil. Serve immediately with crusty bread.
Total Time: About 1 hour (15 minutes active, 45 minutes mostly hands-off)
Expert Tips & Tricks
Here’s everything I’ve learned from making this dozens of times. These tips will save you from my mistakes.
Don’t Skip the Roasting
This is the #1 tip. Boiling cauliflower makes it watery and bland. Roasting concentrates the flavor and adds that nutty depth. If you’re in a huge rush, you can steam it, but the flavor won’t be the same. Trust the roast.
Cut the Cauliflower Uniformly
Big florets and tiny florets will cook at different rates. Try to cut them all to similar sizes so you don’t end up with some burnt and some raw.
Squeeze the Garlic Early
If you wait until the soup is finished to squeeze the garlic, you might miss some cloves. Do it right after roasting while it’s still warm and soft.
Use Low-Sodium Broth
Broths vary wildly in salt content. Starting with low-sodium lets you control the final seasoning. You can always add more salt, but you can’t take it out.
Blend Until Smooth
If you want a silky, restaurant-quality texture, blend it thoroughly. Any lumps will show up in a creamy soup. If you have a high-speed blender, this is easy. If not, you might need to strain it through a sieve for absolute smoothness.
Add Fat at the End
Adding the butter or cream at the very end, off the heat, preserves their flavor and texture. Cooking them too hard can make the soup greasy or separate.
Variations & Substitutions
Once you’ve nailed the basic version, here’s how you can mix it up. I’ve tried all of these.
Spicy Roasted Garlic Cauliflower Soup
Add 1-2 diced jalapeños or a teaspoon of red pepper flakes to the sheet pan before roasting. It adds a nice kick that cuts through the creaminess.
Cauliflower and Potato Soup
Add 2 peeled and diced potatoes to the sheet pan. They’ll roast along with the cauliflower and add extra thickness and heartiness. This is great for colder nights.
Curried Cauliflower Soup
Add 1 tablespoon of curry powder and ½ teaspoon of turmeric to the pot before blending. It turns the soup golden and adds a warm, aromatic flavor. Delicious with a dollop of yogurt.
Vegetarian/Vegan Version
Skip the butter and cream. Use vegetable broth and finish with a swirl of coconut milk or olive oil. It’s still creamy and satisfying.
Protein Boost
Stir in cooked shredded chicken, chickpeas, or white beans after blending. It turns the soup into a full meal.
Serving & Storage
How to Serve:
I usually serve this straight from the pot at the dinner table. It looks rustic and stays warm. But here are other ways I’ve enjoyed it:
Side Dishes:
- Crusty sourdough bread (I love dipping it in the soup)
- A simple green salad with a tangy vinaigrette to cut the richness
- Roasted Brussels sprouts or green beans
Toppings Bar:
When I have guests, I put out: crispy bacon bits, toasted pumpkin seeds, fresh chives, red pepper flakes, and a drizzle of truffle oil. Everyone customizes their bowl.
Storage Instructions:
Refrigerator: Store in an airtight container for up to 4 days. The soup will thicken in the fridge—totally normal.
Reheating: Best method: Add to a pot with a splash of broth or milk over low heat. Stir until heated through and creamy again. Microwave method: Heat in 30-second intervals, stirring between. Add a splash of liquid if it’s too thick.
Freezing: This soup freezes well! Let it cool completely, then freeze in airtight containers or freezer bags for up to 3 months. Thaw in the fridge overnight and reheat gently. The texture might be slightly grainier after freezing, but it’s still delicious.
Nutrition Information
I’m not a nutritionist, but here’s the breakdown if you’re tracking.
Per Serving (based on 6 servings, with cream and butter):
| Nutrient | Amount |
|---|---|
| Calories | 180 |
| Protein | 6g |
| Carbs | 15g |
| Fiber | 4g |
| Sugar | 5g |
| Fat | 12g |
| Saturated Fat | 5g |
| Cholesterol | 20mg |
| Sodium | 450mg |
What’s Good:
- High in fiber and vitamins from the cauliflower
- Low in calories compared to cream-based soups
- Rich in antioxidants
What to Know:
- Higher in fat if you use heavy cream and butter
- Contains dairy
- Can be made vegan by swapping dairy for plant-based alternatives
My Take:
Look, this is a comforting soup with some cream and butter. It’s not a diet recipe, but it’s way healthier than most creamy soups because the base is a vegetable. When I want to make it lighter, I skip the cream and use less butter. But usually? I just eat a reasonable portion and enjoy it.
Final Thoughts
So that’s my roasted garlic cauliflower soup! I’ve probably talked your ear off at this point, but when you make a recipe this often, you have a lot to say about it.
This has saved weeknight dinners more times than I can count. It’s my answer to “what’s for dinner” when I’m tired, don’t want takeout, and still want something that tastes really good. My kids are happy, my husband’s happy, and I’m happy because I’m not stressed about cooking.
Make it yours! Try different add-ins, swap in your favorite vegetables, adjust the garlic (though more is always better in my opinion). The best recipes are the ones you adapt to your family’s tastes.
If you make this, drop a comment and let me know what you think! I love hearing how recipes turn out in your kitchen. And if something doesn’t work, tell me that too—I’m here to help troubleshoot.
Happy cooking! And I hope your kitchen smells half as good as mine does right now.
Frequently Asked Questions
Can I use frozen cauliflower?
You can, but the texture won’t be quite the same. Frozen cauliflower has more water content, so it might make the soup thinner. If you use frozen, roast it at a higher temperature (425°F) to evaporate some of the moisture, or skip the roasting step and just sauté it with the onions. Fresh is definitely better for this recipe.
Why did my soup turn out watery?
This usually happens if you add too much broth or if the cauliflower wasn’t roasted long enough to release its moisture. Let the soup simmer uncovered for a few extra minutes to reduce. If it’s still too thin, you can blend in a cooked potato or a spoonful of cream cheese to thicken it.
Can I make this ahead for a dinner party?
Absolutely! This soup is great made ahead. Roast the veggies and make the soup up to 2 days in advance. Store it in the fridge. When you’re ready to serve, reheat it gently and stir in the cream and butter. It actually tastes better after the flavors have had time to meld.
How do I store leftovers?
Store in an airtight container in the fridge for up to 4 days. It will thicken up in the fridge, so add a splash of broth or milk when reheating to get the right consistency.
Can I freeze this soup?
Yes, this soup freezes well for up to 3 months. Let it cool completely, then freeze in portions. Thaw in the fridge overnight and reheat gently. The texture might be slightly grainier after freezing, but it’s still delicious.
Is this soup gluten-free?
Yes, this recipe is naturally gluten-free as long as you use gluten-free broth. Check your broth label to be sure, as some brands add gluten-based thickeners.
Can I use milk instead of cream?
You can, but the soup will be less rich. Whole milk works best. If you want extra creaminess without heavy cream, try stirring in a spoonful of cream cheese or a splash of coconut milk.
Pin This Recipe!
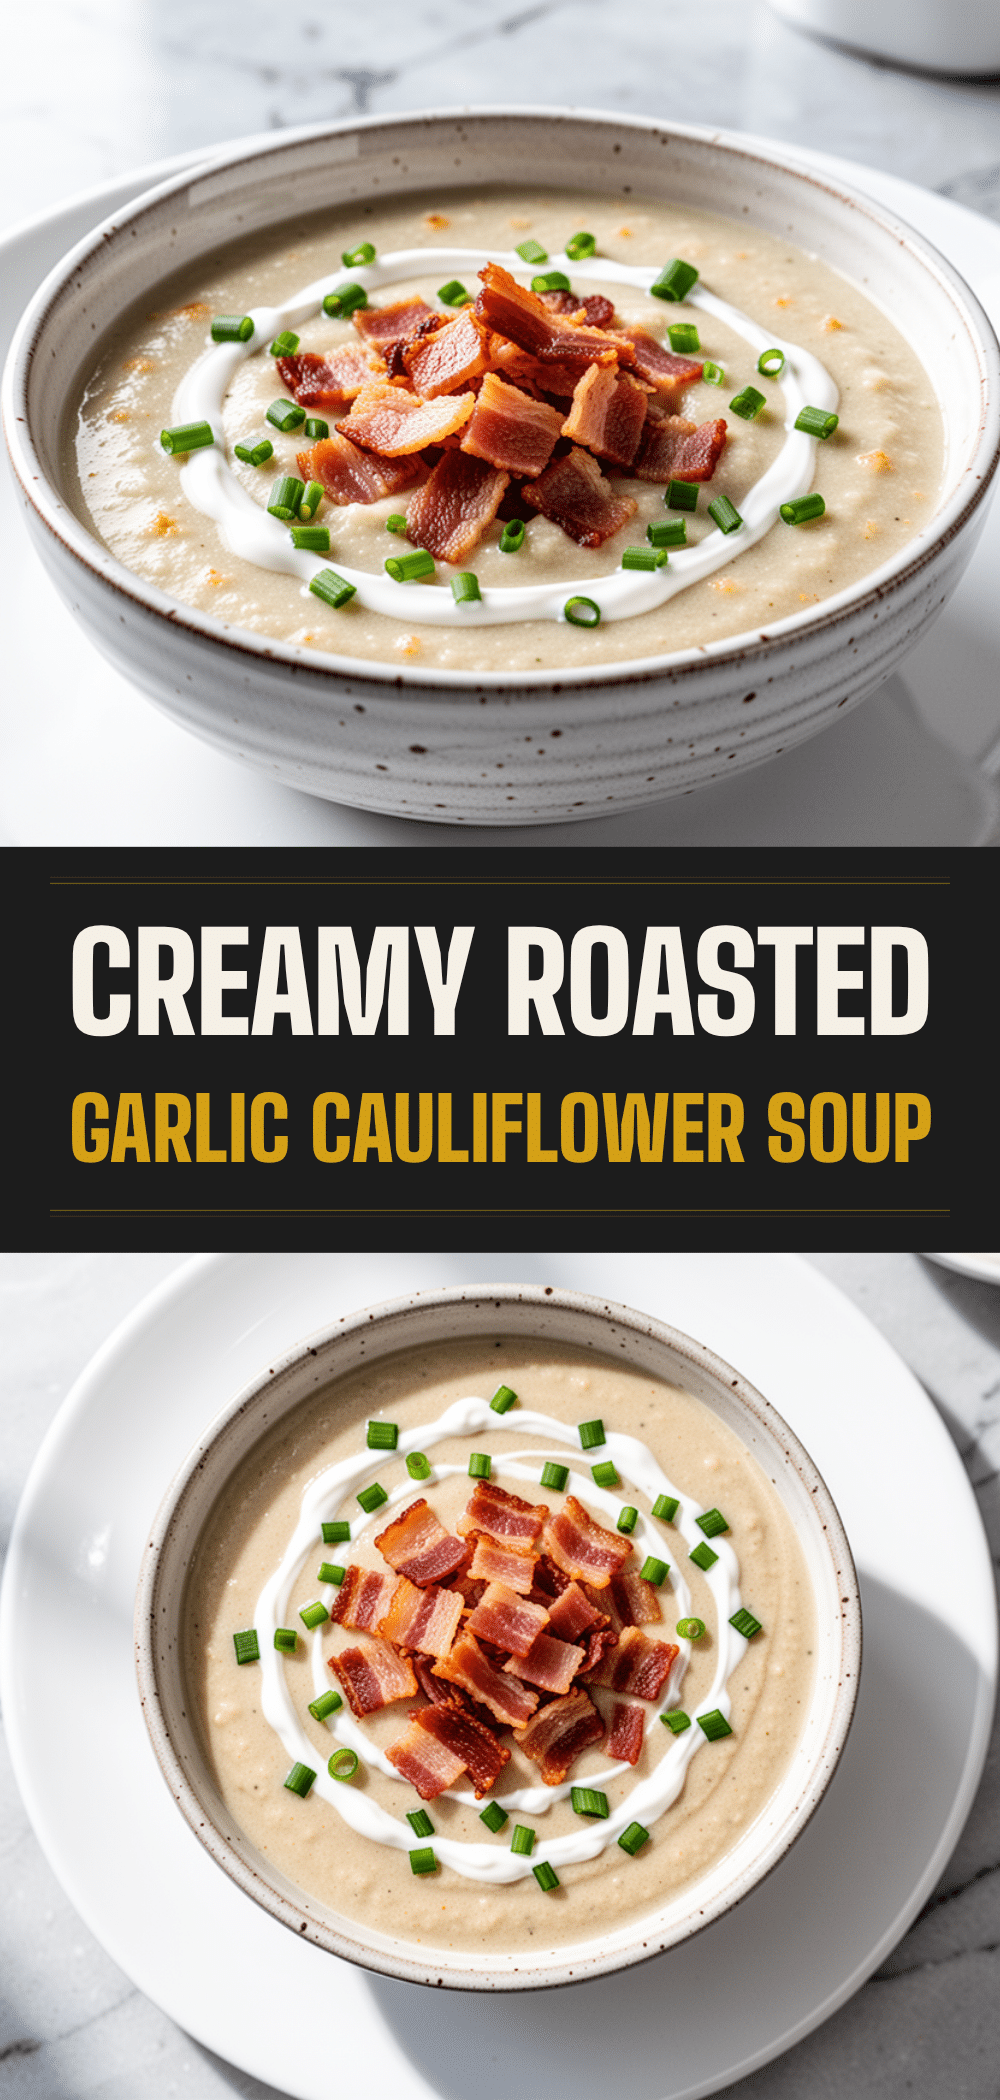

Roasted Garlic Cauliflower Soup
- Total Time: 1 hour
- Yield: 6 servings 1x
Description
A velvety, golden soup made by roasting cauliflower, onions, and a whole head of garlic until caramelized and nutty. It is creamy without needing heavy cream, offering a comforting, low-effort meal perfect for chilly weather.
Ingredients
- 1 large head of cauliflower (about 2.5 lbs / 1.1 kg), cut into florets
- 1 large head of garlic, top cut off to expose cloves
- 1 large yellow onion, chopped into large chunks
- 3 tablespoons extra virgin olive oil, divided
- 1 teaspoon sea salt, divided
- 1/2 teaspoon black pepper, divided
- 2–3 fresh sprigs of thyme or 1 teaspoon dried thyme
- 3–4 cups vegetable or chicken broth (low-sodium)
- 1/2 cup heavy cream or half-and-half (optional)
- 1 tablespoon butter
- 1/2 teaspoon white pepper
- Optional toppings: crispy bacon bits, toasted pumpkin seeds, fresh herbs, red pepper flakes, truffle oil, sour cream, or Greek yogurt
Instructions
- Preheat oven to 400°F (200°C). Line a large sheet pan with parchment paper or foil.
- Place the garlic head on a small piece of foil, drizzle with a little olive oil, and wrap tightly. Place on the sheet pan with cauliflower florets and onion chunks.
- Drizzle the vegetables with the remaining olive oil. Sprinkle with salt, pepper, and thyme. Toss to coat evenly.
- Roast for 35-40 minutes until cauliflower is tender and browned in spots, and garlic is soft and golden.
- Remove from oven and let cool slightly. Squeeze the roasted garlic cloves out of their skins and discard the skins.
- Transfer the roasted cauliflower, onions, and garlic cloves into a large pot or Dutch oven.
- Pour in the broth and bring to a simmer over medium heat for 5 minutes.
- Use an immersion blender to puree the soup until smooth. Alternatively, blend in batches using a standard blender.
- Taste and adjust seasoning with salt and pepper. Stir in the cream (if using) and butter.
- Simmer for 2-3 minutes until heated through and glossy. Add more broth if too thick, or simmer uncovered to reduce if too thin.
- Ladle into bowls and serve immediately with crusty bread and desired toppings.
Notes
Roasting the cauliflower and garlic is essential for developing deep, nutty flavors and avoiding a watery texture. For a vegan version, skip the butter and cream, and use vegetable broth and coconut milk. The soup tastes better the next day as flavors meld. It freezes well for up to 3 months.
- Prep Time: 15 minutes
- Cook Time: 45 minutes
- Category: Main Course
- Cuisine: American
Nutrition
- Serving Size: 1 bowl
- Calories: 180
- Sugar: 5
- Sodium: 450
- Fat: 12
- Saturated Fat: 5
- Carbohydrates: 15
- Fiber: 4
- Protein: 6
Keywords: roasted garlic cauliflower soup, fall recipes, cozy soup, vegetarian soup, gluten-free soup, easy dinner, creamy soup, one pot meal


