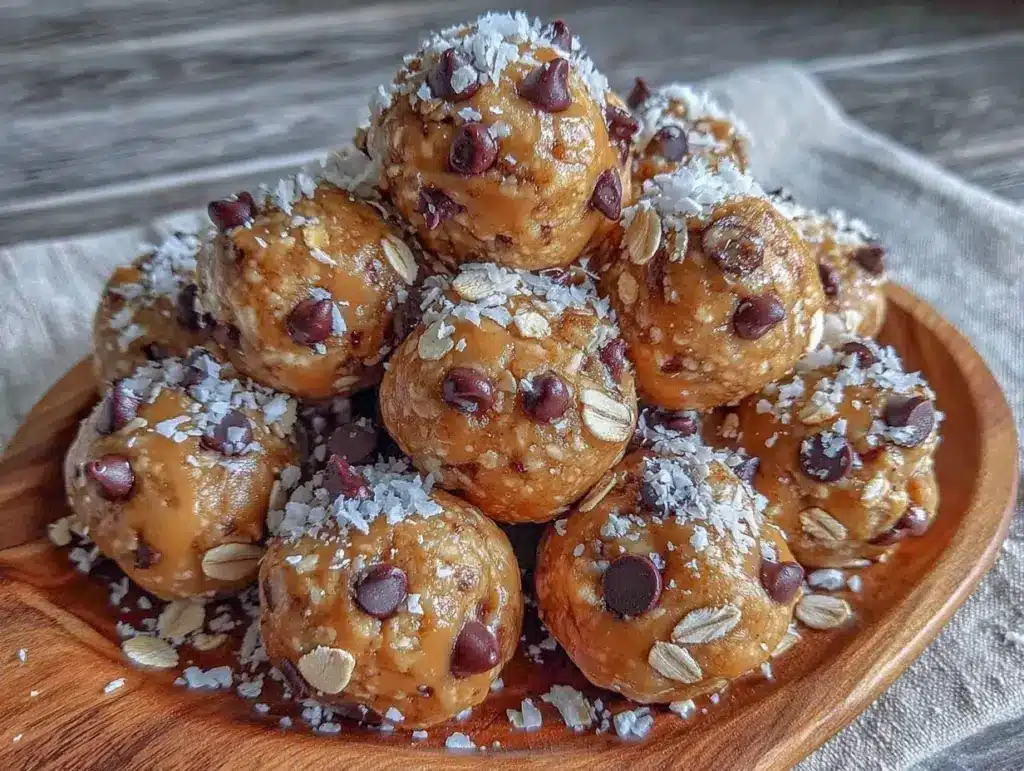
Last Tuesday, I was standing in my kitchen at 6:30 AM, holding a banana that was looking a little past its prime. It had brown spots all over it—the kind of banana that screams “I’m too sweet for a smoothie but too mushy for a fancy cake.” Instead of tossing it, I threw it in the food processor with some oats, a generous scoop of peanut butter, and a drizzle of honey. I didn’t measure anything. I just rolled them into balls and put them in the fridge.
By 7:00 AM, I had grabbed three of them to take with me. They were cold, dense, and tasted like cookie dough but with the satisfaction of a real snack. That was the moment I realized I had stumbled onto the ultimate cheat code for breakfast or afternoon slumps. These peanut butter banana energy bites are not just “healthy snacks.” They are the most forgiving, foolproof thing you can make in your kitchen.
I’ve made these dozens of times. I’ve made them when I had exactly four ingredients. I’ve made them when I was running on zero sleep. I’ve even made them for my kids, who usually reject anything that isn’t coated in chocolate or sugar. They loved them. And honestly? I make them on repeat because they require zero baking, zero cleanup, and zero stress. If you can mash a banana, you can make these.
Why You’ll Make This Recipe On Repeat
There are about a million “healthy snack” recipes out there, and most of them involve chopping three different veggies and worrying about seasoning. Not this one. This is the recipe I come back to when I want something sweet but know I need actual fuel. Here’s why these peanut butter banana energy bites have earned a permanent spot in my routine:
- Stupidly Simple — Seriously, if you can mash a banana and scoop peanut butter, you can make this. I’ve walked my teenager through it over FaceTime while he was at a friend’s house. He made them in a bowl with a fork. No food processor needed.
- Lightning Fast — It takes about 10 minutes of active time. That’s it. The rest is just chilling in the fridge so they set up. I usually throw them together while my coffee brews.
- Pantry-Friendly — You probably have every single ingredient in your house right now. Oats, peanut butter, banana, honey. That’s it. No weird health-food store trips.
- Beginner-Proof — You really can’t mess this up. There’s no baking temperature to guess, no timing to stress about. If it’s too wet, add oats. If it’s too dry, add honey. It’s that simple.
- Makes Amazing Leftovers — I deliberately make a double batch because they taste better after they’ve sat in the fridge for a few hours. They’re my go-to grab-and-go lunch or afternoon pick-me-up.
- Budget-Smart — This costs pennies per bite. Feeds 4-6 people for under $5. It’s way cheaper than buying those pre-made protein balls at the grocery store.
This is my go-to when I need a snack to just work. No complicated techniques, no weird ingredients, just reliable, delicious food that makes everyone happy. It’s the kind of recipe that builds your confidence in the kitchen.
Ingredients You’ll Need
Here’s the best part: you probably have most of this already. I’m particular about only one thing here—the peanut butter—but otherwise, this is a minimalist dream. I like to keep it simple because when you have few ingredients, they have to shine.
For the Base
Rolled oats (1 ½ cups / 150g) — Use the old-fashioned kind, not the instant ones. Instant oats turn this into mush. Old-fashioned oats give you that nice, chewy texture. I buy the big canister because I use them for everything from breakfast casseroles to these bites.
Ripe banana (1 large / about 120g mashed) — The riper, the better. I’m talking brown-spotted, almost black skin. A green banana won’t be sweet enough and will be hard to mash. This is the natural sweetener and the binder that holds everything together.
Peanut butter (½ cup / 125g) — Use natural, creamy peanut butter. The kind with just peanuts and salt. If you use the kind with added sugar and hydrogenated oils, it can get weirdly waxy. I like Skippy or a natural brand that I’ve stirred well. If you have a nut allergy, sunflower seed butter works perfectly fine here.
For the Flavor
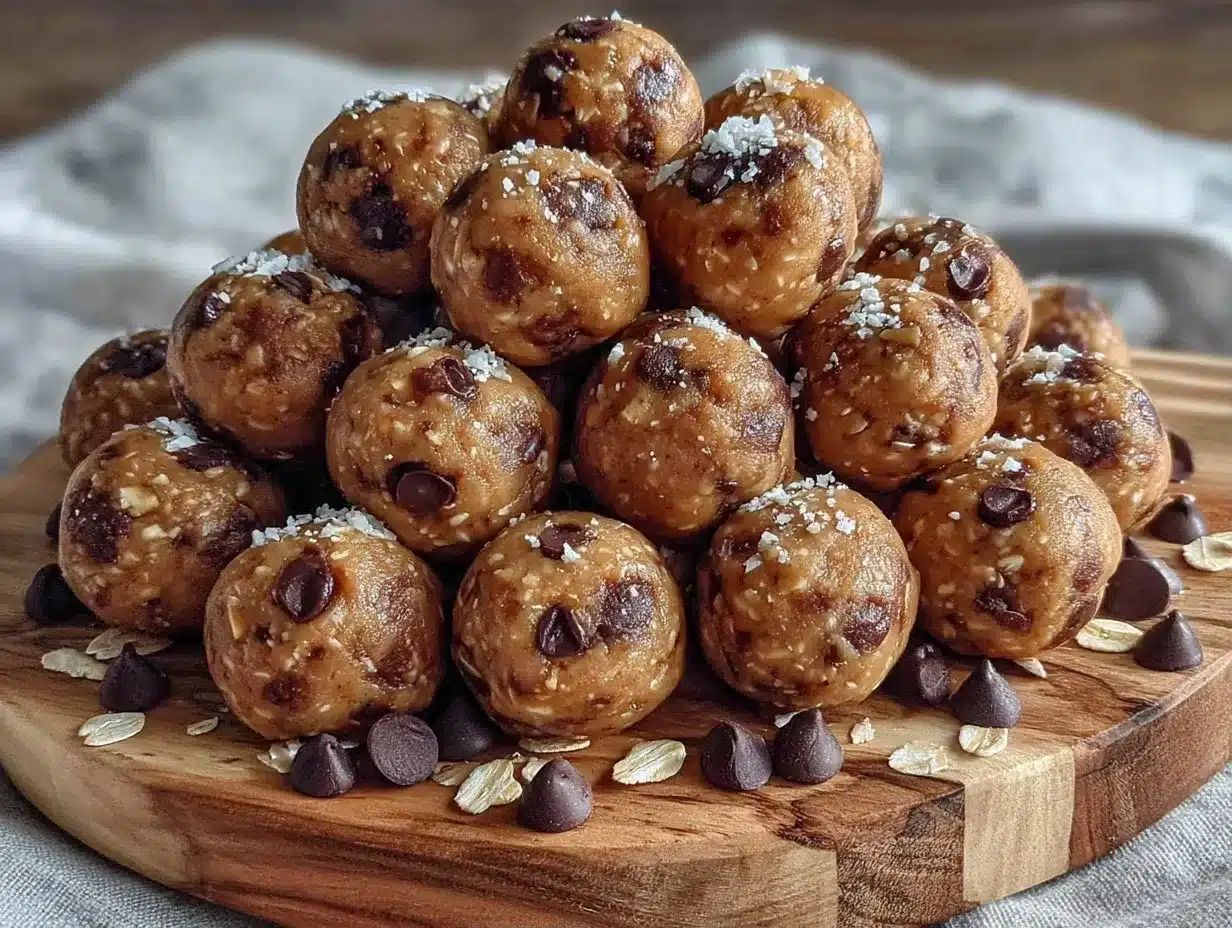
Honey (2 tablespoons / 30ml) — This adds that extra sweetness and helps bind the mixture. Maple syrup works too if you want it vegan, but honey has a nicer flavor profile with peanut butter. Don’t skip this; it makes a difference in the texture.
Vanilla extract (1 teaspoon) — Just a splash to round out the flavors. It makes these taste more like a treat and less like a health food.
Salt (a pinch) — Seriously, just a tiny pinch. It enhances the peanut butter flavor. Don’t skip it.
Optional Add-ins (Because Why Not?)
Mini chocolate chips (¼ cup) — I throw these in sometimes because my kids go crazy for them. It’s basically a peanut butter cup in bite form.
Chia seeds or flaxseed (1 tablespoon) — For a little extra nutrition boost. I usually add this when I’m trying to sneak in some omega-3s.
Ground cinnamon (½ teaspoon) — If you’re feeling fancy, a little cinnamon makes these taste like peanut butter cookies.
Personal Tips:
- Brand recommendations: I use Quaker Old Fashioned Oats. They hold their shape better than generic brands.
- Shopping shortcuts: If you don’t have a food processor, a blender or even a strong fork and a bowl will work. I’ve done it all.
- Substitutions: No honey? Use agave nectar. No peanut butter? Almond butter or cashew butter works great too.
- Storage: These keep well in the fridge for up to a week. I keep them in a small container on the top shelf so they don’t get crushed.
Common Questions
- Can I use crunchy peanut butter? Yes! It adds a nice texture. I actually prefer it sometimes.
- Where do I find rolled oats? In the baking aisle, right next to the flour. They’re not the same as oatmeal packets.
- Can I make this ahead? Yes, that’s the whole point. They need to chill to set up.
Equipment Needed
You don’t need fancy equipment for this. Here’s what I actually use. If you don’t have these, you can probably improvise.
Food processor or blender — This is the easiest way to mash the banana and mix everything. It takes 30 seconds. I use mine almost daily.
Mixing bowl — If you don’t have a food processor, a large bowl works fine. You’ll just have to mash the banana really well with a fork.
Fork — For mashing the banana if you’re doing it by hand. A sturdy fork works best.
Measuring cups and spoons — Pretty standard stuff. Dollar store versions work fine for this.
Baking sheet or plate — To line with parchment paper for chilling. Or just use a small plate.
Parchment paper — Not strictly necessary, but it keeps things clean. I use it for brownies too, so I always have some on hand.
Optional but nice:
- Silicone spatula — For scraping the bowl. Saves you from washing extra dishes.
- Ice cream scoop — Makes the bites uniform in size. But honestly, I just roll them by hand. It’s faster.
How to Make It: Step-by-Step
Alright, let’s make this! I’m walking you through exactly how I do it, including the little tricks I’ve picked up. It’s so simple that you might wonder why you’ve been overcomplicating your snacks.
Step 1: Prep Your Banana (2 minutes)
Peel your ripe banana and break it into chunks. If you’re using a food processor, just toss the chunks in. If you’re doing it by hand, put the chunks in a large bowl. The riper the banana, the easier it will mash. I like to use my fork to smash it until it’s almost a puree. No big lumps allowed.
Step 2: Add the Wet Ingredients (1 minute)
Add the peanut butter and honey to the mashed banana. If using a food processor, just dump them in. If mixing by hand, stir it all together. The mixture will look weird at first—kind of like thick dough. That’s normal. Keep stirring until it’s combined.
Step 3: Mix in the Oats (2 minutes)
Add the rolled oats, vanilla extract, and salt. Pulse in the food processor for about 30 seconds, or stir vigorously by hand. You want everything evenly distributed. The mixture should be sticky and hold together when you press it with your finger. If it’s too dry and crumbly, add another teaspoon of honey. If it’s too wet, add a tablespoon of oats.
Step 4: Chill the Mixture (30 minutes)
Cover the bowl with plastic wrap or put the food processor bowl in the fridge. Let it chill for at least 30 minutes. This is the most important step. It firms up the mixture, making it much easier to roll. I usually do this while I’m getting ready for the day. Don’t skip the chill time—it makes a huge difference.
Step 5: Roll the Bites (5 minutes)
Once the mixture is firm, scoop out tablespoon-sized portions and roll them into balls between your palms. You should get about 12-15 bites. If they stick to your hands, wet them slightly with water. Place them on a plate or baking sheet lined with parchment paper.
Step 6: Set in the Fridge (1 hour)
Put the plate in the fridge for at least one hour to let them set completely. This makes them firm and easy to grab. I usually make them the night before, so they’re ready to go in the morning.
Total Time: About 10 minutes active, plus 1 hour chilling.
Built-in Troubleshooting:
- Mixture too sticky? Add more oats, one tablespoon at a time.
- Mixture too dry? Add more honey or a splash of milk.
- Bites falling apart? You didn’t chill them long enough. Give them more time in the fridge.
Expert Tips & Tricks
Here’s everything I’ve learned from making these dozens of times. These tips will save you from my early mistakes.
Use Ripe Bananas
This is non-negotiable. A green banana will make these taste bland and be hard to mash. I keep bananas on my counter until they have brown spots. If they’re too green, put them in a paper bag with an apple to speed up the ripening. I’ve learned this the hard way with a batch that tasted like raw oats.
Don’t Skip the Chill
I know you’re eager to eat them. But if you skip the chill time, the mixture will be too soft to roll properly. You’ll end up with peanut butter smears on your fingers instead of nice bites. 30 minutes is the minimum, but 1 hour is better.
Wet Your Hands
If the mixture sticks to your hands while rolling, wet them slightly with water. This is a trick I learned from making no-bake bars. It keeps everything clean and makes rolling much easier.
Customize Your Mix-ins
Once you’ve mastered the base, get creative. I’ve added mini chocolate chips, crushed peanuts, coconut flakes, and even a dash of cinnamon. But start with the basic recipe first. Master the foundation before you add extras.
Common Mistakes (and how to avoid them):
- Mistake: Bites are too soft — Fix: Chill them longer. Or add more oats next time.
- Mistake: Bites are too dry — Fix: Add more honey or banana. Don’t add water; it won’t bind.
- Mistake: Flavor is bland — Fix: Add a pinch of salt and vanilla. Peanut butter needs salt to pop.
Variations & Substitutions
Once you’ve nailed the basic version, here’s how you can mix it up. I’ve tried all of these, and they all work.
Chocolate Peanut Butter Cup Style
Add ¼ cup mini chocolate chips to the mixture. Roll them, then dip half of each bite in melted chocolate. Let them set in the fridge. This is my favorite variation.
Coconut Lime
Add 2 tablespoons shredded coconut and 1 teaspoon lime zest. It’s bright and refreshing. Great for summer.
Protein Power
Add 1 scoop of vanilla protein powder. You might need a splash more honey or milk to compensate for the dryness. This is great for post-workout.
Almond Butter Version
Swap peanut butter for almond butter. It’s slightly sweeter and has a different texture. Works just as well.
Dietary Modifications:
- Vegan: Use maple syrup instead of honey. Everything else is naturally vegan.
- Gluten-Free: Use certified gluten-free oats. Most oats are fine, but cross-contamination is real.
- Nut-Free: Use sunflower seed butter or soy nut butter. Sunflower seed butter is the closest in flavor.
Serving & Storage
How to Serve:
I usually grab these straight from the fridge. They’re cold and satisfying. Perfect for a mid-afternoon slump or a quick breakfast on the go. I pair them with a glass of milk or a strawberry banana smoothie for a full breakfast.
Storage Instructions:
- Refrigerator: Store in an airtight container for up to 1 week. They stay firm and fresh.
- Freezer: Yes, you can freeze them! Place them in a freezer-safe bag for up to 3 months. Thaw in the fridge for 30 minutes before eating. I freeze them in batches for busy weeks.
Pro tip: If you’re meal-prepping, make a double batch on Sunday. It saves so much stress during the week.
Nutrition Information
I’m not a nutritionist, but here’s the breakdown if you’re tracking. Keep in mind that these are estimates and can vary based on your specific brands and measurements.
Per Bite (based on 12 bites):
- Calories: 110
- Protein: 4g
- Carbs: 12g
- Fiber: 2g
- Sugar: 6g
- Fat: 5g
- Saturated Fat: 1g
- Sodium: 40mg
What’s Good:
- Decent protein from peanut butter
- Fiber from oats
- Natural sugars from banana and honey
- Healthy fats from peanut butter
What to Know:
- Higher in calories than you might think (but that’s fuel!)
- Contains nuts (unless you use sunflower seed butter)
- Contains gluten (unless you use GF oats)
My Take:
Look, these are snacks. They’re meant to give you energy. They’re not diet food. But they’re way better than a bag of chips, and I know exactly what’s in them. When I want to make them lighter, I use less honey and more oats. But usually? I just enjoy them as a tasty, satisfying treat.
Final Thoughts
So that’s my go-to peanut butter banana energy bites! I’ve probably talked your ear off at this point, but when you make a recipe this often, you have a lot to say about it.
This has saved my mornings more times than I can count. It’s my answer to “what’s for breakfast” when I’m running late and still want something nutritious. My kids are happy, I’m happy, and I’m happy because I’m not stressed about cooking.
Make it yours! Try different mix-ins, swap in your favorite nut butter, adjust the sweetness. The best recipes are the ones you adapt to your family’s tastes.
If you make this, drop a comment and let me know what you think! I love hearing how recipes turn out in your kitchen. And if something doesn’t work, tell me that too—I’m here to help troubleshoot.
Happy cooking! And I hope your kitchen smells half as good as mine does right now.
Frequently Asked Questions
Can I use crunchy peanut butter?
Absolutely. I actually prefer crunchy peanut butter for the texture. It adds a nice crunch to the soft oats. Just make sure it’s well-stirred if it’s natural peanut butter.
Why are my energy bites too sticky?
This usually means you didn’t use enough oats or your banana was too wet. Add more oats, one tablespoon at a time, until the mixture is firm enough to roll. Also, make sure you chilled it long enough.
Can I make these ahead for the week?
Yes! That’s the best part. Make them on Sunday and store them in the fridge for up to a week. They’ll stay fresh and ready to grab. I make a batch every Sunday.
Can I freeze these?
Yes, you can freeze them for up to 3 months. Place them in a freezer-safe bag or container. Thaw in the fridge for 30 minutes before eating. They taste great frozen too, actually.
Can I use almond butter instead of peanut butter?
Yes, almond butter works perfectly. It’s slightly sweeter and has a different flavor, but the texture will be the same. Sunflower seed butter is also a great nut-free alternative.
Do I need a food processor?
No, you don’t. You can mash the banana by hand with a fork and mix everything in a bowl. It just takes a little more elbow grease. I’ve done it both ways, and both work fine.
How long do these last?
In the fridge, they last up to a week. In the freezer, up to 3 months. They don’t last long in my house, so I rarely have to worry about them going bad!
Pin This Recipe!
Peanut Butter Banana Energy Bites: 4-Ingredient No-Bake Recipe
- Total Time: 70 minutes
- Yield: 12-15 servings 1x
Description
These no-bake peanut butter banana energy bites are a simple, forgiving, and delicious snack made with just a few pantry staples. Perfect for breakfast or an afternoon pick-me-up, they require zero baking and minimal cleanup.
Ingredients
- 1 ½ cups rolled oats (old-fashioned)
- 1 large ripe banana (about 120g mashed)
- ½ cup creamy peanut butter
- 2 tablespoons honey
- 1 teaspoon vanilla extract
- A pinch of salt
- Optional: ¼ cup mini chocolate chips, 1 tablespoon chia seeds or flaxseed, ½ teaspoon ground cinnamon
Instructions
- Peel the ripe banana and break it into chunks. Mash the banana thoroughly in a food processor or a large bowl with a fork until it is almost a puree with no big lumps.
- Add the peanut butter and honey to the mashed banana. Mix until combined; the mixture will look like thick dough.
- Add the rolled oats, vanilla extract, and salt. Pulse in the food processor for 30 seconds or stir vigorously by hand until evenly distributed. The mixture should be sticky and hold together when pressed.
- Cover the bowl or food processor bowl and chill in the refrigerator for at least 30 minutes to firm up the mixture.
- Once firm, scoop out tablespoon-sized portions and roll them into balls between your palms. If they stick to your hands, wet them slightly with water.
- Place the rolled bites on a plate or baking sheet lined with parchment paper.
- Refrigerate for at least one hour to let them set completely before serving.
Notes
Use very ripe bananas with brown spots for natural sweetness and easier mashing. If the mixture is too dry, add more honey; if too wet, add more oats. Wet your hands slightly if the mixture sticks while rolling. These can be stored in the fridge for up to a week or frozen for up to 3 months.
- Prep Time: 10 minutes
- Cook Time: 0 minutes
- Category: Snack
- Cuisine: American
Nutrition
- Serving Size: 1 energy bite
- Calories: 110
- Sugar: 6
- Sodium: 40
- Fat: 5
- Saturated Fat: 1
- Carbohydrates: 12
- Fiber: 2
- Protein: 4
Keywords: peanut butter banana energy bites, no-bake recipe, healthy snack, 4-ingredient recipe, gluten-free option, vegan option, meal prep snack


