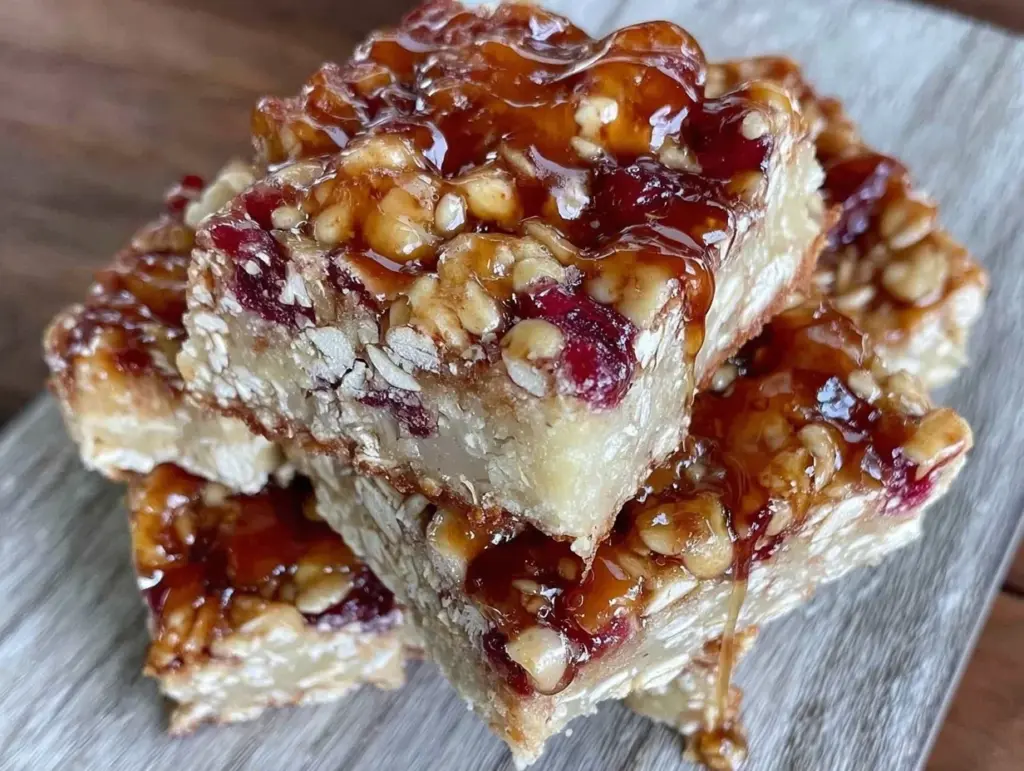
I still remember the panic of August 2019. It was 6:00 PM on a Sunday, and I realized I had zero snacks for the week ahead. No granola bars. No cookies. Just a half-empty pantry and a kid who would definitely stage a hunger strike by Tuesday. I rummaged through the cupboards, found a bag of oats, a bottle of honey, and some dried fruit, and threw them together. I expected something dry and crumbly. Instead, I got these chewy, sweet, perfectly textured bars that my son actually asked for seconds of. Three years later, those “panic bars” are still in my rotation.
That’s the thing about chewy honey oat back to school bars you’ll make on repeat—they’re not fancy. They don’t require a stand mixer or twenty ingredients you’ll only use once. They’re the culinary equivalent of a cozy sweatshirt. You just feel better when you have them. I’ve tested this recipe about a dozen times now, tweaking the honey-to-oat ratio until I hit that sweet spot (pun intended) where they’re chewy but not sticky, sweet but not cloying. The result is a bar that holds together in a lunchbox but melts in your mouth.
Here’s the truth: most snack bar recipes are overcomplicated. They call for almond flour, maple syrup, chia seeds, and a specific type of honey that costs more than my coffee. I don’t have time for that. I need something that works with what I already have. These bars are built on simplicity. If you can stir a bowl and press it into a pan, you can master this. It’s forgiving. It’s reliable. And honestly? It’s better than anything you’ll buy at the store, which is usually just sugar and preservatives disguised as health food.
I make a batch every time school starts, but I’ve started keeping them on hand year-round. Why? Because they’re the perfect mid-afternoon pick-me-up when the energy crashes hit. They’re sturdy enough to toss in a backpack without turning into dust. And they freeze beautifully, so you’re never caught empty-handed again. This isn’t just a recipe; it’s a peace of mind strategy for parents who want to avoid the snack aisle but don’t want to spend hours in the kitchen.
Why You’ll Love This Recipe
There are about a million reasons to keep this chewy honey oat back to school bars you’ll make on repeat in your weekly routine, but here are the big ones that keep me coming back to the same bowl:
- Minimalist Ingredients — Seriously, you probably have 90% of this in your pantry right now. Rolled oats, honey, butter, brown sugar, and mix-ins. That’s it. No weird gums or unpronounceable additives. It’s just real food, simplified.
- Zero Fuss Technique — I’ve walked my teenage nephew through this recipe over the phone, and he didn’t burn the kitchen down. You mix, you press, you bake. No creaming butter, no folding egg whites, no tempering chocolate. If you can stir, you can do this.
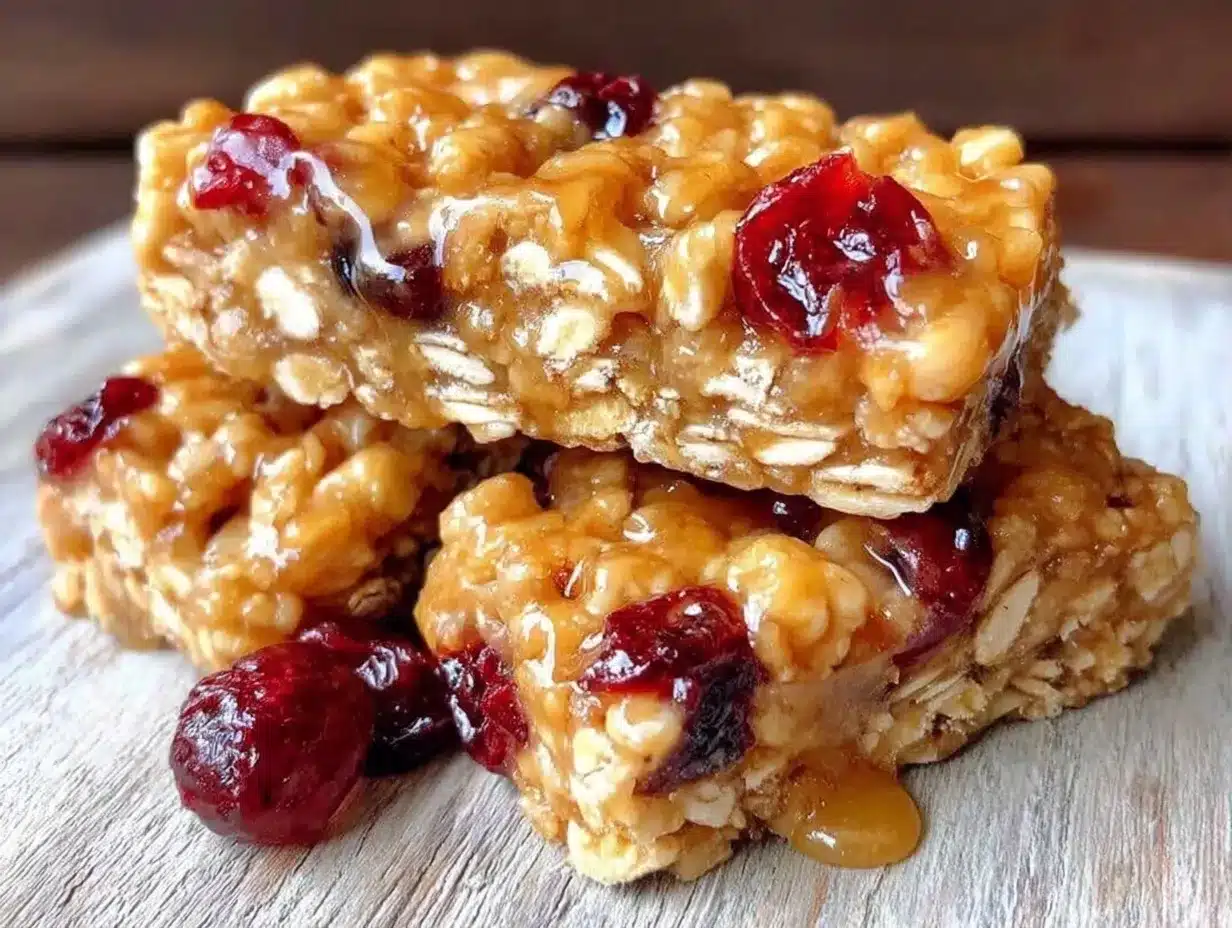
- Perfect Texture Every Time — I’ve struggled with bars that are either too cakey or too hard as rocks. This recipe nails the chew. The honey and brown sugar create a caramel-like bind that keeps them soft and chewy for days, as long as they actually last that long in my house.
- Customizable Any Way You Want — Love nuts? Add them. Hate nuts? Skip them. Into chocolate? Stir in chips. Into dried fruit? Go for it. This recipe is a blank canvas. I’ve made them with raisins, with cranberries, with white chocolate chips, and with everything at once. They all work.
- Lunchbox Proof — These don’t crumble. I’ve tested them in hot cars, cold backpacks, and gym bags. They hold their shape. This is huge for parents who are tired of finding a box of oat dust at pickup time.
- Freezer Friendly — I make two batches at once. One goes in the freezer, wrapped tightly. When I need a snack, I just pull one out. They thaw in about 10 minutes. It’s like having a secret stash of homemade goodness ready to go.
This is my go-to when I need a snack to just work. No complicated techniques, no weird ingredients, just reliable, delicious food that makes everyone happy. It’s the kind of recipe that builds your confidence in the kitchen because the margin for error is basically zero.
Ingredients You’ll Need
Here’s the best part: you probably have most of this already. I’m not asking you to go to three different stores for specialty items. This is pantry-friendly cooking at its finest.
The Base
Old-fashioned rolled oats (3 cups / 270g) — Don’t use quick oats or steel-cut oats. Quick oats will turn to mush, and steel-cut won’t cook right. You need the heartiness of old-fashioned oats to get that chewy texture. I usually buy the store brand; it’s exactly the same.
Unsalted butter (½ cup / 113g) — This adds richness and helps bind everything together. Melt it first, obviously. I use unsalted so I can control the saltiness, especially if my mix-ins are salty (like nuts).
Honey (½ cup / 170g) — This is the star. It provides the chew and the natural sweetness. I use regular clover honey. Raw honey works too, but it’s thicker, so you might need to warm it up slightly before mixing. Avoid overly strong honeys like buckwheat unless you really love that flavor.
Brown sugar (½ cup / 100g, packed) — This adds moisture and a deep, caramel-like flavor that complements the honey. Light or dark brown sugar both work. Dark sugar gives a more molasses-y taste, which is nice if you like deeper flavors.
Vanilla extract (1 teaspoon) — Just a splash to round out the flavors. Don’t skip it. It makes the honey taste more like honey and less like just sugar.
The Binders & Flavor
Large egg (1, beaten) — This is the secret to keeping them chewy rather than crumbly. It binds the oats and sugar together. Room temperature is fine, but cold works too.
All-purpose flour (½ cup / 60g) — A small amount to give structure. You don’t need much. Too much flour makes them cakey. We want chew, not a scone.
Baking soda (½ teaspoon) — Just a tiny bit to help them spread slightly and brown. Don’t add more, or they’ll taste metallic.
Salt (½ teaspoon) — Crucial. Sweet things need salt to taste good. It balances the honey and sugar. Use fine sea salt or table salt.
The Mix-Ins (Pick 1-2 Cups Total)
This is where you get creative. I usually go with about 1 to 1.5 cups total mix-ins. Too many, and the bars fall apart. Too few, and they’re boring.
Chocolate chips (½ cup) — The classic choice. Semi-sweet or milk chocolate both work. I like semi-sweet because it cuts the sweetness of the honey.
Dried cranberries or raisins (½ cup) — Adds chewiness and a tart contrast to the sweet oats. Cranberries are my personal favorite because they don’t get too sweet.
Chopped nuts (½ cup) — Walnuts, pecans, or almonds. Toasting them first adds amazing flavor, but raw is fine if you’re in a rush.
Coconut flakes (½ cup) — Sweetened or unsweetened. Adds a nice texture contrast. I use unsweetened so the bars don’t become too sweet overall.
White chocolate chips (½ cup) — For a milder, creamier sweetness. Great with dried cherries.
Optional Topping
Extra oats or seeds — Sprinkle a few on top before baking for a rustic look. It’s not necessary, but it looks nice if you’re sharing them with friends.
Equipment Needed
You don’t need fancy equipment for this. Here’s what I actually use:
9×9 inch baking pan — Standard size. Line it with parchment paper for easy removal. I hate trying to pry bars out of a pan without parchment. It’s not worth the struggle.
Medium mixing bowl — Big enough to hold the oats and mix-ins. Glass or ceramic works best because you can see what you’re doing.
Small saucepan or microwave-safe bowl — For melting the butter, honey, and brown sugar. I use the microwave because it’s faster. 30-second intervals, stirring in between, until smooth.
Spatula — A sturdy silicone spatula is best for mixing. You need to scrape the sides of the bowl to get all that sticky honey.
Parchment paper — Non-negotiable. It makes cleanup a breeze. If you don’t have parchment, grease the pan heavily with butter, but parchment is superior.
Cooling rack — Let them cool completely before cutting. This is hard, I know, but cutting them warm means they’ll crumble. Patience pays off.
How to Make It: Step-by-Step
Alright, let’s make this! I’m walking you through exactly how I do it, including the little tricks I’ve picked up over the years.
Step 1: Prep Your Pan and Oven (2 minutes)
Preheat your oven to 350°F (175°C). Line your 9×9 inch baking pan with parchment paper, leaving an overhang on the sides. This overhang is your lifeline for lifting the bars out later. Grease the parchment lightly with butter or cooking spray so it sticks to the pan.
Step 2: Mix the Dry Ingredients (2 minutes)
In your medium mixing bowl, combine the rolled oats, flour, baking soda, and salt. Stir them together with a fork or spatula until evenly distributed. This ensures the baking soda doesn’t end up in one clump, which would give you a bitter bite.
Step 3: Melt the Wet Ingredients (2 minutes)
In a small saucepan or microwave-safe bowl, combine the butter, honey, and brown sugar. Heat on medium-low (or microwave in 30-second bursts), stirring frequently, until the butter is melted and the mixture is smooth. It should look like a glossy, bubbling caramel sauce. Don’t let it boil over or burn. Remove from heat and stir in the vanilla extract and beaten egg. Whisk until fully combined.
Step 4: Combine Everything (3 minutes)
Pour the warm honey-butter mixture over the dry oat mixture. Stir vigorously. It will look dry at first, but keep stirring. The oats will absorb the liquid, and it will become a thick, sticky dough. Now, fold in your chosen mix-ins (chocolate chips, dried fruit, nuts, etc.). Make sure they’re evenly distributed. If the mixture feels too dry and crumbly, add a teaspoon more honey. If it’s too soupy, add a tablespoon more oats.
Step 5: Press Into Pan (2 minutes)
Transfer the mixture to your prepared pan. Use a spatula or your hands (lightly greased) to press it down firmly. This is crucial. Pack it down tight. If it’s loose, the bars will be crumbly. Aim for an even layer. If you want a uniform top, wet your fingers slightly to smooth it out.
Step 6: Bake (20-25 minutes)
Place in the preheated oven and bake for 20-25 minutes. You’re looking for golden brown edges and a set center. The centers might look slightly soft when you take them out, but they will firm up as they cool. Don’t overbake, or they’ll become hard. A toothpick inserted into the center should come out with a few moist crumbs, not wet batter.
Step 7: Cool and Cut (30 minutes)
Let the bars cool in the pan on a wire rack for at least 30 minutes. This is the hardest part, I promise. If you cut them while hot, they will fall apart. Once cooled, use the parchment overhang to lift the whole slab out of the pan. Place on a cutting board and slice into squares. I usually cut them into 12-16 bars, depending on how big you want them.
Expert Tips & Tricks
Here’s everything I’ve learned from making this dozens of times. These tips will save you from my mistakes.
Press Them Down Firmly
I can’t stress this enough. The texture depends on how tightly you pack the mixture. If you just spread it out gently, you’ll get loose, crumbly bars. Press it down like you’re trying to compact sand for a castle. Use the bottom of a measuring cup if you need more leverage.
Don’t Skip the Cool-Down
I know you want to eat them immediately. But hot bars are fragile. The sugars are still soft. If you cut them now, they’ll stick to your knife and crumble. Let them cool completely for the cleanest cuts and best chew.
Balance Your Mix-Ins
If you’re adding wet mix-ins like fresh fruit (not recommended) or very sticky dried fruit, reduce the honey slightly. If you’re adding dry nuts or seeds, you might need a tiny bit more honey to bind. Aim for a total of 1-1.5 cups of mix-ins. More than that, and the structural integrity suffers.
Storage is Key
These bars keep best in an airtight container. If they’re exposed to air, they’ll dry out. If they’re in a humid environment, they might get too sticky. Room temperature is fine for up to 5 days. For longer storage, freeze them.
Toast Your Nuts
If you’re using walnuts, pecans, or almonds, toast them in a dry pan for 3-4 minutes before adding them to the mix. It releases their oils and adds a depth of flavor that raw nuts just don’t have. It’s a small step that makes a big difference.
Variations & Substitutions
Once you’ve nailed the basic version, here’s how you can mix it up. I’ve tried all of these.
Chocolate Chip Cookie Dough Bars
Use chocolate chips and add a tablespoon of extra flour. The result tastes like a cookie bar. My kids go crazy for this version.
Trail Mix Bars
Combine dried cranberries, chopped almonds, and white chocolate chips. It’s like a trail mix in bar form. Great for hiking or outdoor snacks.
Peanut Butter Power
Swap half the honey for creamy peanut butter. Add chocolate chips. This version is denser and more protein-rich. It’s incredibly satisfying.
Lemon Blueberry
Add the zest of one lemon to the wet ingredients. Fold in dried blueberries. Bright and tangy, perfect for spring.
Gluten-Free Option
Use certified gluten-free oats and gluten-free flour. Everything else is naturally gluten-free. The texture might be slightly different, but it’s still delicious.
Vegan Version
Use coconut oil instead of butter, maple syrup instead of honey, and a flax egg (1 tbsp ground flax + 3 tbsp water) instead of the regular egg. The bars will be slightly softer, but still tasty.
Serving & Storage
How to Serve:
I usually serve these at room temperature. They’re perfect for lunchboxes, desk snacks, or afternoon treats. Pair them with a glass of cold milk or a cup of tea. They’re also great for potlucks because they’re easy to grab and eat.
Refrigerator:
Store in an airtight container for up to 5 days. They’ll stay chewy and fresh. If your kitchen is very hot, the fridge might help keep them from getting too soft.
Freezer:
These freeze beautifully. Wrap individual bars in plastic wrap, then place them in a freezer bag. They’ll last for up to 3 months. Thaw at room temperature for 15 minutes. They taste just like fresh.
Meal Prep:
I make a double batch every time I make these. It takes the same amount of effort, and I have snacks ready for the week. It’s one of the best ways to save time and avoid impulse buys.
Nutrition Information
I’m not a nutritionist, but here’s the breakdown if you’re tracking. Keep in mind that these are estimates based on standard ingredients.
Per Serving (based on 12 bars):
- Calories: 220
- Protein: 4g
- Carbs: 35g
- Fiber: 2g
- Sugar: 18g
- Fat: 8g
- Saturated Fat: 4g
- Cholesterol: 15mg
- Sodium: 120mg
What’s Good: They provide quick energy from the oats and honey. The fiber from the oats helps with satiety. They’re a much better option than processed granola bars.
What to Know: They are naturally sweetened with honey and brown sugar, so they’re higher in sugar than savory snacks. Portion control is key if you’re watching sugar intake. But honestly? They’re a treat, and that’s okay.
Final Thoughts
So that’s my go-to chewy honey oat back to school bars you’ll make on repeat! I’ve probably talked your ear off at this point, but when you make a recipe this often, you have a lot to say about it.
This has saved my sanity more times than I can count. It’s my answer to “what’s for snack time?” when I’m tired, don’t want to go to the store, and still want something homemade. My kids are happy, my husband’s happy, and I’m happy because I’m not stressed about cooking.
Make it yours! Try different mix-ins, swap in your favorite dried fruits, adjust the honey to your taste. The best recipes are the ones you adapt to your family’s tastes. And if you’re looking for other simple treats, you might enjoy checking out these gooey chocolate chip cookie bars for a richer option, or these homemade no-bake chocolate peanut butter bars when you don’t even want to turn on the oven.
If you make this, drop a comment and let me know what you think! I love hearing how recipes turn out in your kitchen. And if something doesn’t work, tell me that too—I’m here to help troubleshoot.
Happy cooking! And I hope your kitchen smells half as good as mine does right now.
Frequently Asked Questions
Can I use quick oats instead of rolled oats?
I don’t recommend it. Quick oats are thinner and will absorb more liquid, resulting in a denser, mushier bar. Old-fashioned rolled oats provide the structure and chewiness that makes these bars special. If you only have quick oats, you can use them, but the texture will be different—more cake-like than chewy.
Why did my bars fall apart?
This usually happens for two reasons: you didn’t press them down firmly enough, or you cut them while they were still warm. Make sure to pack the mixture tightly into the pan, and let them cool completely before slicing. Also, check your mix-in ratio. Too many mix-ins can weaken the structure.
Can I make these gluten-free?
Yes! Just use certified gluten-free rolled oats and gluten-free all-purpose flour. Everything else in the recipe is naturally gluten-free. The texture might be slightly different, but they will still be delicious.
How do I store these bars?
Store them in an airtight container at room temperature for up to 5 days. For longer storage, wrap individual bars in plastic wrap and freeze them for up to 3 months. They thaw quickly at room temperature.
Can I reduce the sugar?
You can reduce the brown sugar by a tablespoon or two, but don’t reduce the honey. The honey is essential for the chewy texture. If you reduce too much sweetener, the bars will be dry and crumbly. You can also use less sweet mix-ins like unsweetened dried fruit or nuts.
Can I double this recipe?
Absolutely! Just use a 9×13 inch baking pan instead of a 9×9. The baking time might increase by 5-10 minutes, so keep an eye on them. They’re ready when the edges are golden brown and the center is set.
What if I don’t have honey?
You can use maple syrup, but the bars will be slightly softer and less chewy. The texture won’t be exactly the same, but they’ll still be tasty. Avoid using agave nectar as it’s much thinner and will make the bars too wet.
Pin This Recipe!
Chewy Honey Oat Back to School Bars
- Total Time: 35 minutes
- Yield: 12-16 servings 1x
Description
Simple, chewy, and reliable snack bars made with pantry staples like oats, honey, and butter. Perfect for lunchboxes, they are easy to make, customizable with various mix-ins, and freeze beautifully.
Ingredients
- 3 cups old-fashioned rolled oats
- 1/2 cup unsalted butter
- 1/2 cup honey
- 1/2 cup packed brown sugar
- 1 teaspoon vanilla extract
- 1 large egg, beaten
- 1/2 cup all-purpose flour
- 1/2 teaspoon baking soda
- 1/2 teaspoon salt
- 1 to 1.5 cups mix-ins (e.g., chocolate chips, dried cranberries, raisins, chopped nuts, coconut flakes)
Instructions
- Preheat oven to 350°F (175°C). Line a 9×9 inch baking pan with parchment paper, leaving an overhang on the sides, and grease lightly.
- In a medium mixing bowl, combine the rolled oats, flour, baking soda, and salt. Stir to distribute evenly.
- In a small saucepan or microwave-safe bowl, melt the butter, honey, and brown sugar until smooth. Remove from heat and stir in the vanilla extract and beaten egg.
- Pour the wet mixture over the dry ingredients and stir vigorously until a thick, sticky dough forms. Fold in your chosen mix-ins.
- Transfer the mixture to the prepared pan and press it down firmly and evenly using a spatula or greased hands.
- Bake for 20-25 minutes until edges are golden brown and the center is set but still slightly soft.
- Let the bars cool completely in the pan on a wire rack for at least 30 minutes before lifting them out and cutting into squares.
Notes
Press the mixture firmly into the pan to ensure the bars hold together. Do not cut while warm, as they will crumble. For best texture, use old-fashioned rolled oats, not quick oats. Mix-ins can be customized, but keep the total amount between 1-1.5 cups to maintain structural integrity.
- Prep Time: 10 minutes
- Cook Time: 25 minutes
- Category: Snack
- Cuisine: American
Nutrition
- Serving Size: 1 bar
- Calories: 220
- Sugar: 18
- Sodium: 120
- Fat: 8
- Saturated Fat: 4
- Carbohydrates: 35
- Fiber: 2
- Protein: 4
Keywords: honey oat bars, back to school snacks, chewy bars, easy snack recipe, lunchbox ideas, gluten-free option, vegan option, homemade granola bars


