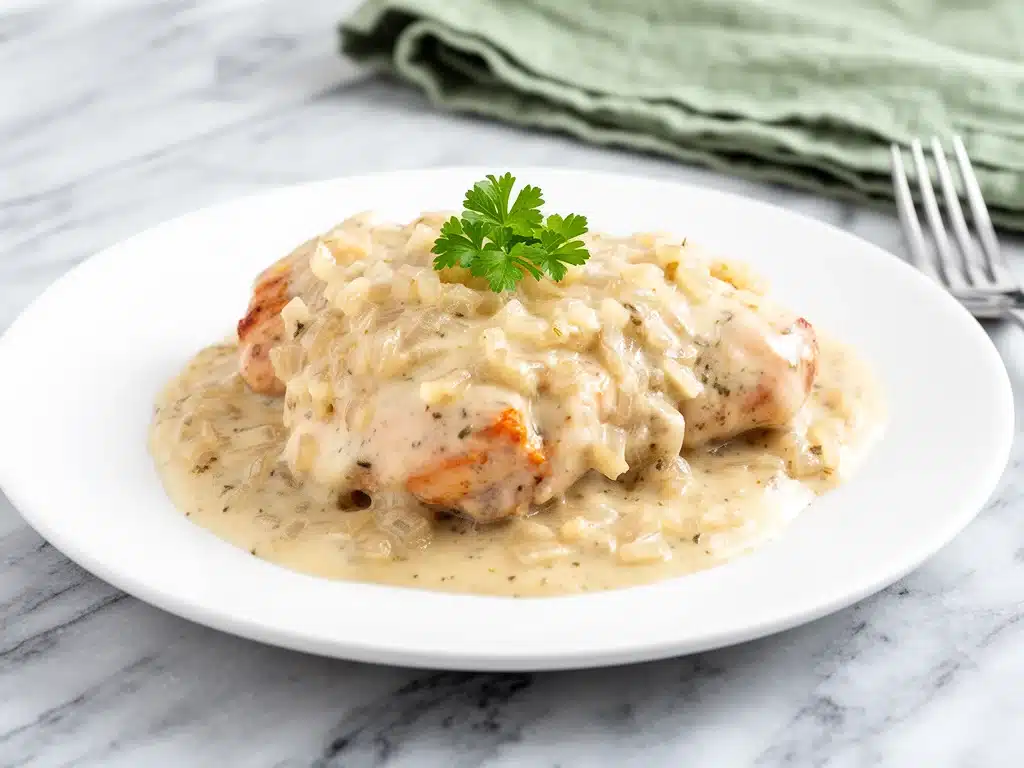
I still remember the exact moment I knew I had to write this down. It was a rainy Tuesday in November, the kind where the wind howls against the windows and the house feels like a cold cave. I was exhausted, my feet were throbbing from standing in the kitchen all day, and I was staring into the fridge hoping a miracle would appear. There was nothing but a few chicken thighs, a sad-looking yellow onion, and a half-empty jar of flour.
I didn’t want to order takeout. I couldn’t bear the thought of paying $18 for lukewarm food in a styrofoam box when I had a perfectly good stove. So I threw together what I thought would be a quick, mediocre meal. I dredged the chicken, pan-fried it until it was golden, threw some onions in the same grease, and whisked up a gravy that I hoped wouldn’t be lumpy.
Twenty minutes later, I sat down at the table. The first bite? My husband looked up from his phone, fork frozen halfway to his mouth, and said, “Wait. Did you order from that Southern place downtown? Because this is better.”
It was just smothered chicken. Simple, rustic, unpretentious smothered chicken. But that night, it felt like a hug in a bowl. Since then, I’ve made this smothered chicken with creamy onion gravy recipe probably fifty times. I’ve tweaked the onion-to-chicken ratio, I’ve argued with myself about whether to use butter or oil, and I’ve learned exactly how to get that gravy silky without it turning into glue. This isn’t fancy restaurant food. It’s better. It’s home food. It’s the kind of meal that makes you forget about your problems for at least an hour.
If you’re tired of the same old roast chicken or dry baked breasts, you need to try this. It’s rich, it’s savory, and it’s ridiculously easy to pull together even on your most chaotic weeknights. Trust me on this one.
Why You’ll Love This Smothered Chicken Recipe
Look, I get it. Weeknight dinners are a struggle. You want something that tastes like you spent hours on it, but you only have thirty minutes. This smothered chicken with creamy onion gravy hits that sweet spot perfectly. Here’s why it’s become a permanent fixture in our dinner rotation, right alongside my fluffy buttermilk pancakes on lazy Sundays.
- It Uses One Skillet (Mostly) — Seriously, the cleanup is minimal. You dredge, you fry, you make the gravy in the same pan. Yes, you might need a baking dish for the final step, but the heavy lifting happens in one pan. I love a low-drama dinner.
- It’s Incredibly Forgiving — I’ve made this with boneless thighs, bone-in thighs, and even breasts (though thighs are king here). I’ve used yellow onions, sweet onions, and even red onions when I was feeling fancy. It always works. It’s hard to mess up.
- The Gravy is Liquid Gold — This isn’t just sauce. It’s a creamy, onion-infused gravy that clings to every piece of chicken. It’s the kind of gravy you want to drink with a spoon. And honestly? It’s better than the gravy at any chain restaurant I’ve ever visited.
- It Feeds a Crowd on a Budget — Chicken thighs are cheap. Onions are dirt cheap. Flour is pantry staples. You can feed four people for under $15, and they’ll think you went all out. It’s budget-smart without feeling like it.
- Leftovers Taste Even Better — I make extra every single time. The chicken soaks up more flavor overnight, and the gravy thickens into something almost like a dip. I eat this cold from the fridge sometimes (don’t judge me) because it’s just that good.
This recipe is my answer to “what’s for dinner?” when I’m tired, broke, and hungry. It’s reliable. It’s delicious. And it makes your kitchen smell like heaven.
Ingredients You’ll Need
Here’s the thing about this recipe: you probably have most of this already. It’s not a shopping list that requires a trip to three different specialty stores. It’s simple, honest ingredients that come together to create something magical. Let’s break it down.
For the Chicken
Chicken thighs (1.5 to 2 pounds / 700-900g) — Boneless, skinless thighs are my go-to because they cook fast and stay juicy. But if you have bone-in, skin-on thighs, use them! Just adjust the cooking time. The skin gets crispy in the pan, which adds amazing flavor to the gravy. Don’t use breasts unless you’re careful—they dry out too easily.
All-purpose flour (1 cup / 120g) — This is for dredging. It creates that crispy crust and helps thicken the gravy later. You can use gluten-free flour if needed, but regular works best for the texture.
Seasoning salt (1 tablespoon) — I use a generous amount. You want the chicken to be seasoned all the way through. If you don’t have seasoning salt, mix 2 teaspoons salt with 1 teaspoon black pepper and 1/2 teaspoon garlic powder.
Black pepper (1 teaspoon, freshly cracked) — Freshly cracked is non-negotiable. Pre-ground pepper loses its punch. Use the good stuff.
Garlic powder (1 teaspoon) — Adds depth without the sharp bite of raw garlic. It’s subtle but essential.
Vegetable oil or lard (3 tablespoons) — I use vegetable oil for convenience, but lard? Lard makes the chicken crispier and adds a rustic flavor I’m obsessed with. If you have lard, use it. If not, oil is fine.
For the Creamy Onion Gravy

Yellow onions (2 large, thinly sliced / about 400g) — Yes, two large onions. This isn’t a garnish; it’s the star. Slice them thinly so they cook down into soft, sweet ribbons. Don’t rush this step.
Butter (2 tablespoons) — Adds richness to the gravy. If you used lard for frying, you might not need as much butter, but I always add a knob of butter at the end for that glossy finish.
Chicken broth (2 cups / 480ml) — Use low-sodium broth so you can control the saltiness. Homemade broth is best, but good quality store-bought works fine. Don’t use the watery kind.
Heavy cream (½ cup / 120ml) — This is what makes it “creamy.” Don’t skimp. Half-and-half works in a pinch, but heavy cream gives that luxurious mouthfeel. I want my gravy to coat the back of a spoon.
Worcestershire sauce (1 teaspoon) — This is the secret weapon. It adds a savory, umami depth that makes the gravy taste complex. You won’t taste “Worcestershire” specifically, but you’ll taste the difference.
Optional: Fresh thyme (1 teaspoon, chopped) — I add this sometimes for an herbal note. It’s not traditional, but I love it. Skip it if you prefer the classic taste.
Equipment Needed
You don’t need fancy gadgets for this. Here’s what I actually use in my kitchen.
Large skillet (12-inch) — Cast iron is my absolute favorite for this. It holds heat well and gets the chicken crispy. But a heavy-bottomed stainless steel or non-stick skillet works too. Just make sure it’s big enough to fit all the chicken in a single layer. If you have to crowd the pan, the chicken steams instead of frying, and you lose that crust.
Baking dish (9×13 inch) — You’ll transfer the chicken here after frying to keep it warm while you make the gravy. A ceramic or glass dish works best.
Whisk — Essential for the gravy. You need to whisk out any lumps from the flour and broth. A small balloon whisk is perfect.
Sharp knife and cutting board — For slicing the onions. A dull knife will make you cry more than the onions do.
Tongs — Much easier than a fork for flipping chicken. Saves your fingers from hot oil.
Measuring cups and spoons — Standard stuff. I keep them on the counter for easy access.
How to Make It: Step-by-Step
Alright, let’s get cooking! This process is straightforward, but there are a few tricks to getting it right. I’m walking you through exactly how I do it.
Step 1: Prep the Chicken (5 minutes)
Pat your chicken thighs completely dry with paper towels. Moisture is the enemy of crispy skin. If they’re wet, they’ll steam. Once they’re dry, place them on a plate. In a shallow bowl or pie dish, mix the flour, seasoning salt, black pepper, and garlic powder. Dredge each thigh in the flour mixture, shaking off any excess. Press the flour into the chicken so it sticks. You want a thin, even coating.
Step 2: Sear the Chicken (10-12 minutes)
Heat the oil (or lard) in your large skillet over medium-high heat. You want it hot but not smoking. When you add the chicken, it should sizzle loudly. Place the thighs in the pan in a single layer. Don’t crowd the pan! If your skillet isn’t big enough, cook in batches. Sear for 4-5 minutes on one side until golden brown and crispy. Flip and cook for another 3-4 minutes. The chicken doesn’t need to be cooked through yet—we’re just building flavor. Remove the chicken to your baking dish and tent loosely with foil.
Step 3: Cook the Onions (10 minutes)
Reduce the heat to medium. In the same skillet with the chicken grease, add the sliced onions. If the pan is dry, add a splash more oil. Cook the onions, stirring occasionally, for about 8-10 minutes. They need to soften and turn translucent. Don’t burn them, but don’t rush this. You want them sweet and soft, not crunchy. This is where the flavor base comes from.
Step 4: Make the Roux (2 minutes)
Once the onions are soft, sprinkle the flour over them. Stir constantly for 1-2 minutes. You’re cooking out the raw flour taste. It will look like a paste. This is your roux, and it’s what thickens the gravy. Be careful not to burn it.
Step 5: Build the Gravy (5 minutes)
Slowly pour in the chicken broth while whisking constantly. This is crucial. If you dump it all in at once, you’ll get lumps. Whisk until the broth is fully incorporated and smooth. Scrape up any browned bits (fond) from the bottom of the pan—that’s pure flavor. Let the mixture simmer for 3-4 minutes. It will start to thicken.
Step 6: Add the Cream and Finish (3 minutes)
Reduce heat to low. Stir in the heavy cream and Worcestershire sauce. Simmer gently for another 2 minutes. The gravy should be creamy and coat the back of a spoon. Taste it. Add more salt or pepper if needed. This is the moment of truth.
Step 7: Combine and Serve (2 minutes)
Pour the hot gravy over the chicken in the baking dish. If you want to keep it warm, put the dish in a 200°F (95°C) oven for 10 minutes. Serve immediately. Spoon extra gravy over the top. It’s gorgeous.
Total Time: About 40 minutes (15 minutes active, 25 minutes mostly hands-off)
Expert Tips & Tricks
Here’s everything I’ve learned from making this dozens of times. These tips will save you from my mistakes.
Don’t Skip the Dredge
I know it’s extra dishes, but dredging the chicken creates that crispy crust. It also helps thicken the gravy naturally. If you skip it, you get boiled chicken in soup. Not what we’re going for.
The Sear is Non-Negotiable
You need that brown crust on the chicken. It’s called the Maillard reaction, and it’s where the flavor lives. If your chicken looks pale, it’s not done searing. Be patient. High heat, dry chicken, don’t move it too soon.
Whisk Like Your Life Depends On It
When adding the broth, whisk like crazy. Lumpy gravy is sad gravy. If you do get lumps, just strain the gravy through a fine-mesh sieve. It saves the dish.
Use the Pan Drippings
Those brown bits stuck to the bottom of the skillet? That’s flavor gold. Don’t wash the pan between searing chicken and making gravy. Deglaze those bits into your gravy. It’s the secret to restaurant-quality taste.
Control the Heat
When adding the cream, keep the heat low. High heat can cause the cream to separate or curdle. Gentle warmth keeps it smooth and silky.
Variations & Substitutions
Once you’ve nailed the basic version, here’s how you can mix it up. I’ve tried all of these.
Spicy Smothered Chicken
Add 1 teaspoon of cayenne pepper or 1 tablespoon of hot sauce to the flour mixture. Top with sliced jalapeños when serving. This is perfect if you like a kick.
Mushroom Lovers
Sauté 8oz of sliced mushrooms with the onions. They add an earthy depth that pairs beautifully with the creamy gravy. I do this when I want to feel like I’m in a French bistro.
Lighter Version
Use half-and-half instead of heavy cream, and reduce the oil slightly. It’s still delicious, just a bit lighter. I make this when I’m trying to be “healthy” (which is a loose term).
Gluten-Free
Use gluten-free all-purpose flour for dredging and thickening. Everything else is naturally gluten-free. I’ve used Bob’s Red Mill and it works great.
Dairy-Free
Replace butter with olive oil and heavy cream with full-fat coconut cream. It changes the flavor slightly, but it’s still rich and creamy. My dairy-free friend loves this version.
Serving & Storage
How to serve this masterpiece? I usually serve it straight from the baking dish at the table. It looks rustic and stays warm. But here are other ways I’ve enjoyed it:
Side Dishes: Mashed potatoes are obvious, but I also love this with buttered egg noodles, steamed green beans, or roasted sweet potatoes. It’s also great with a simple side salad to cut the richness.
Toppings: When I have guests, I put out extra black pepper and fresh parsley. A little green color makes it pop.
Storage: Store leftovers in an airtight container in the fridge for up to 4 days. The gravy will thicken as it cools—this is normal.
Reheating: The best way to reheat is in a skillet over low heat with a splash of broth or milk. Stir gently until warm. Microwave works but can make the chicken rubbery if you’re not careful. Add a splash of liquid and heat in 30-second intervals.
Freezing: You can freeze this, but the texture of the cream sauce might change slightly upon thawing. It’s still edible, but fresh is best. Freeze for up to 3 months.
Nutrition Information
I’m not a nutritionist, but here’s the breakdown if you’re tracking. Please remember these are estimates.
Per Serving (based on 4 servings):
- Calories: 520
- Protein: 35g
- Carbs: 28g
- Fiber: 2g
- Sugar: 6g
- Fat: 28g
- Saturated Fat: 12g
- Cholesterol: 140mg
- Sodium: 680mg
My Take: This is comfort food. It’s rich, it’s savory, and it’s meant to be enjoyed. If you want to lighten it up, use more vegetables and less cream. But honestly? I just eat a reasonable portion and enjoy the heck out of it. It’s better than takeout, cheaper, and you know exactly what’s in it.
Final Thoughts
So that’s my smothered chicken with creamy onion gravy! I know I’ve talked your ear off, but when you make a recipe this often, you have a lot to say about it. This has saved my weeknight dinners more times than I can count. It’s my answer to “what’s for dinner?” when I’m tired, don’t want to think, and still want something that tastes amazing.
My family loves it. My friends ask for the recipe. And I’m happy because I’m not stressed about cooking. Make it yours! Try different onions, add some mushrooms, or make it spicy. The best recipes are the ones you adapt to your tastes.
If you make this, drop a comment and let me know what you think! I love hearing how recipes turn out in your kitchen. And if something doesn’t work, tell me—I’m here to help. Happy cooking!
Frequently Asked Questions
Can I use chicken breasts instead of thighs?
You can, but thighs are much better for this recipe. Breasts dry out easily when simmered in gravy. If you must use breasts, pound them to an even thickness and cook them for less time. But really? Stick with thighs. They’re juicier and more forgiving.
Why is my gravy lumpy?
Lumps usually happen when you add the broth too quickly without whisking. Always add the broth slowly while whisking constantly. If you already have lumps, just strain the gravy through a fine-mesh sieve. It’s a quick fix.
Can I make this ahead of time?
Sort of. You can sear the chicken and make the gravy ahead, but don’t combine them until you’re ready to serve. If you let the chicken sit in the gravy for too long, it can get soggy. Make the components ahead, then assemble and heat right before dinner.
What kind of onions work best?
Yellow onions are the standard and work perfectly. Sweet onions (like Vidalia) are great if you want a milder, sweeter flavor. Red onions work too but will turn the gravy a bit purple. I stick with yellow for the classic taste.
Can I freeze this recipe?
Yes, but the texture of the cream sauce might separate slightly when thawed. It’s still safe to eat and tastes good, but it won’t be as silky as fresh. I recommend freezing the chicken and gravy separately, then recombining and reheating gently on the stove.
How do I reheat leftovers without it getting dry?
Add a splash of milk or broth to the leftovers and reheat gently in a skillet over low heat. Stir frequently. The liquid helps re-emulsify the sauce and keeps the chicken moist. Avoid high heat, which can make the chicken tough.
Pin This Recipe!


Smothered Chicken with Creamy Onion Gravy
- Total Time: 40 minutes
- Yield: 4 servings 1x
Description
A rustic, comforting weeknight dinner featuring pan-fried chicken thighs smothered in a rich, creamy onion gravy. This one-skillet meal is forgiving, budget-friendly, and delivers restaurant-quality flavor with minimal cleanup.
Ingredients
- 1.5 to 2 pounds boneless, skinless chicken thighs
- 1 cup all-purpose flour
- 1 tablespoon seasoning salt
- 1 teaspoon black pepper, freshly cracked
- 1 teaspoon garlic powder
- 3 tablespoons vegetable oil or lard
- 2 large yellow onions, thinly sliced
- 2 tablespoons butter
- 2 cups low-sodium chicken broth
- 1/2 cup heavy cream
- 1 teaspoon Worcestershire sauce
- 1 teaspoon fresh thyme, chopped (optional)
Instructions
- Pat chicken thighs dry and dredge in a mixture of flour, seasoning salt, black pepper, and garlic powder, pressing to adhere.
- Heat oil or lard in a large skillet over medium-high heat. Sear chicken in a single layer for 4-5 minutes per side until golden brown. Remove to a baking dish and tent with foil.
- Reduce heat to medium. In the same skillet, cook sliced onions in the chicken grease for 8-10 minutes until soft and translucent.
- Sprinkle flour over the onions and stir constantly for 1-2 minutes to create a roux.
- Slowly whisk in chicken broth, scraping up browned bits from the bottom of the pan. Simmer for 3-4 minutes until thickened.
- Reduce heat to low and stir in heavy cream and Worcestershire sauce. Simmer for 2 minutes until the gravy coats the back of a spoon.
- Pour the hot gravy over the chicken in the baking dish. Serve immediately, spooning extra gravy over the top.
Notes
For best results, do not crowd the pan when searing chicken to ensure a crispy crust. Whisk constantly when adding broth to prevent lumps. If using bone-in thighs, adjust cooking time accordingly. Leftovers can be stored in the fridge for up to 4 days.
- Prep Time: 15 minutes
- Cook Time: 25 minutes
- Category: Main Course
- Cuisine: American
Nutrition
- Serving Size: 1 chicken thigh with
- Calories: 520
- Sugar: 6
- Sodium: 680
- Fat: 28
- Saturated Fat: 12
- Carbohydrates: 28
- Fiber: 2
- Protein: 35
Keywords: smothered chicken, creamy onion gravy, weeknight dinner, comfort food, one skillet meal, chicken thighs, easy dinner


