
Last Tuesday, I was standing in my kitchen at 6:30 AM, staring at the fridge like it held the secrets to the universe. My kids were already half-dressed, arguing over whose turn it was to pick the playlist for the car ride to school, and I had absolutely nothing packed for lunch. The grocery store is three miles away, the clock was ticking, and I refused to send them out with a sad, store-bought sandwich that tasted like cardboard and regret.
So, I did what I always do when I’m panicking: I opened the pantry, opened the fridge, and grabbed what was already there. I pulled out some deli turkey, a block of sharp cheddar, a tub of cream cheese, a pack of flour tortillas, and a jar of sun-dried tomato pesto. I told myself, “If this is a disaster, we’re eating crackers.”
It wasn’t a disaster. It was actually really good. Better than good. My kids devoured them, asking if we could have “fun roll-ups” for lunch every day. That was three weeks ago. Now, these back to school turkey and cheese pinwheel roll-ups are a non-negotiable staple in our weekly meal prep rotation. They are stupid simple, they look cute (which matters to a ten-year-old), and they taste like a treat, not a chore.
I’ve made these at least a dozen times since that chaotic morning. I’ve tweaked the cheese, swapped the pesto for spinach dip, and tried different tortilla sizes. But the core recipe remains the same because it works. It’s foolproof. If you can spread cream cheese on a tortilla and roll it up, you can make this. Seriously. I’m going to show you exactly how to do it, no fancy techniques required.
Why You’ll Love This Recipe
There are a million things I could say about why this is my new favorite lunch hack, but let’s be real—you’re looking for something that works. Here’s why these pinwheels have earned a permanent spot in your lunchbox game:
- Five Ingredients, Zero Fuss — I’m not kidding. Five items. That’s it. You don’t need a spice rack full of mystery powders or a trip to the specialty store. Just turkey, cheese, cream cheese, tortillas, and a flavor booster. It’s as simple as it gets.
- Beginner-Proof — I’ve watched my teenage daughter make these while listening to a podcast. She didn’t even look up. There’s no cooking involved, no heat, no timing. You just assemble and roll. You really can’t mess this up.
- Looks Like Effort (But Isn’t) — Let’s be honest, presentation matters for kids. These look like something you’d buy at a fancy café. The swirl of cheese and turkey against the green pesto looks vibrant and appetizing. It makes a boring lunch feel special without you lifting a finger.
- Make-Ahead Magic — I make a batch on Sunday night, wrap them in plastic, and toss them in the fridge. By Monday morning, lunch is literally just “grab and go.” No assembly required during the rush. This is my go-to when I want to feel like a organized parent without actually organizing anything.
- Customizable Forever — Hate pesto? Use hummus. Hate cheddar? Use pepper jack. Picky eater? Keep it plain turkey and swiss. The base is neutral enough to handle whatever your family actually likes eating.
This is the kind of recipe that saves your sanity. It’s reliable, it’s tasty, and it gets you out of the “what’s for lunch?” loop. Once you try these, you’ll wonder why you ever bothered with flat, boring sandwiches.
Ingredients You’ll Need
Here’s the best part: you probably have most of this already. This recipe relies on pantry staples and fridge basics. I’m particular about three things here, but mostly, it’s about keeping it simple.
The Base
Flour tortillas (8-inch, large, about 6-8 count) — I use the standard large flour tortillas. They’re soft, pliable, and roll without cracking. Don’t use the tiny taco-sized ones; they’re too small to hold the filling. Don’t use the giant burrito ones either; they’re too big and floppy. 8-inch is the sweet spot.
Light cream cheese (8 oz, softened) — Yes, softened. This is crucial. If it’s cold and hard, you’ll tear the tortilla. Let it sit on the counter for 20 minutes before you start. I use the tub version because it’s easier to spread, but a block works if you let it come to room temp. Full-fat is better for flavor, but light works if you’re watching calories.
The Filling
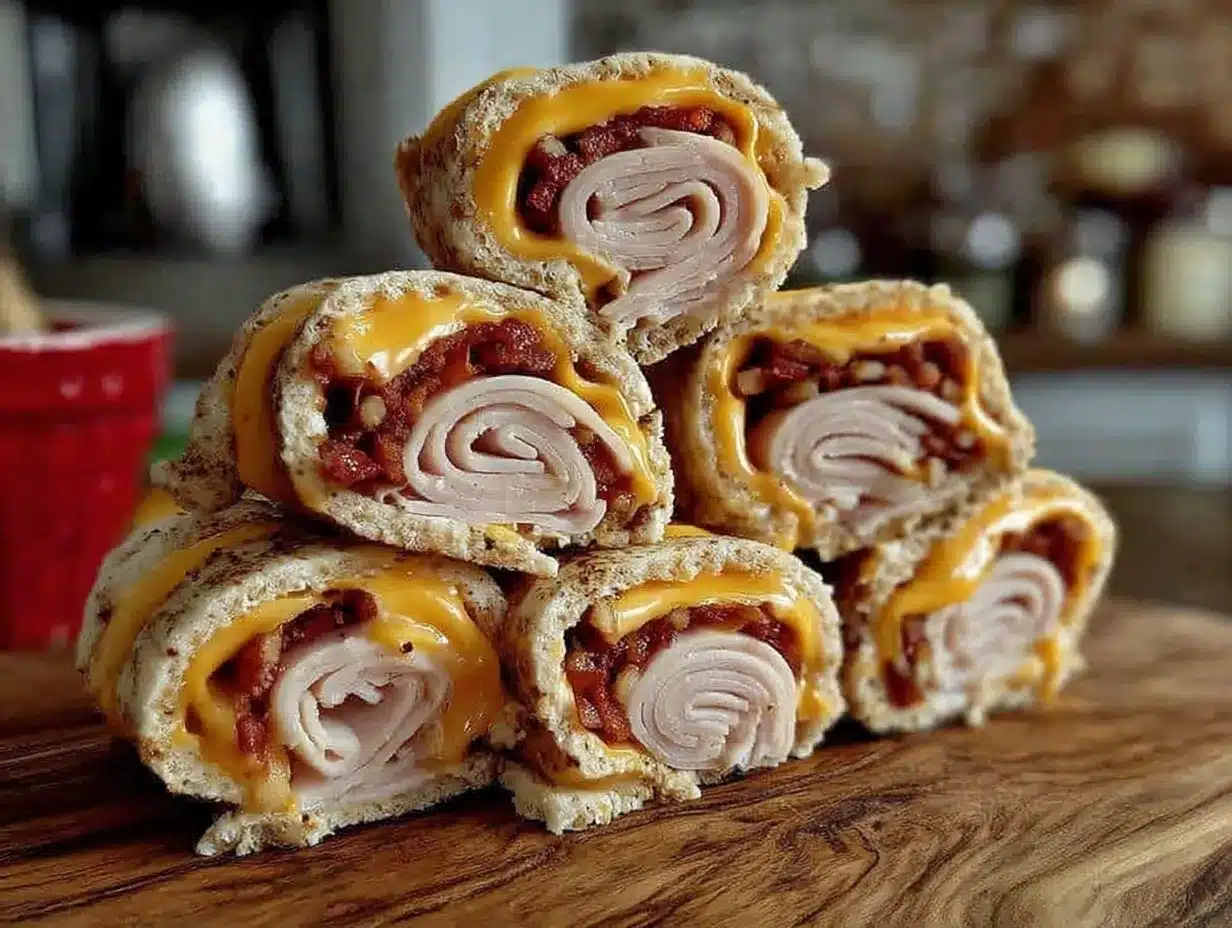
Deli turkey breast (6-8 slices) — Look for the low-sodium variety if you can find it. Standard deli turkey works fine, just be aware of the salt content. Fold the slices in half before laying them down; it makes for a nicer layering effect.
Sharp cheddar cheese (1 cup, shredded) — I like sharp cheddar because it has a stronger flavor that stands up to the cream cheese. Mild cheddar is too subtle. You can use pre-shredded, but freshly shredded melts and spreads better. I grate it myself because I’m a snob, but pre-shredded is a valid shortcut.
Sun-dried tomato pesto (3-4 tablespoons) — This is the flavor bomb. It adds moisture, tang, and color. If you don’t have pesto, sun-dried tomatoes chopped up with a little olive oil works. Or skip it entirely for a plain version. But the pesto? That’s what makes them addictive.
Optional Add-Ins
Spinach leaves (handful) — I toss in a few fresh spinach leaves for a pop of green and a tiny bit of nutrition. It adds texture. If you don’t have spinach, skip it. The recipe doesn’t need it.
Avocado (sliced) — Add avocado slices for creaminess. But add these right before packing, not when prepping, or they’ll brown. I usually add them fresh on Monday mornings.
Equipment Needed
You don’t need fancy equipment for this. Here’s what I actually use.
Large cutting board — I use a big plastic board. It needs to be big enough to lay out the tortillas flat. If your board is too small, you’ll be rolling on the counter, which is fine, but a board is easier to clean.
Butter knife or offset spatula — For spreading the cream cheese. A regular butter knife works perfectly. Don’t use a knife with a sharp edge; you don’t want to cut the tortilla.
Plastic wrap — Essential for rolling and chilling. You need enough to wrap the log tightly so it holds its shape.
Chef’s knife — For slicing the pinwheels. A sharp knife makes clean cuts. A dull knife will squish the roll-ups and make them look messy. I learned this the hard way with a sad, squished pinwheel that fell apart.
Measuring cups — Just for the pesto and cheese. I eyeball it mostly, but having the tools is nice.
Storage containers — Airtight containers or ziplock bags for the fridge. I use containers because they stack better and don’t leak.
How to Make It: Step-by-Step
Alright, let’s make this! I’m walking you through exactly how I do it, including the little tricks I’ve picked up.
Step 1: Prep Your Cream Cheese (5 minutes)
Take your cream cheese out of the fridge and let it sit at room temperature. This is the most important step. If it’s cold, it won’t spread smoothly, and you’ll end up with lumps or tear the tortilla. While it softens, lay out your tortillas on your cutting board.
Step 2: Spread the Cream Cheese (3 minutes)
Take one tortilla and spread a thin, even layer of cream cheese over the entire surface. Leave about a half-inch border on the edge furthest from you—this acts as a seal when you roll. Don’t overdo it; too much cream cheese will make it slide out when you slice. Repeat with all tortillas. You’re making a base layer here.
Step 3: Layer the Turkey and Cheese (3 minutes)
On each tortilla, lay down 2-3 slices of turkey breast. Fold them in half so they fit neatly. Then, sprinkle a generous amount of shredded cheddar cheese over the turkey. The cheese should cover the turkey completely. This layering is what gives you those pretty swirls later. If you want to add spinach or avocado, do it now.
Step 4: Add the Flavor (1 minute)
Drizzle or spread the sun-dried tomato pesto over the cheese. You don’t need much—just enough to flavor the whole thing. A little goes a long way. If you’re using hummus or spinach dip, spread it evenly now.
Step 5: Roll It Up (2 minutes)
This is the fun part. Starting from the edge closest to you, tightly roll the tortilla up. Use your fingers to tuck the filling in as you roll. You want it tight, like a sleeping bag. Once it’s rolled, use the plastic wrap to help you. Place the roll on a sheet of plastic wrap, roll it up in the plastic, and twist the ends like a candy wrapper. This helps it keep its shape while it chills.
Step 6: Chill (30 minutes)
Put the wrapped rolls in the fridge for at least 30 minutes. This step is non-negotiable if you want clean slices. If you skip it, the rolls will be soft and messy when you cut them. I usually wrap them up before bed and slice them in the morning.
Step 7: Slice and Serve (5 minutes)
Take the rolls out of the plastic wrap. Use a sharp knife to slice them into 1-inch pinwheels. Wipe the knife clean between cuts if it gets messy. Arrange them on a plate or in a container. The swirls should be visible and pretty. If some fall apart, just shove them in and eat them first—they still taste great.
Expert Tips & Tricks
Here’s everything I’ve learned from making these dozens of times. These tips will save you from my mistakes.
Keep It Tight
The tightness of the roll determines whether your pinwheels hold their shape. If you roll loosely, the filling will spill out when you cut. Roll it like you’re making a burrito—tight and firm. The plastic wrap twist helps lock that tension in.
Don’t Skimp on the Chill
I know you want to eat them now. But if you don’t chill them, they will be a mess. The cream cheese needs to firm up. 30 minutes is the minimum. An hour is better. Overnight is best. Plan ahead, and you’ll get perfect slices.
Sharp Knife Only
This cannot be stressed enough. Use the sharpest knife you have. A dull knife will squish the roll-up and make the layers blend together. A sharp knife creates clean, distinct circles. If you don’t have a sharp knife, borrow one from a neighbor. It’s worth it.
Softened Cream Cheese is Key
I’ve mentioned this, but I’ll say it again. Hard cream cheese = torn tortillas. Soft cream cheese = smooth spread. If you forgot to take it out, microwave it for 10 seconds. Just 10. Check it. It should be soft but not melted.
Make-Ahead Strategy
You can make these up to 3 days in advance. Keep them in an airtight container in the fridge. Slice them the morning you plan to eat them. If you slice them and leave them out, they’ll dry out. Slice right before packing.
Variations & Substitutions
Once you’ve nailed the basic version, here’s how you can mix it up. I’ve tried all of these.
Spinach & Feta
Swap the cheddar for crumbled feta and add fresh spinach leaves. Use a basil pesto instead of sun-dried tomato. This feels lighter and more Mediterranean. My kids love the tang of the feta.
BLT Pinwheels
Add crispy bacon bits and lettuce leaves. The bacon adds crunch. Add the lettuce right before packing so it stays crisp. This is basically a BLT in roll-up form.
Buffalo Chicken
Use shredded cooked chicken mixed with buffalo sauce instead of turkey. Use blue cheese dressing instead of pesto. This is spicy and tangy. Great for game day.
Vegetarian
Skip the turkey. Use hummus as the base, and add roasted red peppers and cucumber slices. This is fresh and crunchy. I make this version when I want something lighter.
Dietary Modifications
Gluten-Free — Use gluten-free tortillas. They can be brittle, so be gentle when rolling. Let the cream cheese soften fully to prevent tearing.
Lower Carb — Use large lettuce leaves instead of tortillas. Wrap the filling in the leaves. It’s like a low-carb wrap. Not as sturdy, but works in a pinch.
Dairy-Free — Use dairy-free cream cheese and cheese slices. The texture will be different, but it still works. I’ve used Kite Hill cream cheese with success.
Serving & Storage
I usually serve these straight from the container at the dinner table—they look rustic and stay cool. But here are other ways I’ve enjoyed them:
Side Dishes
- Apple slices with cinnamon
- Carrot sticks with ranch
- A handful of grapes
- Crackers (if you want extra carbs)
Storage Instructions
Refrigerator: Store in an airtight container for up to 4 days. They hold up well in the fridge. If they start to look dry, cover them with a damp paper towel.
Freezing: Honestly, these don’t freeze well. The tortillas get soggy and the cream cheese changes texture. Make them fresh or store in the fridge for up to 4 days.
Packing for School: Pack them in a rigid container to prevent crushing. If you’re using a soft bag, put them on top of other items. Add an ice pack if it’s hot outside.
Nutrition Information
I’m not a nutritionist, but here’s the breakdown if you’re tracking. This is per pinwheel (makes about 12-15 pinwheels).
- Calories: 120
- Protein: 6g
- Carbs: 10g
- Fat: 7g
- Sodium: 250mg
It’s moderate in calories and protein, making it a decent lunch option. It’s not a diet food, but it’s not a calorie bomb either. When I want to make it lighter, I use low-fat cream cheese and skip the pesto. But usually? I just enjoy the richness.
Final Thoughts
So that’s my go-to back to school turkey and cheese pinwheel roll-ups! I’ve probably talked your ear off at this point, but when you make a recipe this often, you have a lot to say about it.
This has saved my mornings more times than I can count. It’s my answer to “what’s for lunch?” when I’m tired, don’t want takeout, and still want something that tastes really good. My kids are happy, I’m happy, and I’m happy because I’m not stressed about cooking.
Make it yours! Try different add-ins, swap in your favorite vegetables, adjust the cheese. The best recipes are the ones you adapt to your family’s tastes.
If you make this, drop a comment and let me know what you think! I love hearing how recipes turn out in your kitchen. And if something doesn’t work, tell me that too—I’m here to help troubleshoot.
Happy cooking! And I hope your kitchen smells half as good as mine does right now.
Frequently Asked Questions
Can I use whole wheat tortillas?
Yes! Whole wheat tortillas work great. They’re a bit sturdier, so they might hold up better if you’re packing them for school. Just make sure the cream cheese is soft, or the tortilla might crack when you roll.
Why did my pinwheels fall apart when I sliced them?
Usually, this means the roll wasn’t tight enough, or you didn’t chill them long enough. Make sure you roll it tightly, wrap it in plastic, and chill it for at least 30 minutes. Also, use a sharp knife. A dull knife squishes the roll instead of cutting through it cleanly.
Can I make these ahead for a party?
Absolutely! I make a double batch for parties. Keep them in the fridge until an hour before serving. Slice them right before you bring them out. They hold up well for a few hours at room temperature, but don’t leave them out all day.
Can I use different cheese?
Yes! Mozzarella, pepper jack, swiss, or gouda all work. Just shred it yourself for better melting and texture. Pre-shredded cheese has anti-caking agents that can make the filling grainy.
How long do these last in the fridge?
They last up to 4 days in an airtight container. After that, the tortillas start to get stale. I usually make a batch on Sunday, and they’re gone by Wednesday.
Can I freeze these?
I don’t recommend it. The tortillas get soggy and the cream cheese separates when thawed. It’s best to make them fresh. If you need to prep ahead, assemble the rolls but don’t slice them. Keep them in the fridge for 2-3 days, then slice and serve.
What if I don’t have pesto?
No pesto? No problem. Use hummus, spinach dip, or even just a little mayonnaise mixed with garlic powder. Or skip the sauce entirely and just use the turkey and cheese. It’s still delicious.
Pin This Recipe!


Back to School Turkey Pinwheels: 5-Ingredient & Easy
- Total Time: 45 minutes
- Yield: 12-15 pinwheels 1x
Description
These simple, no-cook turkey and cheese pinwheels are a perfect make-ahead lunch for school or work. With just five ingredients and minimal effort, they offer a customizable, kid-friendly option that looks fancy but is incredibly easy to assemble.
Ingredients
- 8 large flour tortillas (8-inch)
- 8 oz light cream cheese, softened
- 6–8 slices deli turkey breast
- 1 cup sharp cheddar cheese, shredded
- 3–4 tablespoons sun-dried tomato pesto
- Optional: Fresh spinach leaves
- Optional: Sliced avocado
Instructions
- Let the cream cheese sit at room temperature for 20 minutes until softened.
- Lay out the tortillas on a large cutting board.
- Spread a thin, even layer of softened cream cheese over each tortilla, leaving a half-inch border on the far edge.
- Layer 2-3 slices of turkey breast on each tortilla, folding them in half to fit.
- Sprinkle shredded cheddar cheese evenly over the turkey.
- Drizzle or spread sun-dried tomato pesto over the cheese layer.
- Tightly roll up each tortilla from the edge closest to you, tucking in the filling as you go.
- Wrap each roll tightly in plastic wrap, twisting the ends like a candy wrapper to secure the shape.
- Refrigerate the wrapped rolls for at least 30 minutes (or overnight) to firm up.
- Remove plastic wrap and slice into 1-inch pinwheels using a sharp knife.
- Serve immediately or store in an airtight container.
Notes
Ensure cream cheese is fully softened to prevent tearing the tortillas. Rolling tightly is crucial for clean slices. Do not freeze these as the tortillas become soggy and cream cheese texture changes. For best results, slice right before packing or serving to prevent drying out.
- Prep Time: 15 minutes
- Cook Time: 0 minutes
- Category: Lunch
- Cuisine: American
Nutrition
- Serving Size: 1 pinwheel
- Calories: 120
- Sugar: 1
- Sodium: 250
- Fat: 7
- Saturated Fat: 3
- Carbohydrates: 10
- Protein: 6
Keywords: turkey pinwheels, back to school lunch, easy lunch ideas, no cook recipes, make ahead lunch, kid friendly lunch, turkey roll ups, 5 ingredient recipes


