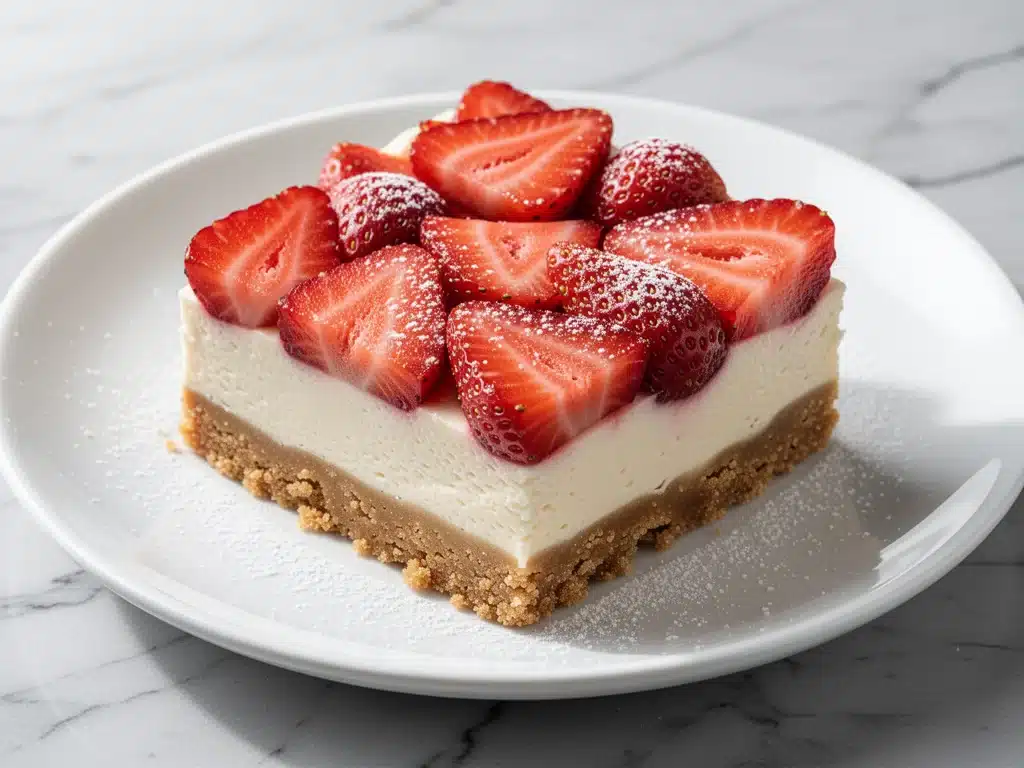
I still remember the first time I made these strawberry cheesecake bars. It was a humid July evening, and I had just returned from a farmers market with a bag of strawberries that were so red they looked almost fake. They were perfect. Ripe, sweet, and begging to be turned into something special. I wanted to make a dessert that felt elegant enough for a dinner party but simple enough to throw together on a Tuesday night. I didn’t want a complicated tart with a fragile crust or a cake that required three bowls and an hour of mixing.
I wanted bars. Something you can cut into neat squares, serve on a napkin, and eat with your hands while standing by the window. So I grabbed my mixer, pulled out the cream cheese, and decided to combine two of my absolute favorite things: the tangy richness of a classic New York cheesecake and the bright, fruity pop of fresh strawberries. The result? These strawberry cheesecake bars. They have a buttery graham cracker crust that actually stays crisp, a filling that is impossibly smooth, and a strawberry layer on top that sets just right.
I’ve made this recipe at least a dozen times since that summer evening. I’ve tweaked the sweetness, adjusted the baking time, and tested different types of sugar. This version is the winner. It’s the one I make when I need to impress in-laws, when I’m bringing a dessert to a potluck, or when I just need a little slice of joy after a long day. It’s foolproof, it’s delicious, and it’s going to become a staple in your kitchen too.
Why You’ll Love This Recipe
There are a lot of cheesecake recipes out there, but this one stands out for reasons that go beyond just taste. Here’s why these strawberry cheesecake bars have earned a permanent spot in my rotation.
Zero Crust Cracks — The biggest fear with cheesecake is the crack. The dreaded spiderweb on top. I’ve learned the trick to a smooth, uncracked surface, and this recipe delivers. The key is gentle mixing and low, slow baking. You get that professional, smooth top every single time. No cracks, no stress.
Buttery Graham Crust That Stays Crisp — I’ve made so many cheesecake bars where the crust gets soggy after sitting in the fridge for a day. Not this one. By pressing the crust firmly and pre-baking it briefly, we create a moisture barrier. The crust stays crisp and buttery even after the bars have chilled overnight. It’s a game-changer.
Real Strawberry Flavor — Many recipes use artificial strawberry jam or flavoring. I use real, fresh strawberries. I macerate them with a little sugar to draw out their juices, then reduce that juice into a glaze. It tastes like actual strawberries, bright and fresh, not like candy.
Make-Ahead Friendly — This is the ultimate make-ahead dessert. In fact, it’s better the next day. The flavors meld together overnight, and the texture sets up perfectly. I often make these two days in advance, which takes all the stress out of hosting. Just pull them out of the fridge 15 minutes before serving.
Simple Ingredients — You don’t need fancy equipment or hard-to-find ingredients. Cream cheese, butter, sugar, eggs, graham crackers, and strawberries. If you have these in your pantry and fridge, you can make this tonight. It’s accessible, reliable, and delicious.
This recipe has saved me more times than I can count. It’s my go-to when I need a dessert that feels homemade and impressive but doesn’t require a degree in pastry arts. My friends ask for the recipe constantly, and honestly? I don’t mind sharing. It’s that good.
Ingredients You’ll Need
Here’s the best part: you probably have most of this already. This recipe relies on simple, high-quality ingredients. You don’t need anything exotic. Here’s exactly what you need and why it matters.
For the Buttery Graham Crust
Graham cracker crumbs (1 ½ cups / 150g) — You can buy pre-made crumbs or make your own by blending graham crackers in a food processor. I prefer making my own because they taste fresher and more buttery. Look for standard honey graham crackers, not the cinnamon ones.
Unsalted butter (6 tablespoons / 85g, melted) — This is the glue that holds your crust together. Use real butter, not margarine. It makes a huge difference in flavor and texture. Melt it completely before mixing.
Granulated sugar (2 tablespoons / 25g) — Just a little bit to sweeten the crust. Don’t skip this; it helps the crust caramelize slightly and adds depth.
Pinch of salt — Enhances the buttery flavor. Just a pinch goes a long way.
For the Cream Cheese Filling
Full-fat cream cheese (24 ounces / 680g, 3 blocks) — This is non-negotiable. Do not use light cream cheese. It will be runny and won’t set properly. Let it sit at room temperature for at least 30 minutes before mixing. Cold cream cheese leads to lumps.
Granulated sugar (1 cup / 200g) — Provides sweetness and helps with the structure. I use white sugar for a clean flavor that doesn’t compete with the strawberries.
Large eggs (3 large) — Room temperature eggs are crucial. Cold eggs can cause the mixture to curdle. Crack them into a separate bowl first to check for shells, then add them one at a time.
Vanilla extract (1 teaspoon / 5ml) — Pure vanilla extract, not imitation. It adds warmth and rounds out the tangy cream cheese flavor. I use Madagascar vanilla for the best aroma.
All-purpose flour (2 tablespoons / 15g) — This is the secret ingredient. A small amount of flour helps stabilize the filling and prevents cracking. It’s barely noticeable but makes a big difference in texture.
For the Strawberry Topping
Fresh strawberries (1 pound / 450g) — Use ripe, red strawberries. If they’re in season and local, even better. Wash and hull them. You’ll slice them thinly for the topping.
Strawberry jam or preserves (¼ cup / 60g) — I use a high-quality seedless strawberry jam for the glaze. It gives a shiny, professional finish. If you can’t find seedless, strain the seeds out later.
Water (1 tablespoon / 15ml) — Helps thin the jam for brushing.
Optional: Fresh mint leaves — For garnish. Adds a pop of color and freshness. I like to tear them slightly before placing them on top.
Equipment Needed
You don’t need fancy equipment for this. Here’s what I actually use.
9×9 inch baking pan — This is the ideal size for these bars. It gives you nice, thick squares. If you don’t have one, a 9×13 pan works too, but the bars will be thinner and you’ll need to adjust baking time slightly.
Parchment paper — Essential for easy removal. Line the pan with parchment, leaving an overhang on the sides. This acts as handles to lift the bars out once they’re set.
Electric mixer — Hand mixer or stand mixer. I use a hand mixer because it’s easier to scrape the bowl. You need to beat the cream cheese until smooth, which is tedious by hand.
Food processor — Optional, but great for making graham cracker crumbs. If you don’t have one, put the crackers in a ziplock bag and crush them with a rolling pin.
Microplane or grater — For zesting the strawberries if you want to add a bit of citrus brightness. I sometimes add a teaspoon of lemon zest to the filling for extra depth.
Spatula — A silicone spatula is perfect for scraping the bowl and folding in the ingredients without overmixing.
Pastry brush — For applying the strawberry glaze. A small, soft brush works best to avoid disturbing the topping.
How to Make It: Step-by-Step
Alright, let’s make this! I’m walking you through exactly how I do it, including the little tricks I’ve picked up over the years.
Step 1: Prep Your Pan and Oven
Preheat your oven to 325°F (160°C). This is a low temperature, which is key for even baking and preventing cracks. Line your 9×9 inch baking pan with parchment paper, leaving an overhang on the long sides. This will make it easy to lift the bars out later. Lightly grease the parchment with butter or cooking spray.
Step 2: Make the Graham Crust
In a medium bowl, combine the graham cracker crumbs, melted butter, sugar, and salt. Mix until it looks like wet sand. Press this mixture firmly into the bottom of your prepared pan. Use the bottom of a measuring cup to pack it down tightly. You want it even and compact. Bake the crust for 8 minutes. This pre-baking step ensures a crisp base. Remove from the oven and let it cool while you make the filling.
Step 3: Beat the Cream Cheese
In a large bowl, beat the room-temperature cream cheese on medium-low speed until completely smooth and creamy. This takes about 2-3 minutes. Scrape down the sides and bottom of the bowl. There should be no lumps. This is the most important step for a smooth filling.
Step 4: Add Sugar and Vanilla
Add the granulated sugar and vanilla extract to the cream cheese. Beat on low speed until just combined. Don’t overmix here; you don’t want to incorporate too much air, which can cause rising and cracking.
Step 5: Incorporate Eggs and Flour
Add the eggs one at a time, beating on low speed after each addition until just incorporated. Add the flour and beat gently until the mixture is smooth. Again, avoid overmixing. The batter should be thick and creamy. If you see any lumps, give it a final stir with a spatula.
Step 6: Pour and Smooth
Pour the filling over the pre-baked crust. Use a spatula to spread it evenly. Tap the pan gently on the counter a few times to release any air bubbles. This helps prevent holes in the final product.
Step 7: Arrange the Strawberries
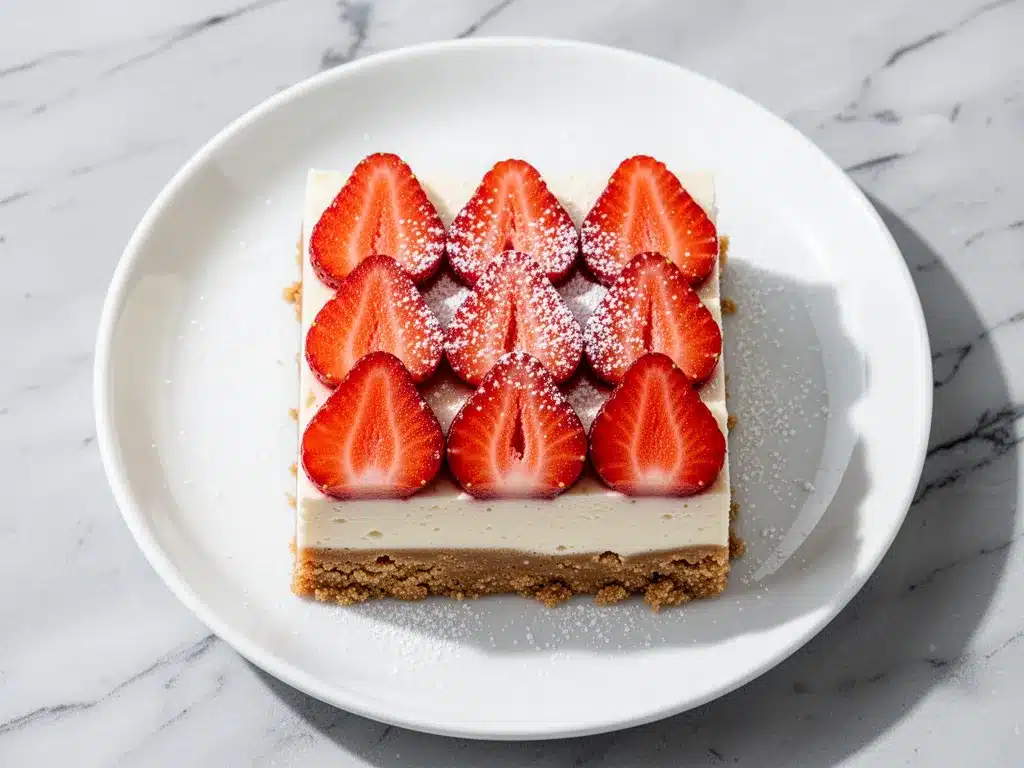
While the cheesecake is in the oven, prepare your strawberries. Slice them thinly. Arrange them in a single layer on top of the cheesecake filling. You can overlap them slightly for a beautiful look. Don’t worry if they look a bit crowded; they’ll settle as they bake.
Step 8: Bake
Bake at 325°F (160°C) for 45-50 minutes. The edges should be set, but the center should still have a slight jiggle. It will firm up as it cools. Do not overbake, or the center will become dry. If the edges are browning too quickly, cover them loosely with aluminum foil.
Step 9: Cool and Chill
Remove from the oven and let the bars cool in the pan on a wire rack for 1 hour. Then, refrigerate for at least 4 hours, preferably overnight. This chilling time is crucial for the bars to set and for the flavors to meld.
Step 10: Make the Glaze and Serve
While the bars are chilling, warm the strawberry jam and water in a small saucepan over low heat. Stir until smooth. Strain through a fine-mesh sieve if you want it completely seedless. Let it cool slightly. Once the bars are fully chilled, lift them out of the pan using the parchment overhang. Brush the strawberry glaze over the top. Slice into squares and serve.
Expert Tips & Tricks
Here’s everything I’ve learned from making this dozens of times. These tips will save you from my mistakes.
Room Temperature Ingredients — This cannot be stressed enough. Cold cream cheese and cold eggs will lead to a lumpy, uneven batter. Plan ahead and let your dairy sit out for at least 30-60 minutes before you start mixing.
Don’t Overmix — Once you add the eggs, mix on the lowest speed possible. Overmixing incorporates air, which causes the cheesecake to rise and then crack as it cools. You want a dense, creamy texture.
Pre-Bake the Crust — I know it’s an extra step, but pre-baking the graham cracker crust for 8 minutes ensures it stays crisp. Without this, the moisture from the filling can make the crust soggy over time.
Low and Slow — Baking at 325°F is gentle. High heat causes the edges to cook too fast while the center remains raw, leading to cracks. Patience pays off.
The Jiggle Test — When the bars are done, the center should jiggle slightly like Jell-O. It will firm up as it cools. If it’s completely firm in the oven, it’s overbaked.
Chill Overnight — I know it’s tempting to cut into them right away, but wait. The bars set up much better after a full night in the fridge. The texture becomes creamy and dense, not crumbly.
Sharp Knife for Slicing — Use a sharp knife and wipe it clean between cuts. For neat squares, dip the knife in hot water and dry it before each cut. This prevents the cream cheese from sticking and smearing.
Variations & Substitutions
Once you’ve nailed the basic version, here’s how you can mix it up. I’ve tried all of these.
Raspberry Swirl — Swap the strawberries for raspberries. Or, swirl a tablespoon of raspberry jam into the cheesecake batter before adding the fruit for a marbled effect.
Lemon Cheesecake — Add the zest of one lemon to the filling. It pairs beautifully with the strawberries and adds a bright, citrusy note.
Oreo Crust — For a chocolate twist, replace the graham cracker crumbs with crushed Oreo cookies (remove the filling first) and use chocolate chip cream cheese if you can find it.
Gluten-Free — Use gluten-free graham crackers. Most major brands make GF versions that work perfectly in this recipe.
Dairy-Free — This is trickier because cream cheese is the star. You can use a high-quality vegan cream cheese, but the texture will be different. You may need to add a bit of cornstarch to help it set.
Blueberry Version — Fresh blueberries work just as well as strawberries. They hold their shape nicely and look gorgeous on top.
Serving & Storage
How to Serve: I usually serve these bars chilled, straight from the fridge. They taste best cold. Pair them with a cup of coffee or tea. For a special occasion, add a dollop of whipped cream and a fresh strawberry on top.
Side Dishes: These bars are rich, so they don’t need much else. A simple green salad or some grilled chicken can balance the meal if you’re serving these as a dessert after dinner.
Storage: Store the bars in an airtight container in the refrigerator for up to 5 days. They keep well because of the sugar and the cold setting. If you need to transport them, keep them chilled in a cooler.
Freezing: You can freeze these bars! Wrap individual slices tightly in plastic wrap, then in aluminum foil. They will keep for up to 2 months. Thaw in the refrigerator overnight before serving. The texture may be slightly softer after thawing, but the flavor remains excellent.
Pro Tip: If you’re making these ahead for a party, make them two days in advance. This gives them plenty of time to set and for the flavors to develop. They’ll be even better than if you make them the day before.
Nutrition Information
I’m not a nutritionist, but here’s the breakdown if you’re tracking. Keep in mind that these are rich, indulgent bars, so portion control is key.
Per Serving (based on 16 bars):
- Calories: 280
- Protein: 5g
- Carbs: 32g
- Fiber: 1g
- Sugar: 22g
- Fat: 15g
- Saturated Fat: 9g
- Cholesterol: 45mg
- Sodium: 180mg
These bars are a treat. They’re not a health food, but they’re made with real ingredients and no artificial additives. When I enjoy one, I savor it. I don’t feel guilty; I just feel happy. That’s the point of dessert.
Final Thoughts
So that’s my go-to strawberry cheesecake bars! I’ve probably talked your ear off at this point, but when you make a recipe this often, you have a lot to say about it. These bars have saved me more times than I can count. They’re my answer to “what dessert can I make that looks fancy but is actually easy?” My friends love them, my family begs for them, and I love making them.
Make them yours! Try different fruits, add a hint of lemon, or experiment with different crusts. The best recipes are the ones you adapt to your tastes. I hope these strawberry cheesecake bars become a favorite in your home, just as they are in mine.
If you make this, drop a comment and let me know what you think! I love hearing how recipes turn out in your kitchen. And if something doesn’t work, tell me that too—I’m here to help troubleshoot. Happy baking!
Frequently Asked Questions
Can I use frozen strawberries?
You can, but fresh is always better. Frozen strawberries release a lot of water, which can make the topping soggy and watery. If you must use frozen, thaw them first, pat them dry with paper towels, and reduce any excess liquid. Fresh strawberries hold their shape much better.
Why did my cheesecake crack?
Cracking is usually caused by overmixing, overbaking, or baking at too high a temperature. Make sure you mix on low speed, bake at 325°F, and take the bars out when the center still has a slight jiggle. Letting them cool slowly in the oven (with the door slightly ajar) can also help prevent cracks.
Can I make these in a springform pan?
A springform pan is typically used for round cheesecakes. For bars, a 9×9 square pan is ideal. If you only have a springform pan, you can use it, but the bars will be round and thicker. You may need to adjust the baking time slightly. Just be sure to line the bottom well to prevent sticking.
How do I store leftover bars?
Store them in an airtight container in the refrigerator for up to 5 days. They can also be frozen for up to 2 months. Wrap individual slices tightly in plastic wrap and then in foil. Thaw in the fridge overnight before serving.
Can I use light cream cheese?
I don’t recommend it. Light cream cheese has a higher water content and less fat, which means the bars won’t set properly and the texture will be grainy. Full-fat cream cheese is essential for the rich, creamy texture these bars are known for.
What if I don’t have a 9×9 pan?
You can use a 9×13 pan, but the bars will be thinner. Reduce the baking time by about 10-15 minutes. Keep a close eye on them to avoid overbaking. Alternatively, you can halve the recipe and use a smaller pan, like an 8×8.
Can I add chocolate chips to the crust?
Absolutely! Add ¼ cup of mini chocolate chips to the graham cracker crust mixture before pressing it into the pan. It adds a nice surprise in every bite. It’s similar to the chocolate chips in our one-bowl banana bread—small additions that make a big difference.
Pin This Recipe!
Strawberry Cheesecake Bars: Best Easy Dessert
- Total Time: 5 hours 23 minutes
- Yield: 16 servings 1x
Description
These strawberry cheesecake bars feature a buttery graham cracker crust, a smooth and creamy cream cheese filling, and a fresh strawberry topping with a shiny glaze. They are foolproof, make-ahead friendly, and perfect for any occasion.
Ingredients
- 1 ½ cups (150g) graham cracker crumbs
- 6 tablespoons (85g) unsalted butter, melted
- 2 tablespoons (25g) granulated sugar
- Pinch of salt
- 24 ounces (680g) full-fat cream cheese, room temperature
- 1 cup (200g) granulated sugar
- 3 large eggs, room temperature
- 1 teaspoon vanilla extract
- 2 tablespoons (15g) all-purpose flour
- 1 pound (450g) fresh strawberries, sliced
- ¼ cup (60g) strawberry jam or preserves
- 1 tablespoon (15ml) water
- Optional: Fresh mint leaves for garnish
Instructions
- Preheat oven to 325°F (160°C). Line a 9×9 inch baking pan with parchment paper, leaving an overhang on the long sides, and lightly grease.
- In a medium bowl, combine graham cracker crumbs, melted butter, sugar, and salt. Mix until it resembles wet sand.
- Press the crust mixture firmly into the bottom of the prepared pan. Bake for 8 minutes, then remove and let cool.
- In a large bowl, beat the room-temperature cream cheese on medium-low speed until smooth and creamy (2-3 minutes). Scrape down the bowl.
- Add the granulated sugar and vanilla extract. Beat on low speed until just combined.
- Add eggs one at a time, beating on low speed after each addition until just incorporated. Add flour and beat gently until smooth.
- Pour the filling over the pre-baked crust and spread evenly. Tap the pan gently to release air bubbles.
- Arrange sliced strawberries in a single layer on top of the filling.
- Bake for 45-50 minutes until edges are set but the center still has a slight jiggle. If edges brown too quickly, cover with foil.
- Cool in the pan on a wire rack for 1 hour, then refrigerate for at least 4 hours or overnight.
- While chilling, warm strawberry jam and water in a small saucepan until smooth. Strain if desired.
- Lift bars out of the pan using parchment overhang. Brush with strawberry glaze, slice into squares, and serve.
Notes
Ensure all dairy ingredients are at room temperature to prevent lumps. Do not overmix the batter after adding eggs to avoid incorporating air, which causes cracking. Pre-baking the crust ensures it stays crisp. The bars are best when chilled overnight.
- Prep Time: 30 minutes
- Cook Time: 53 minutes
- Category: Dessert
- Cuisine: American
Nutrition
- Serving Size: 1 bar
- Calories: 280
- Sugar: 22
- Sodium: 180
- Fat: 15
- Saturated Fat: 9
- Carbohydrates: 32
- Fiber: 1
- Protein: 5
Keywords: strawberry cheesecake bars, easy dessert, make-ahead dessert, graham cracker crust, fresh strawberry topping, no-crack cheesecake


