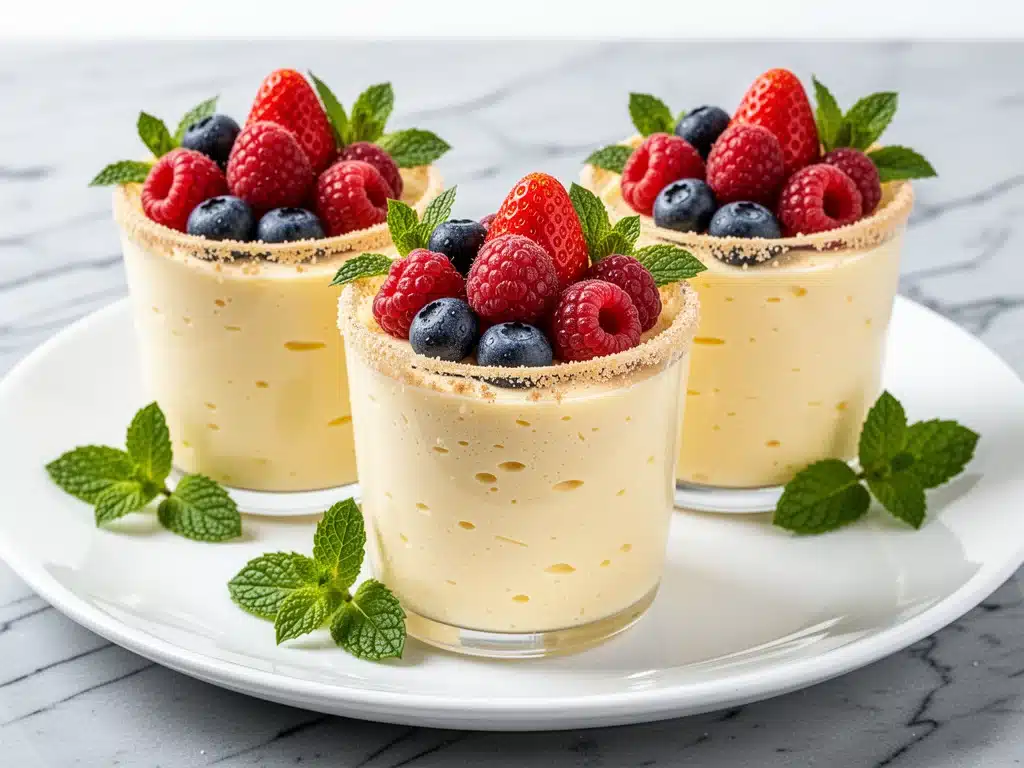
It was 9:30 PM on a Tuesday, and I was staring into the open fridge like it held the secrets to the universe. My husband had just mentioned he wanted “something sweet,” and my brain immediately screamed: cake. But not just any cake. I wanted that rich, tangy, creamy comfort of a New York cheesecake, but I also wanted to stay on track with my low-carb goals. I didn’t want to spend two hours baking, cooling, and chilling a massive 9-inch pan that I’d only eat three slices of before it was gone.
So, I did what any tired cook does: I improvised. I grabbed a block of cream cheese, some heavy cream, a lemon that was begging to be zested, and a handful of sweetener. I blended it up, poured it into four tiny ramekins, and shoved them in the fridge. Twenty minutes later, I pulled them out, topped them with a few fresh raspberries, and took one bite.
Stop what you’re doing. That bite changed everything.
These low-carb lemon cheesecake mousse cups are light, airy, and taste like summer in a spoon. They’re not dense or heavy like traditional baked cheesecake. Instead, they’re fluffy and bright, with just enough tartness from the lemon to keep your palate interested. I’ve made these at least a dozen times since that random Tuesday night. Sometimes I add a dollop of whipped cream. Sometimes I skip the topping. But almost every time, I end up eating the whole cup myself because they’re so small, they feel like a “treat” rather than a full dessert course.
Here’s the thing about dessert on busy weeknights: it usually ends up being a compromise. Either it’s too complicated, it takes too long, or it’s just… meh. But this recipe? It’s the cheat code. It comes together in about 10 minutes of active time. You don’t need an oven. You don’t need a water bath. You don’t need to worry about cracks in your crust. It’s pure, unadulterated lemony goodness that fits perfectly into a keto or low-carb lifestyle without making you feel like you’re missing out.
I’ve tested this recipe with different sweeteners, different lemons, and even different types of cream cheese (full-fat is non-negotiable, by the way). I’ve learned exactly what makes it work and what makes it fail. And I’m here to tell you: once you try these mousse cups, you’ll never go back to heavy, dense cheesecake again. It’s lighter, it’s faster, and honestly? It’s just better.
Why You’ll Love This Low-Carb Lemon Cheesecake Mousse Cups Recipe
There are about ten reasons I keep coming back to these mousse cups, but let’s be real—you probably just want to know why they’re worth the five minutes it takes to make them. Here’s the deal:
- Zero Baking Required — Seriously. No oven, no preheating, no waiting for a crust to set. I make these in the morning, pop them in the fridge, and grab one after dinner. It’s the ultimate lazy dessert hack. If you can blend ingredients, you can make this.
- Ready in Under 30 Minutes — I’m talking 10 minutes of hands-on time, and the rest is just chilling. Unlike a traditional cheesecake that needs hours (or overnight) to set, these mousse cups firm up quickly because they’re airy and light. Perfect for those “I need sugar now” moments.
- Actually Tastes Like Cheesecake — I know, I know. “Low-carb” and “tastes like the real thing” don’t usually go together. But the combination of cream cheese, heavy cream, and lemon juice hits that exact flavor profile you’re craving. It’s tangy, sweet, and creamy without being cloying.
- Portion Control Made Easy — Because they’re in little cups, you can’t accidentally eat half a pan. You eat one cup. It’s satisfying, but it’s also contained. This is huge for me when I’m trying to watch my carbs but still want to enjoy dessert.
- Gluten-Free and Keto-Friendly — No graham cracker crust? No problem. The natural creaminess of the mousse is enough. Plus, with zero sugar and low net carbs, it fits right into any low-carb diet. My keto-loving friends ask for this recipe more than any other dessert I make.
- Impressive but Simple — Serve these to guests, and they’ll think you spent hours in the kitchen. The presentation is elegant—especially with a fresh berry or a mint leaf on top—but the effort is minimal. It’s my go-to when I want to look like a pro without the stress.
This is my go-to when I need dessert to just work. No complicated techniques, no weird ingredients, just reliable, delicious food that makes everyone happy. And if you’re looking for other easy, no-bake treats, you might also enjoy my fall pumpkin tiramisu—it’s another favorite for when you want something festive but don’t want to turn on the oven.
Ingredients You’ll Need
Here’s the best part: you probably have most of this already in your fridge. This recipe relies on simple, high-quality ingredients. Because there’s no crust to hide behind, the flavor of the mousse itself has to shine.
For the Mousse Base
Full-fat cream cheese (8 oz / 225g) — This is the star. Do not use low-fat or light cream cheese. It won’t whip properly and the texture will be runny. Let it sit on the counter for 15 minutes before you start. Softened cream cheese blends smoother and faster.
Heavy whipping cream (1 cup / 240ml) — I use cold heavy cream straight from the fridge. It whips up fluffier and holds its structure better. If you’re using a stand mixer, make sure the bowl is chilled too. Cold is your friend here.
Confectioners’ erythritol or monk fruit blend (½ cup / 60g) — I prefer a powdered sweetener because it dissolves instantly. Granular sweeteners can leave a gritty texture in the mousse. Look for a blend that includes a bulking agent like maltodextrin or erythritol to mimic the volume of sugar. If you only have granular, you can pulse it in a blender first, but it takes a bit more effort.
Fresh lemon juice (3 tablespoons / 45ml) — Bottled lemon juice just doesn’t cut it. It tastes metallic and flat. You need fresh-squeezed lemons. I usually need two medium lemons to get this amount. Squeeze them, then strain the seeds (and pulp if you prefer a smoother texture).
Lemon zest (1 tablespoon) — This is where the real lemon flavor lives. The oils in the peel are what make it taste like lemon, not just sour. Use a microplane or fine grater. Avoid the white pith—it’s bitter. Just the bright yellow part.
Vanilla extract (1 teaspoon) — Pure vanilla adds depth. It balances the tartness of the lemon. Don’t skip it, even if you love lemon. It rounds out the flavor profile.
Salt (a pinch) — I know it sounds weird in a dessert, but salt enhances sweetness and brightens the lemon flavor. Just a tiny pinch goes a long way.
For the Topping (Optional but Recommended)
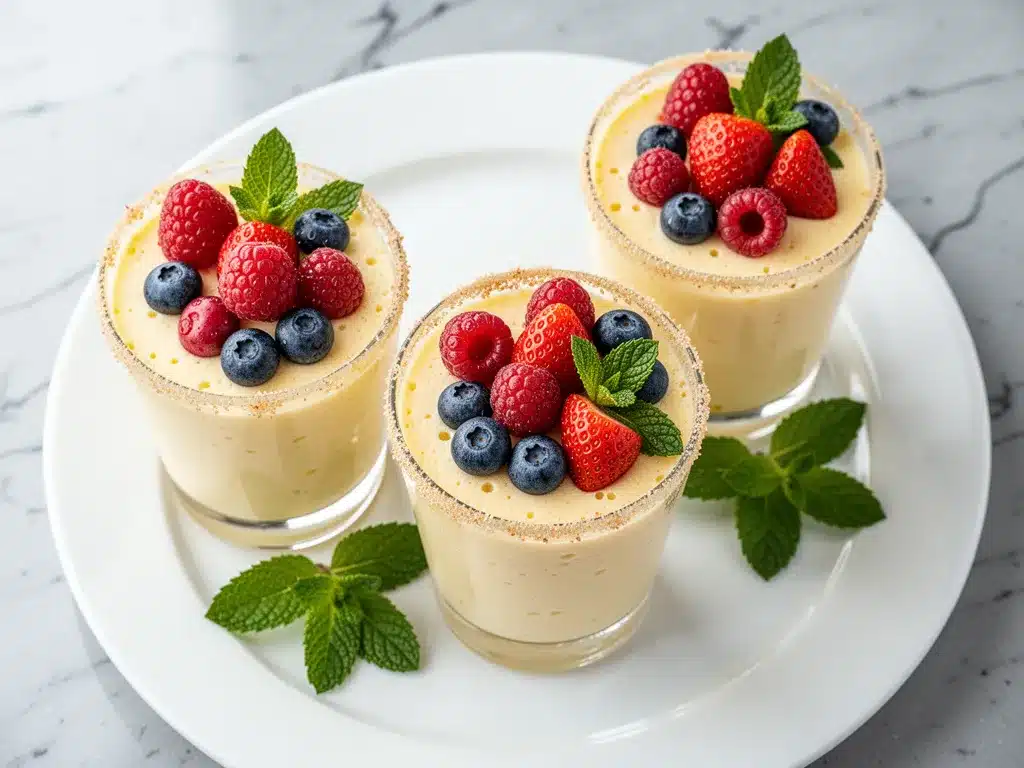
Extra whipped cream — Whip up a little extra heavy cream with a teaspoon of sweetener for dolloping on top. It makes it feel extra indulgent.
Fresh berries — Raspberries are my top choice. Their tartness complements the lemon perfectly. Strawberries work too, but they’re sweeter. Blueberries are nice, but raspberries are the classic pairing.
Lemon twists — A small strip of lemon zest on top adds a pop of color and aroma. It makes the cup look finished and professional.
Edible flowers or mint — If you’re feeling fancy, a small mint leaf or a nasturtium flower adds a beautiful touch. I do this when I have guests over.
Equipment Needed
You don’t need fancy equipment for this. Here’s what I actually use:
Mixer — A hand mixer works perfectly fine. I actually prefer it because it’s easier to clean. A stand mixer is great if you have one, but don’t feel like you need to dig it out. Just make sure it’s clean and dry.
Mixing bowls — Two large bowls. One for the cream cheese mixture, one for the whipped cream. Glass or metal bowls work best. Plastic is fine too, just make sure it’s clean.
Measuring cups and spoons — Standard stuff. I like using a small scale for the cream cheese to get it right, but cups work if you’re careful.
Microplane or zester — For the lemon zest. A box grater works too, but a microplane gives you the finest zest, which blends better into the mousse.
Ramekins or small glasses — I use 4-6 oz ramekins. You can also use small mason jars, wine glasses, or even plastic cups if you’re meal-prepping. Just make sure they’re clean and dry.
Spatula — A flexible silicone spatula is essential for folding the whipped cream into the cheese mixture without deflating it. This is the most important tool for getting that airy texture.
Strainer (optional) — If you don’t like lemon seeds or pulp, use a fine-mesh strainer when juicing your lemons. It takes an extra 30 seconds but makes the texture smoother.
How to Make It: Step-by-Step
Alright, let’s make this! I’m walking you through exactly how I do it, including the little tricks I’ve picked up over time.
Step 1: Prep Your Cream Cheese (5 minutes)
Take your cream cheese out of the fridge. If it’s still cold and hard, you’ll have lumps. Let it sit on the counter for 15-20 minutes until it’s soft to the touch. Cut it into chunks before blending—it helps the mixer get through it faster. If you’re in a hurry, you can microwave it on low for 10-15 seconds, but watch it closely. You want it soft, not melted.
Step 2: Whip the Cream Cheese Mixture (3 minutes)
In a large bowl, beat the softened cream cheese on medium-high speed until it’s completely smooth. This might take 2-3 minutes. Scrape down the sides and bottom of the bowl. Add the powdered sweetener, vanilla extract, lemon juice, lemon zest, and salt. Beat again until everything is fully incorporated and smooth. Taste it. It should be sweet and tangy. If it’s too sour, add a bit more sweetener. If it’s too sweet, add a splash more lemon juice.
Step 3: Whip the Heavy Cream (3 minutes)
In a separate, cold bowl, pour the cold heavy cream. Whip on high speed until you form stiff peaks. This means when you lift the beaters, the cream stands up straight. Don’t over-whip it into butter! Stop as soon as you see stiff peaks. This usually takes 2-3 minutes.
Step 4: Fold the Two Together (3 minutes)
This is the critical step. Add about one-third of the whipped cream to the cream cheese mixture. Stir it in gently to lighten the mixture. Then, add the rest of the whipped cream. Using your spatula, gently fold the cream into the cheese. Fold from the bottom up, turning the bowl as you go. You’re looking for a uniform, airy mixture. Don’t overmix or you’ll deflate the air you just whipped in. It should look fluffy and light, not dense.
Step 5: Chill and Set (20-30 minutes)
Spoon the mousse into your ramekins or glasses. Tap them gently on the counter to remove any air bubbles. Cover with plastic wrap or lids. Put them in the fridge for at least 20 minutes. They’ll firm up as they chill. If you’re in a rush, you can put them in the freezer for 10 minutes, but the fridge is better for even setting.
Step 6: Garnish and Serve
Right before serving, add your toppings. A dollop of whipped cream, a few raspberries, and a twist of lemon zest. Serve immediately. These are best eaten within 24 hours, but they’ll keep in the fridge for up to 3 days.
Total Time: About 15 minutes active, plus 20 minutes chilling.
Expert Tips & Tricks
Here’s everything I’ve learned from making this dozens of times. These tips will save you from my mistakes.
Keep Everything Cold — Except the cream cheese. The heavy cream needs to be ice-cold to whip properly. If your kitchen is hot, chill your bowls and beaters in the fridge for 10 minutes before you start. Warm cream won’t whip to stiff peaks.
Don’t Skip the Zest — I’ve made this with just juice before. It tastes flat. The zest adds the aromatic oils that make it taste like lemon. Use a microplane for the finest zest. If you get any white pith, scrape it off. It’s bitter.
Fold, Don’t Stir — When combining the cream cheese and whipped cream, use a folding motion. Stirring vigorously will knock out the air, and your mousse will be dense. Folding keeps it light and fluffy. Take your time with this step.
Taste as You Go — Every lemon is different. Some are tart, some are sweet. Taste your mixture before you spoon it into cups. Adjust the sweetener or lemon juice to your preference. This is your dessert, after all.
Use a Scale for Accuracy — If you’re tracking macros, weigh your ingredients. Volume measurements for cream cheese can vary depending on how packed it is. A scale ensures consistency.
Don’t Overfill the Cups — Leave a little space at the top for toppings. If you fill them to the brim, your garnishes will sink in or make a mess.
Make Ahead is Key — These taste best after they’ve chilled for a while. The flavors meld together. Make them in the morning, or even the night before. They’ll be ready whenever you are.
Variations & Substitutions
Once you’ve nailed the basic version, here’s how you can mix it up. I’ve tried all of these.
Berry Cheesecake Mousse — Swap the lemon juice and zest for 2 tablespoons of raspberry jam (sugar-free) or mashed fresh raspberries. It’s a classic combination. I love this with a few whole raspberries on top.
Chocolate Cheesecake Mousse — Add 2 tablespoons of unsweetened cocoa powder to the cream cheese mixture. It’s rich and decadent. Top with chocolate shavings.
Key Lime Cheesecake Mousse — Substitute lime juice and zest for the lemon. It’s even more tart and refreshing. Perfect for summer.
Coconut Cream Version — For a dairy-free option, use full-fat coconut cream instead of heavy cream, and coconut yogurt instead of cream cheese. It’s tangy and tropical. Not quite the same texture, but still delicious.
Gluten-Free Crust Option — If you want a crust, crush ¼ cup of almond flour and mix with 1 teaspoon of melted butter and a pinch of sweetener. Press it into the bottom of the ramekins and chill for 10 minutes before adding the mousse. It adds a nice crunch.
Serving & Storage
How to Serve: I usually serve these straight from the ramekin. They look elegant and rustic at the same time. But here are other ways I’ve enjoyed them:
- With a Side of Coffee — A strong espresso cuts through the creaminess perfectly. It’s a great after-dinner treat.
- With Fresh Berries — Raspberries, strawberries, or blueberries add a fresh, juicy contrast to the rich mousse.
- With a Sprinkle of Nuts — Chopped pistachios or toasted almonds add a nice crunch and visual appeal.
Storage Instructions:
Refrigerator: Store in an airtight container or covered with plastic wrap for up to 3 days. They actually taste better on day two as the flavors meld. Don’t freeze them—the texture of the whipped cream will change and become grainy when thawed.
Reheating: Do not reheat these. They are best served cold. If they get too cold and firm, let them sit at room temperature for 5-10 minutes before eating.
Nutrition Information
I’m not a nutritionist, but here’s the breakdown if you’re tracking. This is per serving (1 cup), based on 6 servings.
| Nutrient | Amount |
|---|---|
| Calories | 280 |
| Total Fat | 24g |
| Net Carbs | 3g |
| Total Carbs | 4g |
| Fiber | 1g |
| Sugar | 2g |
| Protein | 5g |
| Sodium | 120mg |
What’s Good: Low net carbs, high fat, moderate protein. It’s filling and satisfies sweet cravings without spiking blood sugar. The lemon adds vitamin C, and the cream cheese provides calcium.
What to Know: Higher in calories due to the cream cheese and heavy cream. But that’s the nature of keto desserts. It’s rich and satisfying, so a little goes a long way. If you’re watching calories, reduce the heavy cream to ½ cup.
Final Thoughts
So that’s my go-to low-carb lemon cheesecake mousse cups! I’ve probably talked your ear off at this point, but when you make a recipe this often, you have a lot to say about it. This has saved me from reaching for ice cream or store-bought cookies more times than I can count. It’s my answer to “what’s for dessert” when I want something light, refreshing, and definitely not heavy.
My kids love them because they’re sweet and creamy. My husband loves them because they’re not too filling. And I love them because they’re easy to make and fit perfectly into my low-carb lifestyle. It’s a win-win-win.
Make it yours! Try different toppings, swap in different sweeteners, or add a splash of liqueur for an adult twist. The best recipes are the ones you adapt to your tastes. If you make this, drop a comment and let me know what you think! I love hearing how recipes turn out in your kitchen. And if something doesn’t work, tell me that too—I’m here to help troubleshoot.
Happy cooking! And I hope your kitchen smells half as good as mine does right now.
Frequently Asked Questions
Can I use low-fat cream cheese?
I really don’t recommend it. Low-fat cream cheese has more water and less fat, which means it won’t whip up properly. The mousse will be runny and won’t hold its shape. Full-fat is the way to go for the right texture and flavor.
Why did my mousse turn out runny?
Usually, this happens because the heavy cream wasn’t cold enough, or you overmixed it. Make sure your cream is ice-cold and you whip it to stiff peaks. Also, when folding, be gentle. If you stir too vigorously, you’ll deflate the air. If it’s still runny, try chilling it for another 30 minutes.
Can I make this ahead of time?
Yes! In fact, it’s better if you do. Make them up to 24 hours in advance. They’ll firm up and the flavors will meld. Just keep them covered in the fridge. They’re perfect for meal prep or when you have guests coming over.
What sweetener works best?
I prefer powdered erythritol or monk fruit blends because they dissolve completely. Granular sweeteners can leave a gritty texture. If you only have granular, pulse it in a blender first. Avoid liquid sweeteners like stevia drops unless you adjust the liquid in the recipe, as it can throw off the consistency.
Can I freeze these mousse cups?
I don’t recommend it. The whipped cream can separate and become grainy when thawed. They’re best eaten fresh or stored in the fridge for up to 3 days. If you need to make a big batch, just make them and keep them in the fridge.
Is this recipe keto-friendly?
Yes! With no added sugar, no crust, and low net carbs, it’s perfect for a keto diet. Just make sure your sweetener is keto-approved and check the labels on your cream cheese and heavy cream to ensure there are no hidden carbs.
Can I use lemon extract instead of fresh lemon?
You can, but the flavor won’t be as bright. Fresh lemon juice and zest provide a complexity that extract can’t match. If you must use extract, use ½ teaspoon of lemon extract and 1 tablespoon of lemon juice. But fresh is definitely better.
Pin This Recipe!

Low-Carb Lemon Cheesecake Mousse Cups: Easy Keto Dessert
- Total Time: 30 minutes
- Yield: 4 servings 1x
Description
Light, airy, and tangy low-carb lemon cheesecake mousse cups that require zero baking. Ready in under 30 minutes, these keto-friendly treats are perfect for busy weeknights and satisfy sweet cravings without the heavy density of traditional cheesecake.
Ingredients
- 8 oz (225g) full-fat cream cheese, softened
- 1 cup (240ml) heavy whipping cream, cold
- ½ cup (60g) confectioners’ erythritol or monk fruit blend
- 3 tablespoons (45ml) fresh lemon juice
- 1 tablespoon lemon zest
- 1 teaspoon vanilla extract
- 1 pinch salt
- Optional toppings: Extra whipped cream, fresh raspberries, lemon twists, edible flowers or mint
Instructions
- Let the cream cheese sit on the counter for 15-20 minutes until soft. Cut into chunks to help it blend smoother.
- In a large bowl, beat the softened cream cheese on medium-high speed until completely smooth, about 2-3 minutes. Scrape down the sides.
- Add the powdered sweetener, vanilla extract, lemon juice, lemon zest, and salt to the cream cheese. Beat until fully incorporated and smooth. Taste and adjust sweetness or tartness if needed.
- In a separate cold bowl, whip the cold heavy cream on high speed until stiff peaks form, about 2-3 minutes. Do not over-whip.
- Add one-third of the whipped cream to the cream cheese mixture and stir gently to lighten. Add the remaining whipped cream.
- Using a spatula, gently fold the cream into the cheese mixture from the bottom up, turning the bowl, until uniform and airy. Avoid overmixing to prevent deflating the air.
- Spoon the mousse into 4-6 oz ramekins or glasses. Tap gently to remove air bubbles.
- Cover and chill in the refrigerator for at least 20 minutes to firm up.
- Garnish with extra whipped cream, fresh berries, or lemon twists before serving.
Notes
Ensure the heavy cream is ice-cold to whip properly. Use full-fat cream cheese for the correct texture; low-fat versions will result in a runny mousse. Fold the whipped cream gently to maintain airiness. These are best eaten within 24 hours but keep in the fridge for up to 3 days. Do not freeze as the texture may become grainy.
- Prep Time: 10 minutes
- Cook Time: 0 minutes
- Category: Dessert
- Cuisine: American
Nutrition
- Serving Size: 1 mousse cup
- Calories: 280
- Sugar: 2
- Sodium: 120
- Fat: 24
- Saturated Fat: 15
- Carbohydrates: 4
- Fiber: 1
- Protein: 5
Keywords: low-carb, keto, lemon cheesecake, mousse, no-bake, gluten-free, easy dessert, healthy sweets


