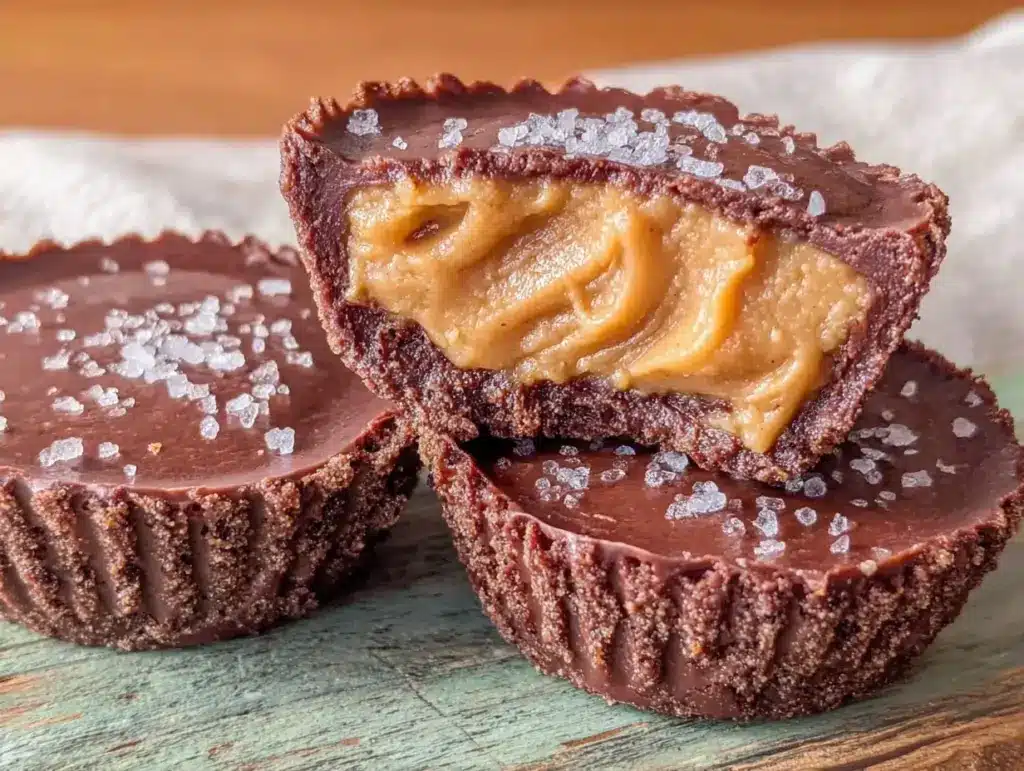
Let’s be honest for a second. I have a weakness. It’s not for fancy, artisanal chocolates from a boutique shop. It’s not for those delicate truffles that melt if you look at them wrong. My weakness is the cheap, waxy, overly sweet chocolate peanut butter cups you find in the bulk bin at the grocery store. You know the ones. The ones that stick to your teeth and leave that weird, artificial aftertaste that lingers for hours.
For years, I bought them. I’d grab a bag, tell myself I was being “good” by only having two, and then eat the whole thing by midnight while watching TV. Then came the keto phase, the sugar-free phase, and eventually, just the phase where I started reading labels and realizing how much junk was in those little foil wrappers. I wanted the crunch, the salt, the rich peanut butter, and the dark chocolate. But I didn’t want the 20 grams of sugar that came with it.
So, I tried making my own. The first batch? Disaster. The chocolate seized up into a rocky mess. The peanut butter filling was too loose and slid out the bottom. The second batch was better, but still too sweet. I ended up eating them myself while my husband thought they were store-bought (he didn’t ask for seconds, which was a good sign). But by the fifth attempt, I cracked the code.
These sugar-free dark chocolate peanut butter cups are not just a substitute. They’re better. The dark chocolate has a depth that milk chocolate never achieves, and the peanut butter filling is perfectly sweetened with erythritol or monk fruit—no weird aftertaste, just rich, creamy, salty-sweet perfection. I’ve made these dozens of times now, and they’ve become my go-to dessert when I need something that feels indulgent but doesn’t wreck my diet or blood sugar. If you can only make one dessert this month, make these. You really can’t mess them up.
Why You’ll Love This Sugar-Free Dark Chocolate Peanut Butter Cups Recipe
There are a few reasons these have completely replaced the store-bought kind in my pantry. It’s not just about the sugar content (though that’s huge). It’s about the simplicity and the fact that you control exactly what goes into your body.
- Only 5 Ingredients — Seriously. That’s it. You don’t need a chemistry degree or a trip to three different specialty stores. Just chocolate, peanut butter, sweetener, coconut oil, and a pinch of salt. If you can melt chocolate, you can make this.
- Ready in 20 Minutes (Plus Chill Time) — This isn’t a “set it and forget it for three days” recipe. You spend about 10-15 minutes active. The rest is just waiting in the fridge. It’s the perfect quick fix for a craving.
- Actually Tastes Good — I’ve tried sugar-free desserts before that taste like cardboard or artificial chemicals. These don’t. The dark chocolate is high-quality, and the peanut butter filling has the right texture—firm but creamy, not gritty or oily.
- Perfect for Meal Prep — I make a batch on Sunday, store them in the fridge, and I have a healthy dessert ready to grab all week. No guilt, no impulse buy at the gas station.
- Keto and Low-Carb Friendly — These are naturally gluten-free and low-carb. Whether you’re diabetic, keto, or just trying to cut back on sugar, these fit right in.
I also love that these look impressive. If I bring them to a potluck or office party, people assume I bought them from a fancy candy shop. When I tell them they’re sugar-free and made in my kitchen in under 30 minutes, I get the same reaction I do when I make my no-bake chocolate peanut butter bars—they’re skeptical until they take a bite.
Ingredients You’ll Need
Here’s the best part: you probably already have most of this on hand. I’m being serious. This isn’t a recipe that requires you to hunt down obscure ingredients. Let’s break down what you need and why it matters.
For the Chocolate Shell
Sugar-Free Dark Chocolate Chips (12 oz / 340g) — This is the most important ingredient. Don’t skimp here. I use Lily’s Dark Chocolate Chips because they melt smoothly and have a pleasant cocoa flavor without the erythritol grit that some cheaper brands leave behind. If you can’t find Lily’s, look for any brand that lists cacao and erythritol as the main ingredients. Avoid chocolate with “sugar alcohols” that taste like menthol; they ruin the flavor.
Coconut Oil (1 tablespoon) — This is the secret weapon. Adding a little fat to the chocolate helps it melt smoother and gives the shell a slight snap when it sets. It also prevents the chocolate from becoming too thick and gloopy. Use refined coconut oil if you don’t want a coconut flavor, or unrefined if you’re a fan. I usually keep refined on hand just for this.
For the Peanut Butter Filling
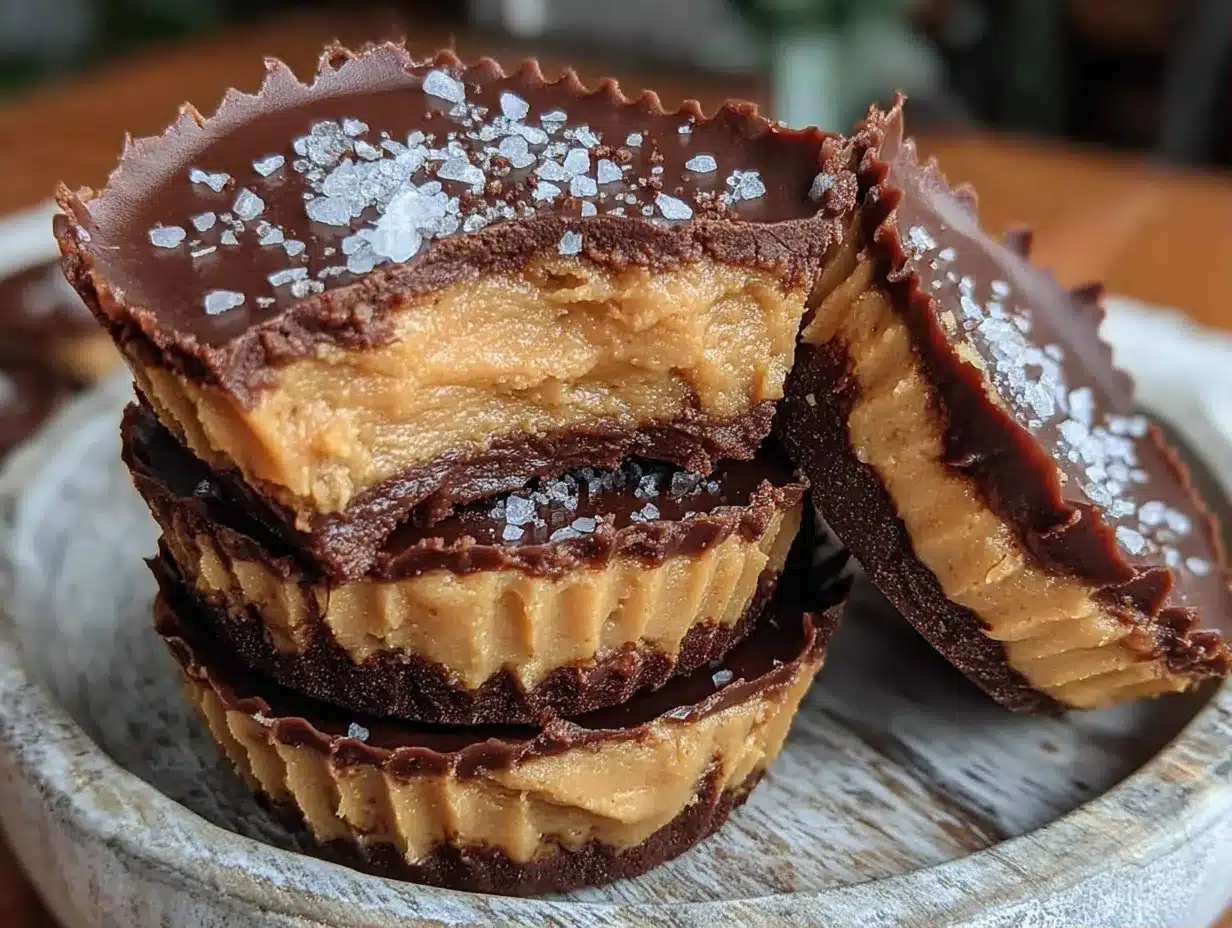
Natural Peanut Butter (½ cup / 120g) — Use creamy, natural peanut butter. The kind where the oil separates is perfect, but make sure you stir it well before measuring. If you use processed peanut butter (like Jif or Skippy), it’s fine too, but the texture will be slightly softer. I prefer natural because it tastes more “real.” Just don’t use crunchy unless you like bits of peanut in your filling.
Sugar-Free Sweetener (¼ cup / 30g) — This is where you customize. I use powdered erythritol (like Swerve Confectioners) because it dissolves completely and doesn’t leave that cooling minty aftertaste that granular erythritol can. Monk fruit sweetener works great too. If you use granular sweetener, you *must* blend it in a coffee grinder until it’s a fine powder first. Otherwise, your filling will be gritty. Trust me on this.
Unsalted Butter (2 tablespoons) — Butter adds richness and helps stabilize the filling so it’s not too soft. It also adds that classic peanut butter cup flavor. If you’re dairy-free, swap this for coconut oil, but the texture will be slightly different.
Vanilla Extract (1 teaspoon) — Just a splash. It rounds out the flavors and makes it taste like a real dessert, not just peanut butter and sugar.
Sea Salt (A pinch) — This is non-negotiable. The salt balances the sweetness and enhances the chocolate flavor. Don’t skip it.
Optional: Mini Chocolate Chips (1 tablespoon) — I like to stir these into the filling for little bursts of chocolate. It’s a nice touch if you’re feeling fancy.
Equipment Needed
You don’t need fancy gadgets for this. In fact, keeping it simple is part of why this recipe works. Here’s what I use:
- Muffin Tin — A standard 12-cup muffin tin is perfect. I use a non-stick one because the chocolate releases easily. If you don’t have a non-stick, line the cups with paper liners or foil cups. Foil cups look more professional.
- Microwave-Safe Bowl — For melting the chocolate. I prefer glass bowls because they don’t get hot to the touch as quickly as plastic.
- Small Mixing Bowl — For the peanut butter filling. Any small bowl will do.
- Spoon or Piping Bag — I just use a teaspoon to drop the filling into the shells. If you want it to look super neat, use a piping bag with a small round tip, but it’s not necessary.
- Freezer or Fridge — You need a place to chill these. The freezer is faster, but the fridge works if you have time.
Pro Tip: I keep a stack of mini muffin tins in my cupboard specifically for projects like this. It’s a small investment that makes a big difference in presentation. But if you’re in a pinch, regular muffin tins work just fine.
How to Make It: Step-by-Step
Alright, let’s get into the kitchen. This is going to be quick. I’m walking you through exactly how I do it, including the little tricks that keep the chocolate from seizing and the filling from getting messy.
Step 1: Prep Your Muffin Tin
Grab your muffin tin. If you’re using paper or foil liners, place them in the cups now. If you’re not using liners, you might want to lightly spray the cups with non-stick cooking spray, though most non-stick tins don’t need it. I usually skip the spray and just rely on the chocolate acting as a non-stick layer. Set the tin aside.
Step 2: Melt the Chocolate
Place your sugar-free dark chocolate chips in a microwave-safe bowl. Add the tablespoon of coconut oil. This is crucial—it helps the chocolate stay fluid. Microwave on high for 30 seconds. Remove and stir. If it’s not fully melted, microwave in 15-second intervals, stirring after each one. Do not overheat. Chocolate burns easily, especially sugar-free chocolate, which can have different melting properties. You want it smooth and glossy, not thick or clumpy. If it looks too thick, add another ½ teaspoon of coconut oil and stir until smooth.
Step 3: Create the Bottom Shell
Take a spoon and dip it into the melted chocolate. Add about 1 tablespoon of chocolate to the bottom of each muffin cup. Use the back of the spoon to spread the chocolate up the sides, creating a little cup. You want the bottom to be thicker than the sides so it doesn’t break. Don’t worry if it’s not perfect—it’s homemade. Just make sure you cover the bottom of the cup completely. If you have leftover chocolate, save it for later to drizzle on top.
Step 4: Chill the Shells
Place the muffin tin in the freezer for 5-10 minutes. This sets the chocolate shell so it doesn’t get messy when you add the filling. You’ll know they’re ready when the chocolate looks matte and firm to the touch. If you’re in a rush, 5 minutes is enough. If you can wait 10, they’ll be rock hard.
Step 5: Make the Peanut Butter Filling
While the shells are chilling, make the filling. In a small bowl, combine the peanut butter, powdered sweetener, butter, vanilla, and salt. Mix vigorously with a spoon or spatula. It might look crumbly at first. Keep mixing! The butter will soften from the heat of your hands and the friction of mixing. Once it’s smooth and creamy, stir in the mini chocolate chips if you’re using them. The consistency should be like thick frosting. If it’s too dry, add a teaspoon of peanut butter. If it’s too wet, add a sprinkle more sweetener.
Step 6: Fill the Cups
Remove the muffin tin from the freezer. Take a teaspoon of the peanut butter mixture and drop it into the center of each chocolate shell. Flatten it slightly with the back of the spoon. Don’t overfill! Leave about ¼ inch of space at the top for the final chocolate layer. You want a nice ratio of chocolate to filling, not just peanut butter.
Step 7: Seal with Chocolate
Now, take the remaining melted chocolate (or melt a little more if you ran out) and spoon it over the peanut butter filling. Cover the filling completely. Use a toothpick or the tip of a knife to swirl the chocolate and smooth out any air bubbles. You want a flat, even top. If you have leftover chocolate, drizzle it over the tops for a fancy look.
Step 8: Final Chill
Place the muffin tin back in the freezer for at least 15-20 minutes. You want them fully set. If you try to take them out too early, they’ll be soft and messy. Once they’re firm, pop them out of the tin. If you used liners, just peel them off. If not, you might need to gently wiggle them out with your fingers. Store them in an airtight container in the fridge.
Total Time: About 20 minutes active, plus 30 minutes chilling.
Expert Tips & Tricks
Here’s everything I’ve learned from making these dozens of times. These tips will save you from my early mistakes.
- Don’t Skimp on the Coconut Oil in the Chocolate — Sugar-free chocolate can be finicky. It often seizes up or becomes too thick. The extra fat keeps it fluid and helps it set with a nice snap. It’s not just a suggestion; it’s a necessity for good texture.
- Powdered Sweetener is Key — I cannot stress this enough. Granular erythritol or monk fruit will make your filling gritty and unpleasant. Blend your sweetener in a coffee grinder until it’s a fine powder. It takes 10 seconds and changes everything.
- Keep Your Tools Dry — Water is the enemy of melting chocolate. Even a drop of water can cause the chocolate to seize into a lump. Make sure your bowl and spoon are completely dry before you start.
- Don’t Overheat the Chocolate — Sugar-free chocolate burns faster than regular chocolate. Low and slow is the way to go. If you’re using a microwave, go in short bursts. If you want to be extra safe, you can melt it in a double boiler over low heat, but the microwave works fine if you’re careful.
- Freeze, Don’t Just Refrigerate — The freezer sets the chocolate much faster and firmer. If you refrigerate them, they might stay soft and sticky. The freezer is your friend here.
Variations & Substitutions
Once you’ve nailed the basic version, here’s how you can mix it up. I’ve tried all of these, and they’re all winners.
- Salted Caramel Style — Add a tiny dollop of sugar-free caramel sauce (like Wholesome Sweeteners) into the center of the peanut butter filling before sealing with chocolate. It’s rich and decadent.
- Almond Butter Version — Swap the peanut butter for almond butter. It’s slightly sweeter and has a different flavor profile. I love this for a more sophisticated taste.
- Cookie Dough Filling — Swap the peanut butter for a sugar-free cookie dough filling (cream cheese, sweetener, vanilla, and a little almond flour). Top with mini chocolate chips. It tastes like a raw cookie dough bite.
- Halva Style — Add a tablespoon of tahini to the peanut butter filling. It adds a nutty, sesame flavor that pairs beautifully with dark chocolate.
- Crunchy Topping — Before the final chocolate layer sets, sprinkle a few crushed sugar-free peppermint candies or crushed nuts on top for texture.
Dietary Notes: These are naturally gluten-free and keto-friendly. If you need them dairy-free, swap the butter for coconut oil and use dairy-free chocolate chips. They’re also vegan if you use a vegan sweetener and chocolate.
Serving & Storage
How do you enjoy these? I usually eat them straight out of the fridge, cold and firm. But here are some other ways I’ve enjoyed them:
- With Coffee — Pair one with a hot coffee or tea. The bitterness of the coffee balances the sweetness of the chocolate.
- With Milk — A cold glass of almond milk or oat milk is perfect alongside these.
- In a Salad — I know this sounds weird, but crumble one over a chocolate mint salad. It’s a great way to add sweetness without sugar.
Storage: Store these in an airtight container in the fridge for up to 2 weeks. They can also be frozen for up to 3 months. If you freeze them, let them thaw in the fridge for 10 minutes before eating. They taste like ice cream bars when frozen solid!
Pro Tip: If you’re bringing these to a party, keep them in a cooler or on ice. They melt quickly in warm rooms. I’ve learned this the hard way at picnics.
Nutrition Information
I’m not a nutritionist, but here’s the breakdown if you’re tracking. This is per cup (based on 12 cups).
| Nutrient | Amount per Cup |
|---|---|
| Calories | 180 |
| Total Fat | 14g |
| Saturated Fat | 6g |
| Carbohydrates | 6g |
| Fiber | 3g |
| Sugar Alcohols | 3g |
| Net Carbs | 3g |
| Protein | 5g |
| Sodium | 40mg |
Look, this is still a dessert with chocolate and peanut butter. It’s not a health food. But it’s way better than a regular candy bar, which might have 20g of sugar and 250 calories. These are satisfying, they curb the craving, and they fit into almost any diet.
Final Thoughts
So that’s my foolproof sugar-free dark chocolate peanut butter cups recipe! I’ve probably talked your ear off at this point, but when you make a recipe this often, you have a lot to say about it. These have saved my dessert game more times than I can count. They’re my answer to “I want something sweet” when I’m trying to stick to my goals. My kids love them, my husband loves them, and I love them because I know exactly what’s in them.
Make them yours! Try different sweeteners, add different mix-ins, or just enjoy them as is. The best recipes are the ones you adapt to your tastes. If you make these, drop a comment and let me know how they turned out! I love hearing how recipes work in your kitchen. And if something doesn’t work, tell me that too—I’m here to help troubleshoot.
Happy cooking! And I hope your kitchen smells half as good as mine does right now.
Frequently Asked Questions
Can I use regular chocolate chips instead of sugar-free?
You can, but then they won’t be sugar-free. If you use regular chocolate, the calories and sugar content will go up significantly. I recommend sticking with sugar-free chocolate if that’s your goal. Lily’s is my go-to, but Guittard also makes a great sugar-free dark chocolate bar you can chop up.
Why did my chocolate seize up?
Water is the enemy. Even a tiny drop of water can cause the chocolate to seize into a hard lump. Make sure your bowl and spoon are completely dry. Also, don’t overheat the chocolate. Sugar-free chocolate burns easily. If it does seize, you can sometimes save it by adding a little more coconut oil or butter and stirring vigorously, but it’s better to prevent it in the first place.
Can I make these ahead of time?
Yes! These are perfect for meal prep. Make them on Sunday and store them in the fridge for up to 2 weeks. They actually taste better after a day or two because the flavors have time to meld together. Just keep them in an airtight container to prevent them from absorbing fridge odors.
What if I don’t have a muffin tin?
You can use silicone mold trays, which are great for easy removal. You can also make them in small ramekins or even just spoon them onto a parchment-lined baking sheet and form them into rounds with your fingers. It’s less neat, but it works.
Can I use granular sweetener instead of powdered?
I don’t recommend it. Granular sweetener doesn’t dissolve well in peanut butter, and it will leave a gritty texture in your filling. If you only have granular, blend it in a coffee grinder or food processor until it’s a fine powder. It takes a minute, but it’s worth it for the texture.
How do I fix a filling that’s too soft?
If your filling is too soft to hold its shape, add a little more powdered sweetener or a teaspoon of coconut oil (chilled). If it’s still too soft, pop the muffin tin in the freezer for 10 minutes before adding the final chocolate layer. The cold will help firm it up.
Pin This Recipe!
Sugar-Free Dark Chocolate Peanut Butter Cups
- Total Time: 20 minutes
- Yield: 12 servings 1x
Description
A foolproof, keto-friendly recipe for homemade sugar-free dark chocolate peanut butter cups. These treats feature a rich dark chocolate shell and a creamy, salty-sweet peanut butter filling, ready in under 30 minutes.
Ingredients
- 12 oz (340g) Sugar-Free Dark Chocolate Chips (e.g., Lily’s)
- 1 tablespoon Coconut Oil (refined or unrefined)
- ½ cup (120g) Natural Peanut Butter (creamy)
- ¼ cup (30g) Powdered Sugar-Free Sweetener (e.g., Swerve Confectioners or Monk Fruit)
- 2 tablespoons Unsalted Butter
- 1 teaspoon Vanilla Extract
- A pinch of Sea Salt
- 1 tablespoon Mini Chocolate Chips (optional)
Instructions
- Line a standard 12-cup muffin tin with paper or foil liners, or lightly spray with non-stick cooking spray.
- Place chocolate chips and coconut oil in a microwave-safe bowl. Microwave on high for 30 seconds, then stir. Continue microwaving in 15-second intervals, stirring after each, until smooth and glossy. Do not overheat.
- Spoon about 1 tablespoon of melted chocolate into the bottom of each muffin cup. Use the back of the spoon to spread chocolate up the sides to form a shell. Ensure the bottom is thicker than the sides.
- Place the muffin tin in the freezer for 5-10 minutes to set the chocolate shells.
- While shells chill, combine peanut butter, powdered sweetener, butter, vanilla extract, and sea salt in a small bowl. Mix vigorously until smooth and creamy. Stir in mini chocolate chips if using.
- Remove muffin tin from freezer. Drop a teaspoon of peanut butter filling into each chocolate shell, flattening slightly. Leave about ¼ inch of space at the top.
- Spoon remaining melted chocolate over the filling to seal. Smooth the top with a toothpick or knife to remove air bubbles. Drizzle with extra chocolate if desired.
- Freeze for at least 15-20 minutes until fully set. Pop out of the tin and store in an airtight container in the fridge.
Notes
Ensure all tools are completely dry to prevent chocolate from seizing. Use powdered sweetener to avoid a gritty texture. Sugar-free chocolate can be finicky; adding coconut oil helps it melt smoothly and set with a nice snap. Store in the fridge for up to 2 weeks or freeze for up to 3 months.
- Prep Time: 15 minutes
- Cook Time: 0 minutes
- Category: Dessert
- Cuisine: American
Nutrition
- Serving Size: 1 cup
- Calories: 180
- Sodium: 40
- Fat: 14
- Saturated Fat: 6
- Carbohydrates: 6
- Fiber: 3
- Protein: 5
Keywords: sugar-free, keto, low-carb, dark chocolate, peanut butter, gluten-free, healthy dessert, no-bake, meal prep


