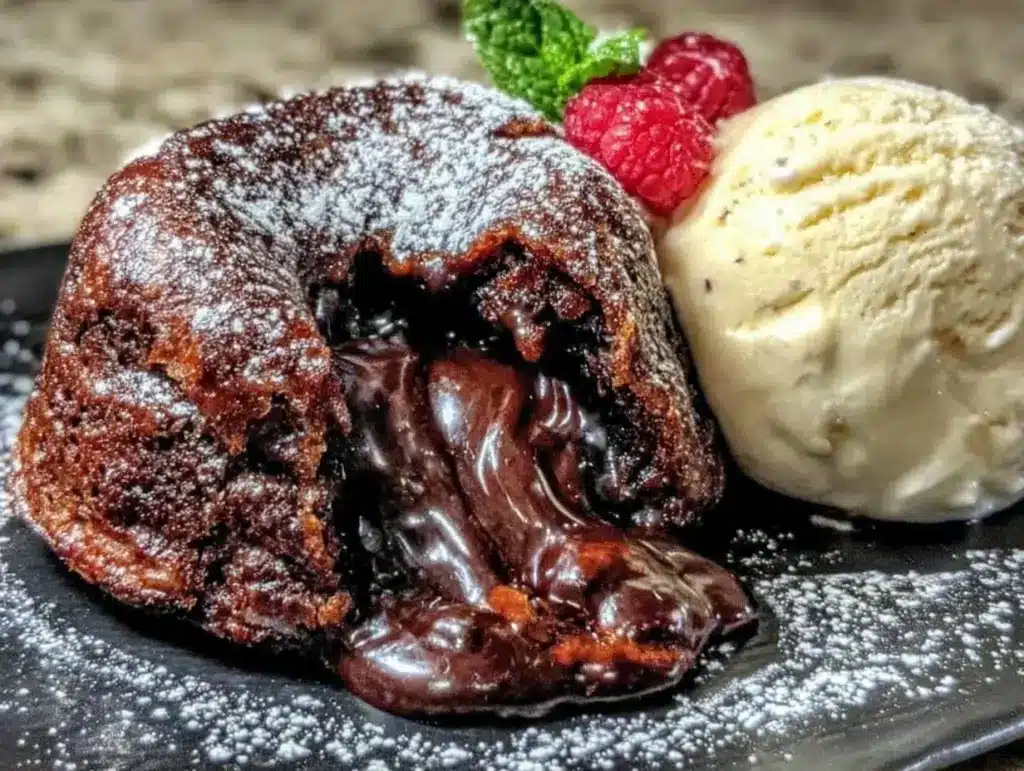
I have a confession to make. For years, I avoided chocolate lava cakes. They seemed like something only possible for chefs with steady hands and expensive equipment. I thought I’d need a thermometer, a precise timer, and a level of patience I simply didn’t have at 10 PM on a Tuesday.
Then I made a batch of fudgy peanut butter swirl brownies and realized I’d been overcomplicating my life. If I could make those gooey, perfect brownies without a mixer, why couldn’t I make a warm, molten chocolate center in a ramekin?
So, I tried. And failed. And failed again. I burned the edges. I undercooked the centers. I ended up with dense chocolate bricks instead of liquid gold.
But here’s the thing: I kept at it. I tweaked the ratio. I changed the baking time by thirty seconds. I stopped worrying about perfection and started paying attention to texture. And now? This easy one-bowl dessert is my go-to. It’s foolproof. It’s rich. And honestly, it’s easier than making toast.
If you’re scared of baking, or if you just want a dessert that tastes like a five-star restaurant but takes less time than ordering takeout, this is the recipe for you. You really can’t mess this up.
Why You’ll Love This Chocolate Lava Cake Recipe
There are a few reasons I keep coming back to this one-bowl chocolate lava cake with vanilla ice cream. It’s not just about the taste (though that’s huge). It’s about how easy it is to pull off.
One Bowl, Seriously — I’m not joking. You don’t need a stand mixer, you don’t need a double boiler, and you don’t need to separate eggs if you don’t want to. Just one bowl, a whisk, and a microwave or oven. I’ve made this while wearing pajamas and holding a glass of wine. It’s that simple.
Zero Fancy Ingredients — You probably have everything in your pantry right now. Butter, sugar, eggs, chocolate, flour. No exotic flours, no weird extracts, no expensive gadgets. It’s basic baking at its finest. If you can make moist chocolate banana bread, you can make this.
It Feels Fancy But Isn’t — When you cut into it and that warm chocolate flows out? It looks incredible. People assume you spent hours on it. They’ll ask for the recipe. You’ll hand them a piece of paper with four ingredients listed and watch their faces. It’s a great party trick.
Forgiving as Hell — I know, I said that already. But hear me out. If you overbake it by a minute, it’s just a really rich chocolate cake. If you underbake it, it’s even more gooey. There is no “wrong” outcome here, just different textures of delicious. That’s rare in baking.
Best with Ice Cream — This is non-negotiable. The contrast between the hot, bitter-sweet chocolate and the cold, creamy vanilla ice cream is what makes it a complete experience. It’s the ultimate comfort combo.
Ingredients You’ll Need
Here’s the best part: this list is short. Like, terrifyingly short. But don’t let the simplicity fool you. The quality of these few ingredients matters.
For the Chocolate Batter
Dark Chocolate (6 ounces / 170g) — This is the star. Use good quality baking chocolate or high-end chocolate chips. I like 60-70% cocoa. If it tastes good on its own, it’ll taste amazing in the cake. Avoid the cheapest stuff; it has wax and won’t melt smoothly.
Unsalted Butter (½ cup / 115g) — Room temperature is ideal, but melted works too. Salted butter is fine, just reduce the salt in the recipe if you use it. Don’t skimp on the butter; it provides the richness and the structure.
Granulated Sugar (1 cup / 200g) — Yes, a full cup. It’s sweet, but the dark chocolate balances it. Don’t reduce it, or you’ll lose the texture. The sugar helps create that shiny, crackly top.
Eggs (2 large + 2 yolks) — The yolks are crucial. They add richness and help create that gooey, custard-like center. If you’re worried about raw eggs, use pasteurized eggs, but honestly, the baking time is long enough to be safe.
All-Purpose Flour (2 tablespoons / 15g) — Just a little bit. It gives the cake structure so it doesn’t collapse into a puddle. Don’t substitute with almond flour or gluten-free blends unless you know what you’re doing; the protein content matters here.
Salt (¼ teaspoon) — Just a pinch. It wakes up the chocolate flavor. If your butter is salted, skip this.
For Serving
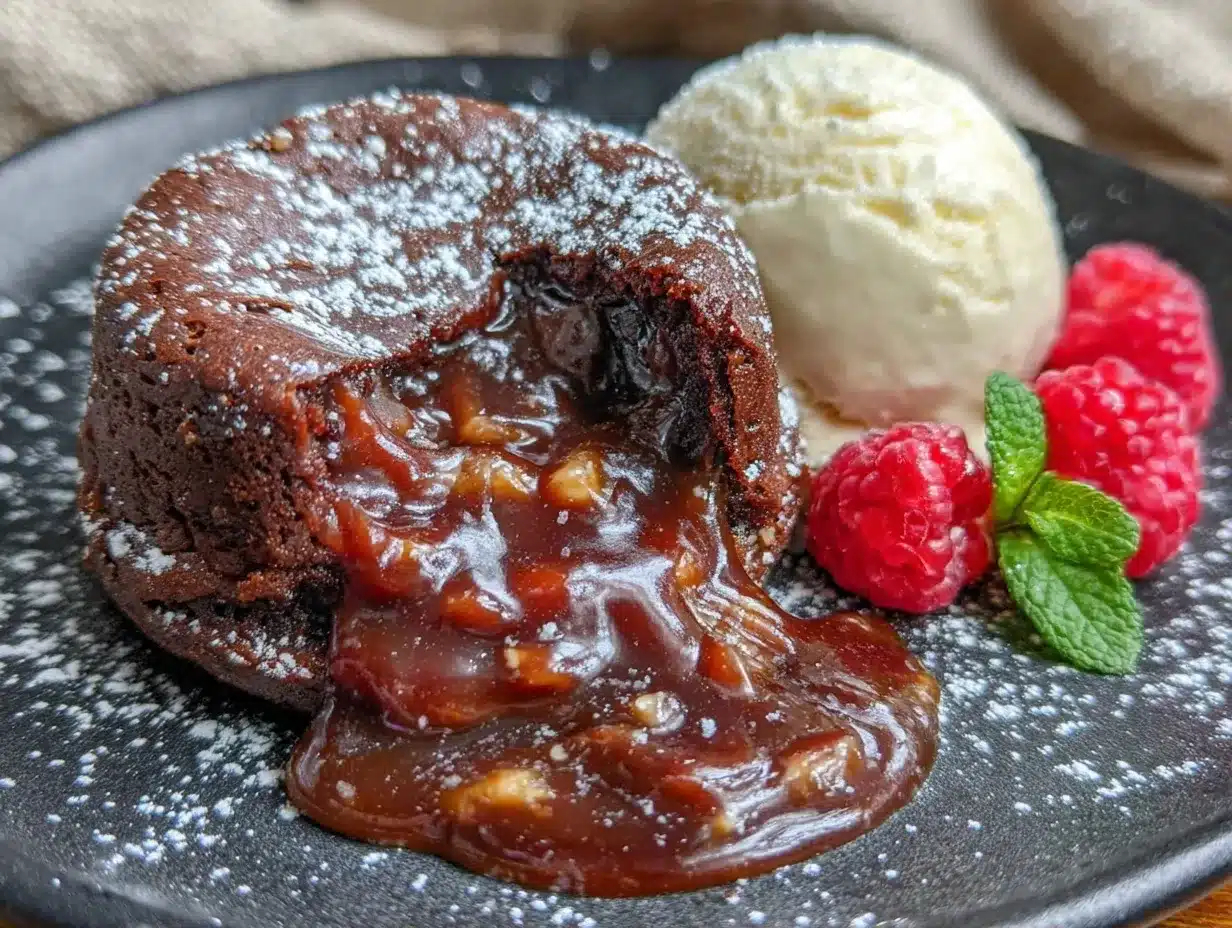
Vanilla Ice Cream — High quality is best. Vanilla bean ice cream is perfect. If you don’t have it, whipped cream works, but ice cream is the classic pairing.
Butter for Ramekins — To grease your dishes. I use a small pat of butter and a sprinkle of sugar for that nice crunchy crust.
Cocoa Powder (for dusting) — Optional, but adds a nice professional touch.
Equipment Needed
You don’t need much. Keep it simple.
One Medium Bowl — Whatever size you have that can fit all the ingredients. Glass or ceramic works best so you can microwave the chocolate/butter if needed.
Whisk — For mixing. A fork works in a pinch, but a whisk makes it smoother.
4-6 Ramekins — Standard 6-ounce ramekins are ideal. They’re small ceramic dishes. If you don’t have them, use a muffin tin lined with paper cups, though the texture might be slightly different.
Baking Sheet — If your ramekins don’t fit on a tray, use a cookie sheet. It makes transferring them in and out of the oven easier.
Timer — Your phone works. Do not trust your internal clock. These bake fast.
How to Make It: Step-by-Step
Alright, let’s do this. I’m going to walk you through it like we’re standing in the kitchen together. No fancy techniques, just straight talk.
Step 1: Prep Your Ramekins
Butter the inside of your ramekins thoroughly. I like to dust them with a little sugar after buttering. It creates a little caramelized crunch on the outside. Set them aside on a baking sheet. This makes cleanup and transport way easier.
Step 2: Melt the Chocolate and Butter
Break your chocolate into chunks and put it in the bowl with the butter. Microwave in 30-second intervals, stirring in between, until smooth. Or use a double boiler on the stove. You want it glossy and smooth. No lumps. Set it aside to cool slightly.
Step 3: Whisk the Eggs and Sugar
In the same bowl (or a clean one if you’re paranoid about chocolate bits), whisk the eggs and egg yolks with the sugar. Whisk vigorously for about a minute. You want it pale and slightly thickened. This incorporates air and helps the cake rise.
Step 4: Combine Everything
Pour the chocolate mixture into the egg mixture. Whisk until combined. Sift in the flour and salt. Fold it in gently. Don’t overmix. You just want no dry streaks left. The batter should be thick and glossy.
Step 5: Fill and Bake
Divide the batter evenly among the ramekins. They should be about ¾ full. Bake at 425°F (220°C) for 12-14 minutes. Watch them closely. The edges should be set and firm, but the center should still look soft and jiggly. It will look slightly underbaked. That’s exactly what you want.
Step 6: The Flip
Remove from the oven. Let them sit for 1 minute. Then, run a knife around the edge and invert them onto plates. They should slide out easily. If they stick, you didn’t grease them enough next time.
Step 7: Serve Immediately
Top with a scoop of vanilla ice cream. Eat immediately. The lava needs to be hot and flowing. It won’t wait.
Expert Tips & Tricks
Here’s what I’ve learned from making this dozens of times. These tips will save you from my early mistakes.
Don’t Overbake — This is the #1 mistake. The center should jiggle when you shake the ramekin. If it’s firm, you’ve baked a chocolate cake, not a lava cake. It’s better to underbake than overbake.
Room Temperature Ingredients — Make sure your butter and eggs are at room temperature. Cold eggs can cause the chocolate to seize up. It’s a small step that makes a big difference in texture.
Use a Scale — Baking is chemistry. Measuring flour by volume is inaccurate. Use a kitchen scale if you have one. 15 grams of flour is different than a “scant tablespoon.” Consistency is key.
Make Ahead — You can fill the ramekins and refrigerate them for up to 24 hours. Just add 2-3 minutes to the baking time when you’re ready to cook them. Great for dinner parties.
Microwave Option — If you’re in a rush, you can microwave them. Use 1 large ramekin or 2 small ones. Microwave on high for 60-90 seconds. It’s not as pretty, but it works.
Variations & Substitutions
Once you’ve nailed the basic version, here’s how you can mix it up. I’ve tried all of these.
Peanut Butter Lava — Add a teaspoon of peanut butter to the center of each ramekin before baking. It creates a peanut butter swirl inside the chocolate. If you like my fudgy peanut butter swirl brownies, you’ll love this.
Espresso Lava — Add 1 teaspoon of instant espresso powder to the chocolate mixture. It intensifies the chocolate flavor without tasting like coffee.
Chocolate Chip Lava — Stir a handful of chocolate chips into the batter. You get pockets of melted chocolate throughout.
Gluten-Free — Swap the all-purpose flour for a 1:1 gluten-free flour blend. It works perfectly.
Vegan — This is harder because of the eggs. Use flax eggs and vegan butter/chocolate. It changes the texture, but it’s still good.
Serving & Storage
These are best eaten right away. They don’t keep well because the magic is in the hot, gooey center.
Serving Suggestions — I serve these straight from the plate with a big scoop of ice cream. Sometimes I add fresh raspberries or strawberries for a bit of acidity. A dusting of powdered sugar looks nice too.
Storage — If you have leftovers (unlikely), store the batter in the fridge in an airtight container for up to 2 days. Bake fresh. Do not store baked lava cakes; they’ll be dry and rubbery.
Nutrition Information
I’m not a nutritionist, but here’s the breakdown if you’re tracking. This is a rich dessert, so moderation is key.
Per Serving (1 cake):
- Calories: 450
- Protein: 8g
- Carbs: 45g
- Fat: 28g
- Sugar: 35g
It’s indulgent. That’s the point. Enjoy it without guilt.
Final Thoughts
So that’s my chocolate lava cake recipe. I know I’ve talked about how easy it is, but I can’t stress it enough. You really can’t mess this up. It’s forgiving, it’s delicious, and it makes you look like a pro.
Make it for your family, your friends, or just for yourself. It’s the perfect way to end a meal. And if you’re feeling adventurous, try my creamy caramel flan next time you want something different.
Happy baking! And remember, if you burn it, just call it “rustic.” No one will know.
Frequently Asked Questions
Can I use milk chocolate instead of dark chocolate?
You can, but it will be much sweeter and less intense. I recommend sticking with dark chocolate (60-70% cocoa) for the best balance. If you use milk chocolate, reduce the sugar in the recipe by half.
Why did my lava cakes turn out solid?
You baked them too long. The center should still be jiggly when you take them out. It continues to cook slightly from residual heat. Try reducing the baking time by 1-2 minutes next time.
Can I make these ahead of time?
Yes! Fill the ramekins with batter and cover with plastic wrap. Refrigerate for up to 24 hours. When ready to bake, let them sit at room temperature for 10 minutes, then bake as directed (add 1-2 minutes to the time).
Do I have to use ramekins?
No. You can use a muffin tin lined with paper cups. The baking time will be slightly shorter (10-12 minutes). The texture will be slightly different, but still delicious.
Can I freeze them?
I don’t recommend freezing baked lava cakes. The texture suffers. You can freeze the batter in the ramekins, but thaw overnight in the fridge before baking.
What if I don’t have an oven?
You can use the microwave. Use 1 large ramekin and microwave on high for 60-90 seconds. Check every 15 seconds after the first minute. It’s not as pretty, but it works in a pinch.
Pin This Recipe!
Chocolate Lava Cake: Easy One-Bowl Dessert
- Total Time: 29 minutes
- Yield: 4 servings 1x
Description
A foolproof, rich chocolate lava cake made in just one bowl with simple pantry ingredients. Features a warm, molten center that flows when cut, best served with vanilla ice cream.
Ingredients
- 6 ounces (170g) dark chocolate (60-70% cocoa)
- 1/2 cup (115g) unsalted butter, room temperature or melted
- 1 cup (200g) granulated sugar
- 2 large eggs
- 2 egg yolks
- 2 tablespoons (15g) all-purpose flour
- 1/4 teaspoon salt
- Butter and sugar for greasing ramekins
- Cocoa powder for dusting (optional)
- Vanilla ice cream for serving
Instructions
- Preheat oven to 425°F (220°C). Butter the inside of 4-6 ramekins thoroughly and dust with sugar. Place on a baking sheet.
- Break chocolate into chunks and combine with butter in a microwave-safe bowl. Microwave in 30-second intervals, stirring until smooth. Alternatively, melt using a double boiler. Let cool slightly.
- In a medium bowl, whisk eggs, egg yolks, and sugar vigorously for about one minute until pale and slightly thickened.
- Pour the melted chocolate mixture into the egg mixture and whisk until combined.
- Sift in flour and salt, then gently fold until no dry streaks remain. The batter should be thick and glossy.
- Divide batter evenly among prepared ramekins, filling them about 3/4 full.
- Bake for 12-14 minutes. Edges should be set but the center should still look soft and jiggly.
- Remove from oven and let sit for 1 minute. Run a knife around the edge and invert onto plates.
- Serve immediately topped with vanilla ice cream.
Notes
Do not overbake; the center must remain jiggly. Ingredients should be at room temperature. Can be made ahead by refrigerating filled ramekins for up to 24 hours (add 2-3 minutes to bake time). Microwave option: 60-90 seconds on high for 1 large ramekin.
- Prep Time: 15 minutes
- Cook Time: 14 minutes
- Category: Dessert
- Cuisine: French
Nutrition
- Serving Size: 1 cake
- Calories: 450
- Sugar: 35
- Sodium: 120
- Fat: 28
- Saturated Fat: 16
- Carbohydrates: 45
- Fiber: 2
- Protein: 8
Keywords: chocolate lava cake, molten chocolate cake, easy dessert, one bowl recipe, rich chocolate dessert, date night dessert


