
It was supposed to be a quiet Tuesday. Just me, a takeout menu, and zero desire to stand over a hot stove. But then my neighbor, Sarah, dropped off her toddler for an hour while she ran to the vet. The kid, Leo, is three, which means he is currently in the “only eats yellow foods” phase of his life. I had chicken nuggets in the freezer, but I also had a head of cauliflower that was starting to look a little sad on my counter.
I panicked. I needed something fast, something that wouldn’t require twenty ingredients, and something that might actually trick a three-year-old into eating a vegetable. So, I threw together what I thought would be a mediocre snack. I tossed florets in a quick cornstarch mixture, air-fried them until they were actually crispy (not soggy, which is usually the problem with cauliflower), and then tossed them in a sticky, sweet, garlicky sauce.
Leo took one bite. Then another. Then he held out his hand for more. My husband walked in ten minutes later, saw the empty bowl, and asked, “Wait, are those chicken?” When I told him they were cauliflower, he didn’t believe me until I showed him the floret shape. That was the moment I knew I had struck gold.
These crispy honey garlic cauliflower bites have become the unofficial star of our house. I’ve made them for game day parties where people were digging for them faster than the wings. I’ve made them for my meat-eating father-in-law, who claimed he didn’t like vegetables but ate three handfuls. And I’ve made them for lazy weeknights when I just want dinner on the table in 20 minutes flat. They are addictive. They are crispy. And honestly? They taste better than the takeout version.
If you’ve ever struggled with cauliflower that turns into mush in the oven, or sauce that just slides right off, this recipe is your answer. I’ve tested this method dozens of times to get the coating perfect—crunchy on the outside, tender on the inside, and coated in that sticky honey-garlic glaze that makes you lick your fingers. Let’s get into why this is the best way to eat cauliflower, and how you can make it yourself.
Why You’ll Love This Crispy Honey Garlic Cauliflower Bites Recipe
Look, I get it. Cooking vegetables can feel like a chore. It’s easy to just boil them or roast them plain and call it a day. But these crispy honey garlic cauliflower bites are different. They’re not a side dish you push around your plate. They’re the main event. Here’s why I keep making this recipe on repeat:
- Actually Crispy — Most cauliflower recipes fail because the coating gets soggy after 30 seconds. I use a specific cornstarch and flour ratio (plus a little baking powder) that keeps these bites crunchy even after they hit the sauce. I’ve left them on the counter for an hour while I set the table, and they were still crisp. That’s rare for this kind of dish.
- 20 Minutes or Less — From chopping to plate, this takes about 20 minutes if you have your air fryer or oven ready. It’s faster than waiting for delivery. I make this on busy weeknights when I’m exhausted and don’t want to think about a complicated dinner. It just works.
- Sticky Sauce Perfection — The honey garlic sauce is the secret weapon. It’s not overly sweet, and the garlic is bold but not overpowering. It clings to every nook and cranny of the floret. I’ve tried making this with just soy sauce or just honey, but the combination is what makes it addictive. It’s the same flavor profile as my favorite Asian takeout, but healthier.
- Kid-Approved (Even Picky Ones) — If you can trick a toddler into eating cauliflower, you can feed anyone. The sweet and savory flavor masks the “vegetable” taste completely. My husband says he doesn’t know how I do it, but I think it’s just the crunch factor. Adults love crunch too, obviously.
- Gluten-Free Friendly — I made a version of this for a friend with celiac disease, and she couldn’t tell the difference. By swapping the flour for rice flour or just using cornstarch, you keep that crunch without the gluten. It’s naturally dairy-free too, which is a huge bonus for my lactose-intolerant sister.
- Budget-Friendly — Cauliflower is cheap, especially if you buy it whole rather than pre-cut florets. A whole head costs about $3-4 and makes a huge batch of bites. This feeds 4 people as a main or 6 as an appetizer. It’s way cheaper than ordering appetizers at a restaurant.
This is my go-to when I need to impress guests or just want a healthy dinner that doesn’t taste like diet food. It’s flavorful, satisfying, and surprisingly easy. Once you try these, you’ll never go back to plain roasted cauliflower.
Ingredients You’ll Need for Crispy Honey Garlic Cauliflower Bites
Here’s the best part: you probably have most of these ingredients already. I’m particular about a few things here, but the list is short and simple. No weird spices you’ll use once a year.
For the Coating:
Cauliflower (1 large head, cut into bite-sized florets) — This is obviously the star. Buy a large, dense head. Avoid ones that are starting to yellow or have brown spots. I prefer cutting it myself because pre-cut florets are often too big and don’t cook evenly. Aim for pieces that are about 1.5 inches wide.
All-purpose flour (½ cup / 65g) — This helps create the initial crust. If you’re doing gluten-free, use rice flour or a 1:1 gluten-free blend. I use regular AP flour because it’s what I always have.
Cornstarch (½ cup / 60g) — This is the magic ingredient for crispiness. It creates that light, airy crunch that doesn’t get heavy like breading. Don’t skip this. I’ve tried using just flour, and the result was soggy.
Baking powder (1 teaspoon) — Not baking soda! Baking powder helps the coating puff up slightly and stay crisp. It reacts with the moisture to create tiny air pockets.
Garlic powder (1 teaspoon) — Adds depth to the coating itself. If you don’t have this, onion powder works too.
Salt and black pepper (to taste) — Season the coating well. It’s the base flavor for the bites.
Plant milk or water (¾ cup / 180ml) — I use unsweetened almond milk because it adds a little richness, but water works fine too. You want a thin batter, like pancake batter consistency.
For the Honey Garlic Sauce:

Garlic (4-5 cloves, minced) — Yes, fresh garlic. No jarred stuff here. Fresh garlic gives that sharp, aromatic punch that defines this dish. Mince it finely so it distributes evenly.
Honey (¼ cup / 85g) — Use good quality honey. If you want it less sweet, you can reduce to 2 tablespoons, but the honey balances the salt and garlic perfectly.
Soy sauce (2 tablespoons) — I use low-sodium soy sauce so I can control the saltiness. Tamari is great for gluten-free. This adds the umami savory note.
Rice vinegar (1 tablespoon) — This cuts through the sweetness and adds a little tang. It prevents the sauce from being cloying. If you don’t have rice vinegar, white wine vinegar works.
Sesame oil (1 teaspoon) — Just a teaspoon. It adds that classic Asian flavor profile. Don’t use too much or it will overpower the garlic.
Red pepper flakes (½ teaspoon, optional) — For a little heat. I usually add this because I like a little kick, but you can skip it for kids.
Water (2 tablespoons) — Helps thin the sauce so it coats the cauliflower evenly without being too thick or gloopy.
Green onions (2 stalks, sliced) — For garnish. Adds color and a fresh onion bite. Also looks pretty on Instagram, which is a plus.
Sesame seeds (1 tablespoon) — Toasted sesame seeds add a nutty crunch and visual appeal. I keep a jar of these in my pantry specifically for dishes like this.
Equipment Needed
You don’t need fancy equipment for this. Here’s what I actually use.
Air Fryer — I highly recommend this. It makes the cauliflower crispy in 12-15 minutes with little to no oil. If you don’t have one, see below for oven instructions.
Large mixing bowls — You need one for the dry ingredients and one for the wet batter. Two medium bowls work best.
Paper towels — Crucial. You need to pat the cauliflower dry before battering. Wet cauliflower = soggy bites.
Small saucepan — For heating the sauce. A small non-stick pan works perfectly.
Whisk — For mixing the batter and sauce. A small whisk is easiest.
Tongs — For tossing the cauliflower in the sauce. Makes cleanup easier than using a spoon.
How to Make Crispy Honey Garlic Cauliflower Bites: Step-by-Step
Alright, let’s make this! I’m walking you through exactly how I do it, including the little tricks I’ve picked up so you get that perfect crunch every time.
Step 1: Prep the Cauliflower (5 minutes)
Start by washing your cauliflower head. Cut it into florets, aiming for bite-sized pieces about 1.5 inches wide. You want them uniform so they cook evenly. Once cut, spread the florets out on a layer of paper towels. Pat them dry thoroughly. This is the most important step. If the cauliflower is wet, the batter will slide off, and they won’t crisp up. I usually let them sit for 5 minutes to air dry a bit more.
Step 2: Make the Batter (2 minutes)
In a medium bowl, whisk together the flour, cornstarch, baking powder, garlic powder, salt, and pepper. In a separate bowl, whisk the plant milk (or water) until smooth. Pour the wet ingredients into the dry ingredients. Whisk until you have a smooth, thin batter. It should look like thin pancake batter. If it’s too thick, add a splash more milk. If it’s too runny, add a teaspoon of flour. Don’t overmix; a few lumps are fine.
Step 3: Coat the Cauliflower (3 minutes)
Add the dried cauliflower florets to the batter. Use a spoon or your hands to toss them until every piece is coated. Let them sit in the batter for about 2 minutes. This helps the coating adhere. If you’re air frying, line the basket with parchment paper or lightly spray with oil. If you’re using the oven, line a baking sheet with parchment.
Step 4: Cook Until Crispy (12-15 minutes)
Air Fryer Method: Preheat your air fryer to 400°F (200°C). Place the coated florets in the basket in a single layer. Do not overcrowd! Cook in batches if necessary. Air fry for 12-15 minutes, flipping halfway through, until golden brown and crispy. They should be firm to the touch.
Oven Method: Preheat oven to 425°F (220°C). Place coated florets on a baking sheet. Lightly spray with oil. Bake for 20-25 minutes, flipping halfway, until crispy and browned. The oven method takes longer but still works well. I prefer the air fryer for speed and crispiness.
Step 5: Make the Sauce (5 minutes)
While the cauliflower cooks, make the sauce. In a small saucepan over medium heat, combine the minced garlic, honey, soy sauce, rice vinegar, sesame oil, and red pepper flakes. Whisk together and bring to a gentle simmer. Let it bubble for 2-3 minutes until it thickens slightly. Stir in the water to thin it out a bit. It should coat the back of a spoon. Remove from heat.
Step 6: Toss and Serve (2 minutes)
Once the cauliflower is crispy, transfer it to a large bowl. Pour the warm honey garlic sauce over the hot cauliflower. Toss gently with tongs until every piece is coated. The heat from the cauliflower will help the sauce stick. Garnish with sliced green onions and toasted sesame seeds. Serve immediately. These are best eaten right away while they’re still crispy.
Expert Tips & Tricks for Perfect Crispy Honey Garlic Cauliflower Bites
Here’s everything I’ve learned from making this dozens of times. These tips will save you from my mistakes.
- Pat Dry, Then Pat Dry Again — I cannot stress this enough. Moisture is the enemy of crispiness. If your cauliflower is wet, the batter will be watery and slide off. Use paper towels, press down gently, and let them air dry. I’ve skipped this step before, and the results were sad and soggy. Don’t skip it.
- Don’t Overcrowd the Basket — Whether you’re air frying or baking, space is key. If the florets are touching, they steam instead of crisp. Cook in batches if you have a small air fryer. It’s worth the extra 5 minutes.
- Coat While Hot — Toss the cauliflower in the sauce immediately after cooking. The residual heat helps the sauce adhere and creates that sticky glaze. If you let them cool down first, the sauce won’t stick as well.
- Use Fresh Garlic — Jarred garlic has a metallic taste that doesn’t work well in a delicate honey sauce. Fresh garlic gives that bright, pungent flavor that makes this dish pop. Mince it finely so you get flavor in every bite.
- Double the Sauce — If you’re serving this as an appetizer or for a crowd, double the sauce recipe. People will want extra for dipping. I usually keep a small bowl of sauce on the side for extra dipping.
- Toast Your Sesame Seeds — If you have time, toast the sesame seeds in a dry pan for 1-2 minutes before sprinkling. It brings out a nutty flavor that elevates the dish. It’s a small step that makes a big difference.
Variations & Substitutions for Crispy Honey Garlic Cauliflower Bites
Once you’ve nailed the basic version, here’s how you can mix it up. I’ve tried all of these.
Spicy Honey Garlic
Add 1 tablespoon of sriracha or gochujang paste to the sauce. It adds a nice heat that balances the sweetness. This is my favorite version when I want a little kick.
Vegan Option
This recipe is already vegan if you use plant milk and maple syrup instead of honey. Use tamari instead of soy sauce for gluten-free. It’s naturally dairy-free.
Baked vs. Air Fried
I prefer air frying for crispiness, but baking works too. If baking, make sure to spray the florets with oil before cooking. The air fryer circulates heat better, which is why it’s crispier.
Other Vegetables
You can use this same method for broccoli or cauliflower. Just adjust cooking times slightly. Broccoli might take 2-3 minutes less in the air fryer.
Sauce Variations
Try teriyaki sauce instead of honey-soy for a different flavor. Or add a tablespoon of peanut butter to the sauce for a Thai-inspired twist. I’ve done both, and they’re delicious.
Serving & Storage
How to Serve
I usually serve these straight from the bowl as an appetizer or alongside grilled chicken or tofu as a main. They pair well with rice or noodles. I love serving them with a side of steamed rice and a simple cucumber salad.
Storage
Refrigerator: Store leftovers in an airtight container for up to 3 days. The coating will soften, but they’re still good. Reheat in the air fryer or oven to restore crispiness. Microwave will make them soggy.
Reheating
Reheat in the air fryer at 350°F for 3-4 minutes. This brings back the crunch. If you microwave them, they’ll be soft. I don’t recommend microwaving if you care about texture.
Freezing
You can freeze the cooked cauliflower bites before tossing them in sauce. Freeze on a baking sheet, then transfer to a bag. Reheat from frozen in the air fryer. Do not freeze with the sauce, as it will become watery.
Nutrition Information
I’m not a nutritionist, but here’s the breakdown if you’re tracking. Per serving (based on 4 servings as a main):
- Calories: 180
- Protein: 6g
- Carbs: 32g
- Fiber: 4g
- Sugar: 18g
- Fat: 4g
- Sodium: 350mg
What’s Good: High in fiber and vitamins from the cauliflower. Low in fat if air fried. Good source of antioxidants.
What to Know: Higher in sugar from the honey sauce. Use less honey or swap for a sugar-free sweetener to reduce sugar content. Moderate sodium from soy sauce.
Final Thoughts
So that’s my go-to crispy honey garlic cauliflower bites! I’ve probably talked your ear off at this point, but when you make a recipe this often, you have a lot to say about it. This has saved weeknight dinners more times than I can count. It’s my answer to “what’s for dinner” when I’m tired, don’t want takeout, and still want something that tastes really good. My kids are happy, my husband’s happy, and I’m happy because I’m not stressed about cooking.
Make it yours! Try different add-ins, swap in your favorite vegetables, adjust the garlic (though more is always better in my opinion). The best recipes are the ones you adapt to your family’s tastes. If you make this, drop a comment and let me know what you think! I love hearing how recipes turn out in your kitchen. And if something doesn’t work, tell me that too—I’m here to help troubleshoot.
Happy cooking! And I hope your kitchen smells half as good as mine does right now.
Frequently Asked Questions
Can I bake these instead of air frying?
Yes! Bake at 425°F (220°C) for 20-25 minutes, flipping halfway. Spray with oil for crispiness. The air fryer is faster and crispier, but the oven works well too.
Why did my cauliflower get soggy?
Usually, this happens because the cauliflower was too wet before battering, or the batter was too thick. Make sure to pat the florets dry and use a thin batter. Also, don’t overcrowd the air fryer or baking sheet.
Can I make the sauce ahead?
Yes, make the sauce up to 2 days ahead and store in the fridge. Reheat gently before tossing with the cauliflower. The sauce thickens when cold, so add a splash of water when reheating.
Is this recipe gluten-free?
Yes, if you use cornstarch and rice flour (or gluten-free flour blend) and tamari instead of soy sauce. The base recipe is naturally gluten-free if you skip the flour.
Can I freeze these?
Freeze the cooked cauliflower bites before adding sauce. Thaw and reheat in the air fryer. Do not freeze with the sauce, as it will become watery.
What can I serve with this?
These go well with steamed rice, noodles, or a simple salad. They also pair nicely with grilled chicken or tofu for a complete meal. Check out my fluffy buttermilk pancakes for a breakfast option, or creamy pumpkin alfredo pasta for a cozy dinner idea.
Pin This Recipe!
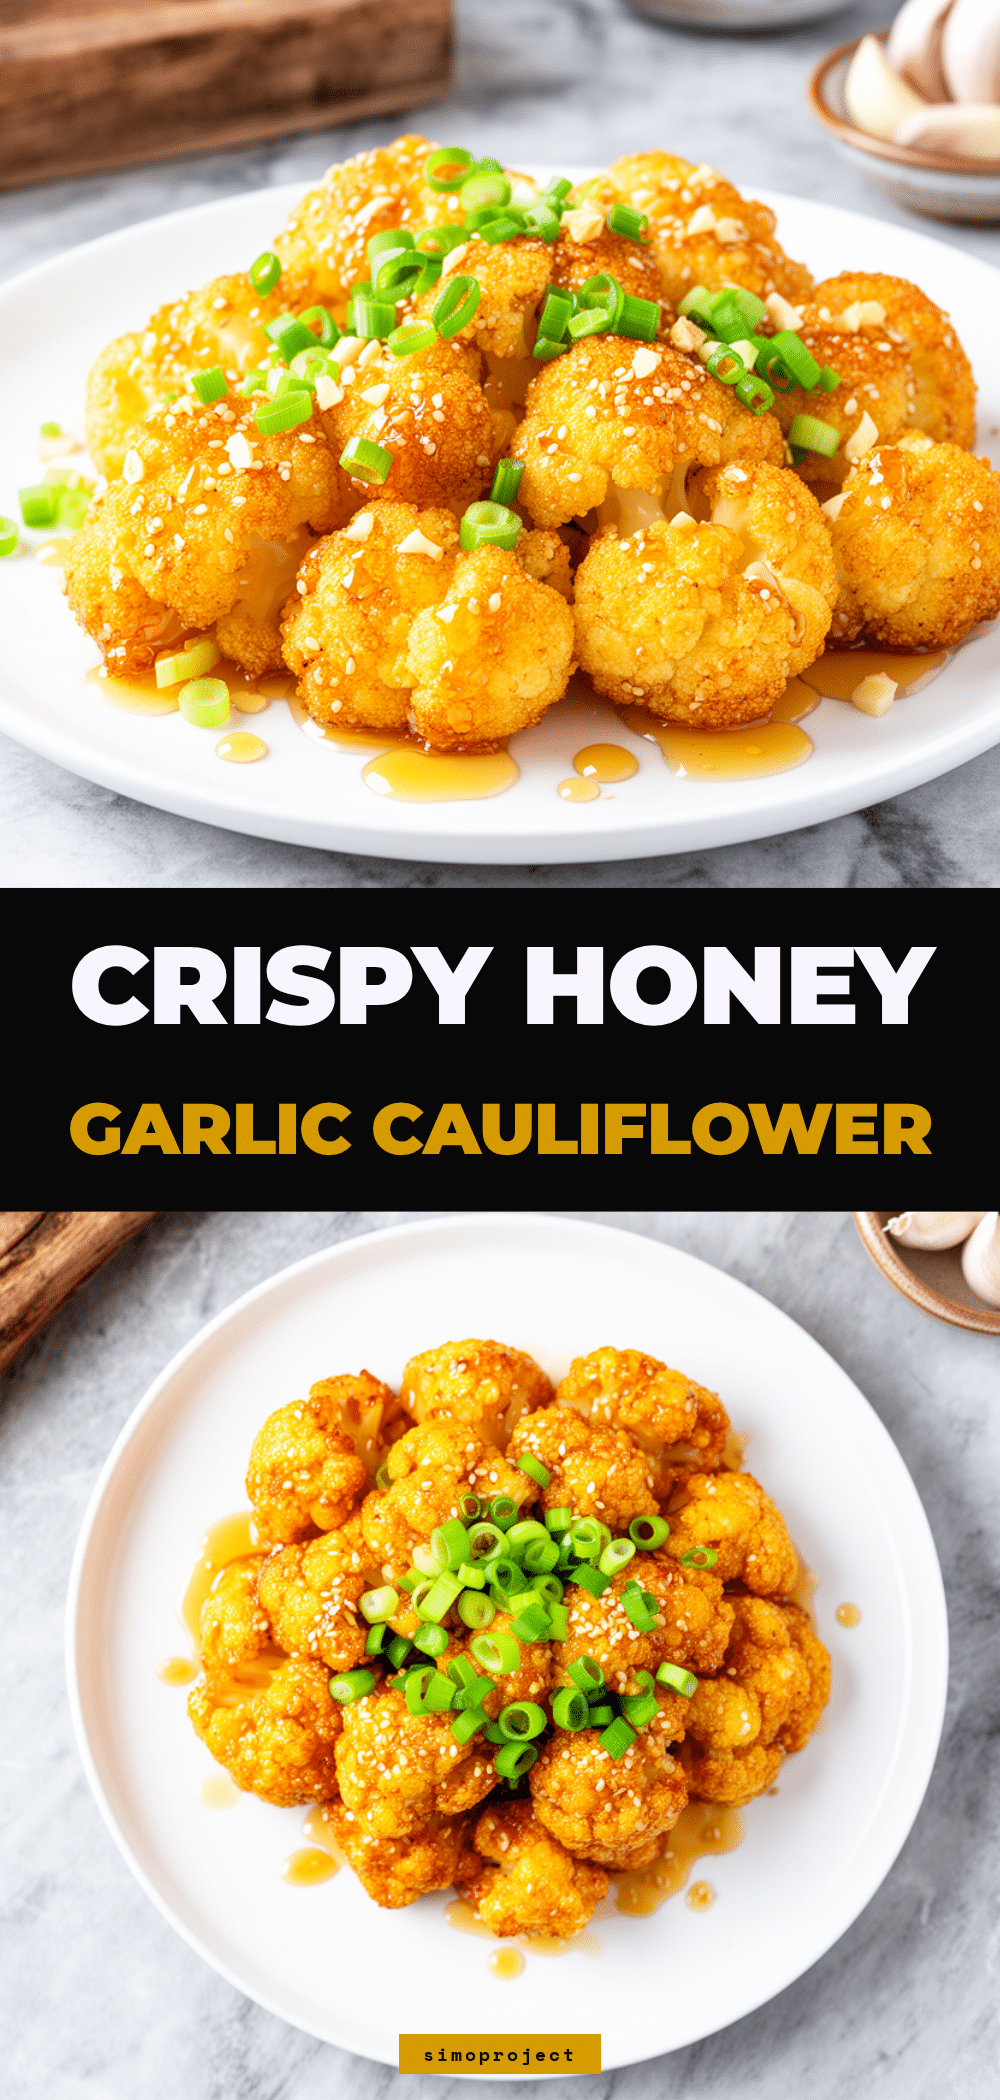

Crispy Honey Garlic Cauliflower Bites
- Total Time: 25 minutes
- Yield: 4 servings 1x
Description
A quick, 20-minute recipe for crispy, air-fried cauliflower florets tossed in a sticky, sweet, and savory honey garlic sauce. Kid-approved and gluten-free friendly.
Ingredients
- 1 large head cauliflower, cut into 1.5-inch bite-sized florets
- ½ cup all-purpose flour (or rice flour for gluten-free)
- ½ cup cornstarch
- 1 teaspoon baking powder
- 1 teaspoon garlic powder
- Salt and black pepper to taste
- ¾ cup plant milk or water
- 4–5 cloves garlic, minced
- ¼ cup honey
- 2 tablespoons soy sauce (or tamari for gluten-free)
- 1 tablespoon rice vinegar
- 1 teaspoon sesame oil
- ½ teaspoon red pepper flakes (optional)
- 2 tablespoons water
- 2 stalks green onions, sliced
- 1 tablespoon toasted sesame seeds
Instructions
- Pat the cauliflower florets completely dry with paper towels to ensure crispiness.
- In a medium bowl, whisk together flour, cornstarch, baking powder, garlic powder, salt, and pepper.
- In a separate bowl, whisk plant milk (or water) until smooth, then pour into the dry ingredients to form a thin batter.
- Toss the dried cauliflower florets in the batter until evenly coated. Let sit for 2 minutes.
- Preheat air fryer to 400°F (200°C) or oven to 425°F (220°C).
- Air fry in a single layer for 12-15 minutes, flipping halfway, until golden and crispy. Alternatively, bake on a lined sheet for 20-25 minutes, flipping halfway.
- While cauliflower cooks, combine minced garlic, honey, soy sauce, rice vinegar, sesame oil, red pepper flakes, and 2 tablespoons water in a small saucepan over medium heat.
- Simmer the sauce for 2-3 minutes until slightly thickened, then remove from heat.
- Toss the hot, crispy cauliflower in the warm sauce until coated.
- Garnish with sliced green onions and toasted sesame seeds. Serve immediately.
Notes
Patting the cauliflower dry is crucial for crispiness. Do not overcrowd the air fryer basket. For best texture, serve immediately. Leftovers can be stored in the fridge for 3 days and reheated in the air fryer to restore crunch.
- Prep Time: 10 minutes
- Cook Time: 15 minutes
- Category: Main Course
- Cuisine: Asian Fusion
Nutrition
- Serving Size: 1 serving (approx. 1
- Calories: 180
- Sugar: 18
- Sodium: 350
- Fat: 4
- Carbohydrates: 32
- Fiber: 4
- Protein: 6
Keywords: cauliflower bites, honey garlic cauliflower, air fryer recipes, healthy appetizer, gluten-free, vegan options, quick dinner, kid-friendly vegetables


