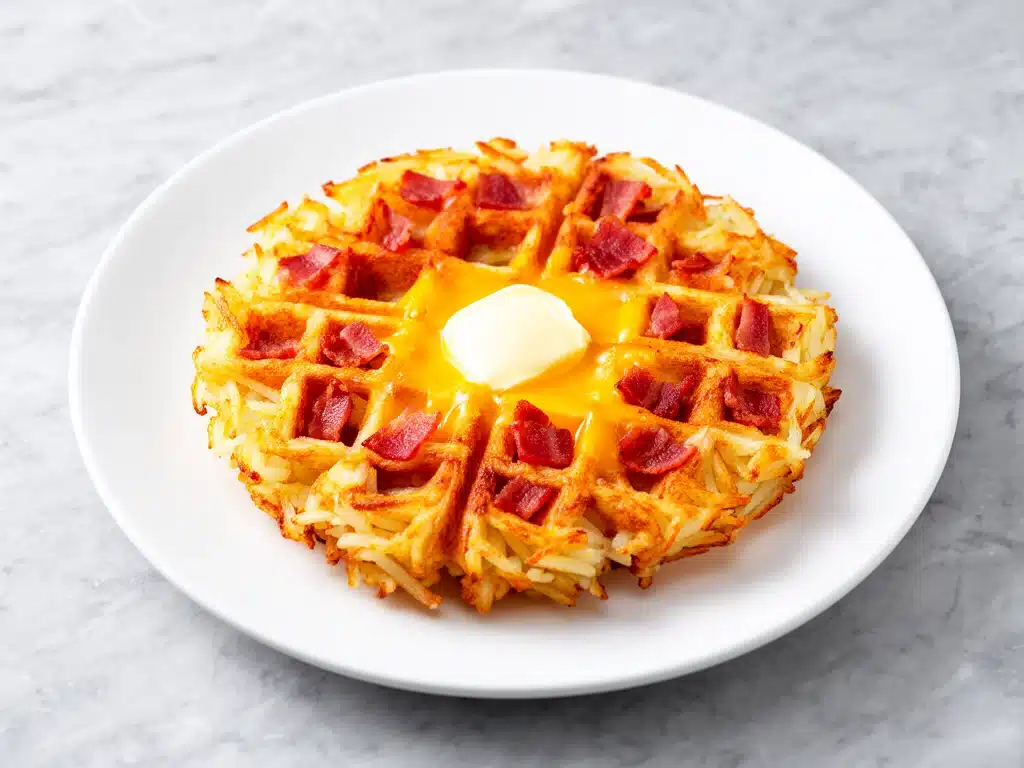
It was 5:45 AM on a Tuesday, and I was staring at the ceiling wondering why I had agreed to volunteer for the school bake sale. My brain felt like it was wrapped in wet cotton, my coffee pot was still three feet away on the counter, and my kids were already making noises that suggested they were ready to revolt before their first sip of milk. I knew I had to get up. I knew I had to make breakfast. But the idea of chopping vegetables, heating up a skillet, and managing the chaos of a full fry-up was enough to make me consider just sending them to school on dry cereal and hope for the best.
That was the breaking point. I couldn’t keep living like this. I needed a breakfast that was fast, filling, and actually tasted good without requiring me to be fully conscious for twenty minutes. That morning, I grabbed a bag of frozen hash browns, some leftover bacon, and a block of sharp cheddar cheese, and I threw them into the waffle iron. I expected a mushy disaster. What I got was a golden, crispy, savory masterpiece that smelled like a diner in the best way possible.
Those Crispy Bacon and Cheddar Hash Brown Waffles have been a game-changer for our mornings. They are crispy on the outside, soft on the inside, and packed with enough protein and fat to keep me sane until lunch. I’ve made them at least fifty times in the last six months, tweaking the ratio of cheese to potato until it was perfect. They freeze beautifully, reheat in seconds, and can be made ahead for those days when you have to drop three kids at school and drive forty minutes to a meeting. If you are tired of dry toast or sad oatmeal, you need to try these. They are the answer to “what’s for breakfast” when you have zero time but high standards.
Why You’ll Love This Recipe
I’m not exaggerating when I say this recipe has saved our family schedule more times than I can count. It’s not just about saving time; it’s about having a breakfast that feels like a treat rather than a chore. Here is why these waffles have earned a permanent spot in our weekly rotation:
- Stupid Simple Prep — Seriously, if you can shred cheese and dump frozen potatoes, you can make this. There is no mixing bowls, no whisking, no complicated batter. It’s just toss and cook. I’ve made this while one kid was crying and another was trying to put on shoes. It works.
- Lightning Fast — From grabbing the ingredients to the first bite is about 10 minutes. The waffle iron does the heavy lifting, crisping up the potatoes in just 4-5 minutes. That’s faster than most coffee brewing times.
- Make-Ahead Friendly — This is the holy grail. You can make a big batch on Sunday, let them cool, and freeze them in a single layer. When you need breakfast, just toss them in the toaster. They come out crispy again. I keep a bag of these in the freezer at all times.
- Savory Craving Satisfaction — Most breakfasts are sweet. Pancakes, waffles, French toast—it’s all sugar. These hit that savory, salty spot that feels like comfort food. It’s like eating a breakfast burrito but in waffle form. No syrup needed.
- Picky-Eater Approved — My youngest usually turns her nose up at anything with “vegetables” in it, but she eats these like they’re candy. The bacon and cheese mask the potato flavor just enough to make it irresistible.
- Budget-Smart — Frozen hash browns are cheap. Bacon doesn’t have to be expensive (I use the standard strip bacon). Cheddar is affordable. You’re feeding four people for under $10, which is a miracle in today’s grocery market.
This is my go-to when I need dinner—or breakfast—to just work. No complicated techniques, no weird ingredients, just reliable, delicious food that makes everyone happy and gets everyone out the door on time.
Ingredients You’ll Need
Here’s the best part: you probably have most of this already. This isn’t a recipe that requires a special trip to the store. It’s built around pantry staples and freezer basics. I’m particular about two things here—the type of hash browns and the cheese—but the rest is flexible.
The Base
Frozen shredded hash browns (16 ounces / 450g) — This is your main ingredient. Do not use diced or shredded fresh potatoes unless you are okay with squeezing out all the moisture yourself. The frozen shredded kind is pre-cooked slightly and has the right texture. I always keep a bag in the freezer. Thaw them slightly before mixing so they aren’t ice-cold blocks.
Sharp cheddar cheese (1 cup / 100g, shredded) — I use sharp cheddar because the flavor stands up to the potatoes and bacon. Mild cheddar is too bland for this. Grate it yourself from a block if you can. Pre-shredded cheese has anti-caking agents that can make the waffles a bit gummy instead of crispy.
The Flavor
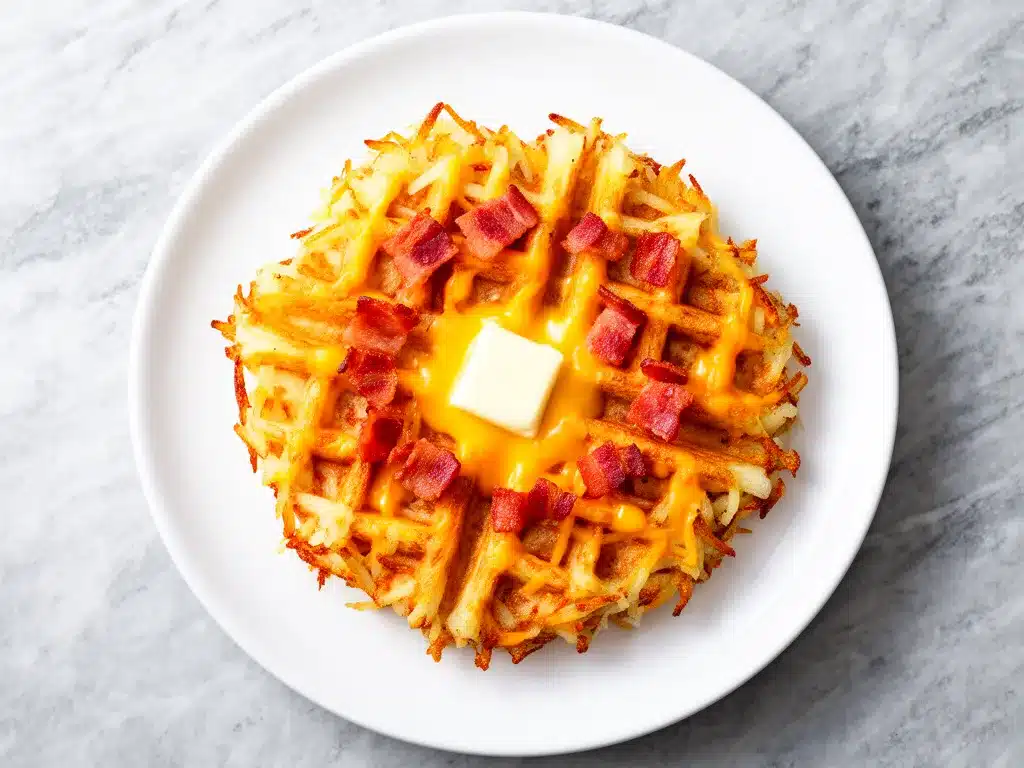
Cooked bacon (6-8 strips / about 150g) — You need crispy bacon, crumbled into small pieces. I cook it in the oven while I prep everything else. It’s easier than the skillet and you get more crispy bits. If you’re in a rush, microwave bacon works, but oven-baked is best for texture.
Large egg (1 large) — This acts as the binder. It holds the hash browns and cheese together so your waffle doesn’t fall apart in the iron. Don’t skip this, or you’ll have a mess to clean.
All-purpose flour (2 tablespoons) — This helps bind everything further and adds a little structure. It prevents the waffle from being too crumbly.
Garlic powder (½ teaspoon) — This adds a subtle savory depth that pairs perfectly with the cheddar. It’s not garlicky; it’s just “good.”
Onion powder (½ teaspoon) — Again, subtle flavor boost. If you have fresh chives, you can use 1 tablespoon chopped chives instead, but onion powder is easier and lasts forever.
Salt and black pepper (to taste) — The bacon is salty, so go easy on the salt. I usually add a pinch of salt and a good crack of black pepper.
Non-stick cooking spray — Essential for keeping the waffle from sticking. I use avocado oil spray because it has a higher smoke point, but any vegetable spray works.
Optional Add-ins:
- Chopped green onions — Adds a fresh pop of color and mild onion flavor.
- Cooked sausage crumbles — If you don’t have bacon, breakfast sausage works great too.
- Jalapeños — For those who like a little heat. Diced fresh or canned.
Equipment Needed
You don’t need fancy equipment for this. Here’s what I actually use.
Standard Waffle Iron — I use a regular square waffle iron, not a Belgian one. Belgian waffles are too thick and deep, and the hash browns might not cook all the way through. A standard iron gives you that perfect crispy surface area. Any brand works—my old Cuisinart from Target still does the job.
Large Mixing Bowl — Something big enough to toss the hash browns, cheese, and egg together. I use a 4-quart bowl.
Cutting Board and Knife — For crumbling the bacon. A sharp knife makes this easier, but even a dull one works if you’re patient.
Spatula — A silicone or metal spatula for flipping the waffle out of the iron. Metal is fine for non-stick waffle irons, but silicone is safer if you’re worried about scratching.
Wire Rack — Optional but recommended. If you’re making a batch, place the cooked waffles on a wire rack in a low oven (200°F / 95°C) to keep them warm and crispy while you cook the rest. If you stack them on a plate, they’ll steam and get soggy. I learned this the hard way with a stack of soggy waffles.
Toaster or Toaster Oven — Needed if you’re making these ahead and freezing them. They reheat best in a toaster.
How to Make It: Step-by-Step
Alright, let’s make this! I’m walking you through exactly how I do it, including the little tricks I’ve picked up to ensure maximum crispiness.
Step 1: Cook the Bacon
Start by cooking your bacon. I prefer oven-baking because it’s hands-off. Line a baking sheet with parchment paper, lay the bacon strips in a single layer, and bake at 400°F (200°C) for 15-20 minutes, flipping halfway through, until crispy. Let it cool on the baking sheet, then crumble it into small bits. You want little bits, not big chunks, so they distribute evenly in the waffle.
Step 2: Thaw the Hash Browns
Take your frozen hash browns out of the freezer. They don’t need to be completely thawed, but they should be soft enough to mix. If they are still rock-hard ice blocks, let them sit for 10-15 minutes. If you try to mix ice-cold hash browns, they’ll clump up and not mix well with the cheese and egg.
Step 3: Mix the Batter
In your large mixing bowl, combine the thawed hash browns, shredded cheddar cheese, crumbled bacon, egg, flour, garlic powder, onion powder, salt, and pepper. Use your hands or a sturdy spoon to toss everything together. You want the cheese and bacon distributed evenly. The mixture will look like a thick, chunky salad. If it feels too dry, add a tiny bit more egg. If it’s too wet, add a sprinkle more flour.
Step 4: Preheat the Waffle Iron
While you’re mixing, preheat your waffle iron to medium-high heat. You want it hot enough to crisp the potatoes immediately. Spray the iron generously with non-stick cooking spray. Don’t be shy with the spray; hash browns love to stick.
Step 5: Cook the Waffles
Scoop about ½ to ¾ cup of the hash brown mixture onto the center of the waffle iron. Use the back of a spoon or your fingers to press it down into an even layer. Don’t overfill the iron, or it will spill over and make a mess. Close the lid and cook for 4-5 minutes. You’ll know they’re done when the steam stops coming out and the waffle is golden brown and crispy. The exact time depends on your waffle iron, so keep an eye on the first one.
Step 6: Remove and Serve
Open the iron carefully—the steam will be hot. Use a fork or spatula to lift the waffle out. It should come away easily if you sprayed the iron well. Place it on a plate or wire rack. Repeat with the remaining mixture, spraying the iron between each waffle. Serve immediately with a dollop of sour cream, Greek yogurt, or salsa if you want.
Total Time: About 10-15 minutes (depending on how fast your bacon cooks).
Troubleshooting Tips:
- Waffle sticks to iron? Your iron wasn’t hot enough, or you didn’t spray it enough. Always spray between batches.
- Waffle is soggy? You might have used too much egg, or you didn’t cook it long enough. Cook for an extra minute if it looks pale.
- Waffle falls apart? You didn’t bind it enough. Make sure you have the egg and flour, and press the mixture down firmly into the iron.
Expert Tips & Tricks
Here’s everything I’ve learned from making this dozens of times. These tips will save you from my mistakes.
Squeeze Out Excess Moisture
If your hash browns are very wet after thawing, give them a gentle squeeze in a clean kitchen towel or paper towels. Excess water is the enemy of crispiness. If the mixture is too wet, the waffle will steam instead of fry. I don’t always do this with the frozen kind (they’re usually fine), but if you’re using fresh shredded potatoes, you absolutely must squeeze them.
Don’t Overcrowd the Iron
It’s tempting to pack the hash browns in tight, but they need space to crisp. If you pile it too high, the center will stay soft and doughy. Aim for a thin, even layer. It’s better to make two smaller waffles than one huge, undercooked one.
Keep Them Crispy
As I mentioned, if you’re making a batch, use a wire rack in a low oven. Stacking them on a plate traps steam and makes them soggy within minutes. I keep the oven at 200°F (95°C) and put the rack on a baking sheet. This keeps them warm and crispy for up to 30 minutes.
Customize Your Cheese
Cheddar is classic, but don’t be afraid to experiment. Pepper jack adds spice. Monterey Jack melts beautifully. A mix of cheddar and mozzarella gives you the best of both worlds—flavor and melt. I’ve tried gouda, and it’s amazing but expensive. Stick to cheddar for budget-friendly wins.
Batch Cooking for Freezing
This is the real secret weapon. Make a double batch. Let the waffles cool completely on a wire rack. Once they’re cool, place them in a single layer on a baking sheet and freeze for 1-2 hours. Once they’re hard, transfer them to a freezer bag. They’ll last for up to 3 months. To eat, just pop them in the toaster. They come out crispy and hot in 2 minutes. This is my Sunday ritual.
Variations & Substitutions
Once you’ve nailed the basic version, here’s how you can mix it up. I’ve tried all of these.
Veggie-Packed
Add ½ cup of finely diced bell peppers, onions, or spinach to the mixture. I like to sauté the veggies first so they soften, then mix them in. It adds nutrition and color without changing the flavor profile too much. My kids don’t even notice the extra veggies.
BBQ Bacon
Toss the crumbled bacon in a little BBQ sauce before mixing it in. It adds a sweet and smoky flavor that pairs well with the cheddar. It’s like a BBQ chicken pizza in waffle form.
Breakfast Sausage
Swap the bacon for breakfast sausage crumbles. Brown the sausage in a skillet, drain the fat, and mix it in. This is great if you don’t have bacon on hand. It’s slightly fattier but very flavorful.
Gluten-Free
Use gluten-free hash browns (check the label, some frozen ones have wheat starch) and substitute the all-purpose flour with a 1:1 gluten-free flour blend. The rest of the ingredients are naturally gluten-free. This works perfectly.
Dairy-Free
Use dairy-free cheddar shreds (they melt differently, so keep an eye on the cook time) and skip the bacon if you’re vegan, or use a plant-based bacon alternative. I haven’t tested this extensively, but I’ve had friends do it with success. The egg can be replaced with a flax egg (1 tbsp ground flax + 3 tbsp water) if needed.
Spicy Kick
Add diced jalapeños or a pinch of cayenne pepper to the mixture. Top with hot sauce when serving. This is for those who like their breakfast to wake them up.
Serving & Storage
I usually serve these straight out of the waffle iron, hot and crispy. But here are other ways I’ve enjoyed them:
How to Serve
These are savory, so skip the maple syrup. I like to serve them with:
- Sour cream — The classic topping. Cool and tangy.
- Greek yogurt — A healthier alternative to sour cream, but still creamy.
- Salsa — Adds freshness and acidity. Great for a Mexican-inspired twist.
- Fried egg — If you want extra protein, top the waffle with a sunny-side-up egg. The yolk acts as a sauce.
- Hot sauce — Sriracha or Frank’s RedHot works well.
Storage Instructions
Refrigerator: Store leftovers in an airtight container for up to 3 days. They will soften in the fridge, so reheating is essential.
Reheating: The best method is a toaster or toaster oven. Reheat at 350°F (175°C) for 3-4 minutes until crispy. You can also reheat them in an air fryer at 350°F for 3 minutes. Avoid the microwave unless you don’t care about crispiness—it will make them chewy.
Freezing: As mentioned, freeze cooled waffles in a single layer, then transfer to a bag. They last up to 3 months. This is the best way to enjoy them on busy mornings.
Meal Prep: Make a big batch on Sunday, freeze them, and toast them throughout the week. It takes the stress out of morning breakfast. I usually make 12-15 waffles at a time.
Nutrition Information
I’m not a nutritionist, but here’s the breakdown if you’re tracking. These are estimates per waffle (makes about 4-6 waffles depending on size).
| Nutrient | Amount per Waffle |
|---|---|
| Calories | 280 |
| Protein | 12g |
| Carbs | 28g |
| Fat | 14g |
| Fiber | 2g |
| Sugar | 1g |
| Sodium | 450mg |
What’s Good: Decent protein from the egg and cheese. Low sugar. The hash browns provide carbs for energy.
What to Know: Higher in sodium due to bacon and cheese. If you’re watching salt, use low-sodium bacon and reduce the added salt.
My Take: This is comfort food. It’s not a diet recipe, but it’s far better than a donut or a pastry. It’s filling and keeps you satisfied. When I want to make it lighter, I use turkey bacon and less cheese, but usually? I just eat a reasonable portion and enjoy it.
Final Thoughts
So that’s my go-to Crispy Bacon and Cheddar Hash Brown Waffles! I’ve probably talked your ear off at this point, but when you make a recipe this often, you have a lot to say about it.
This has saved weeknight dinners and morning routines more times than I can count. It’s my answer to “what’s for breakfast” when I’m tired, don’t want takeout, and still want something that tastes really good. My kids are happy, my husband’s happy, and I’m happy because I’m not stressed about cooking.
Make it yours! Try different add-ins, swap in your favorite vegetables, adjust the cheese. The best recipes are the ones you adapt to your family’s tastes. If you make this, drop a comment and let me know what you think! I love hearing how recipes turn out in your kitchen. And if something doesn’t work, tell me that too—I’m here to help troubleshoot.
Happy cooking! And I hope your kitchen smells half as good as mine does right now.
Frequently Asked Questions
Can I use fresh hash browns instead of frozen?
You can, but you need to squeeze out all the excess moisture first. Fresh potatoes have a lot of water, and if you don’t squeeze them, the waffles will be soggy. I recommend using a clean kitchen towel and squeezing hard. Frozen hash browns are pre-cooked and have less moisture, so they’re easier and more consistent. I stick with frozen for reliability.
Why did my waffle stick to the iron?
This usually happens if the iron wasn’t hot enough when you added the mixture, or if you didn’t spray it well enough. Always preheat the iron fully and spray it generously with cooking spray before adding the hash browns. Also, don’t try to flip the waffle too early. Let it cook until it releases naturally from the iron.
Can I make these ahead and freeze them?
Yes! This is one of the best things about this recipe. Cook the waffles, let them cool completely on a wire rack, then freeze them in a single layer on a baking sheet. Once frozen, transfer them to a freezer bag. They’ll last up to 3 months. Reheat in a toaster or toaster oven for best results.
Can I use different cheese?
Absolutely. Cheddar is my favorite for its sharp flavor, but you can use pepper jack for spice, mozzarella for meltiness, or a mix of cheeses. Just make sure the cheese is shredded yourself, as pre-shredded cheese can affect the texture.
Do I have to use bacon?
No. You can use breakfast sausage, ham, or even just skip the meat and add more veggies. The bacon adds a smoky, salty flavor, but the waffles are delicious without it. If you’re vegetarian, just omit the bacon and add extra cheese or veggies.
How do I keep them crispy if I’m making a batch?
Use a wire rack in a low oven (200°F / 95°C). Stacking them on a plate traps steam and makes them soggy. The wire rack allows air to circulate, keeping them crispy while you cook the rest.
Can I make these in an air fryer?
Not directly, as you need a waffle iron to get the waffle shape. However, you can bake the mixture in a small loaf pan or muffin tin in the oven to make “hash brown bites” if you don’t have a waffle iron. But for the best texture and shape, a waffle iron is essential.
Pin This Recipe!
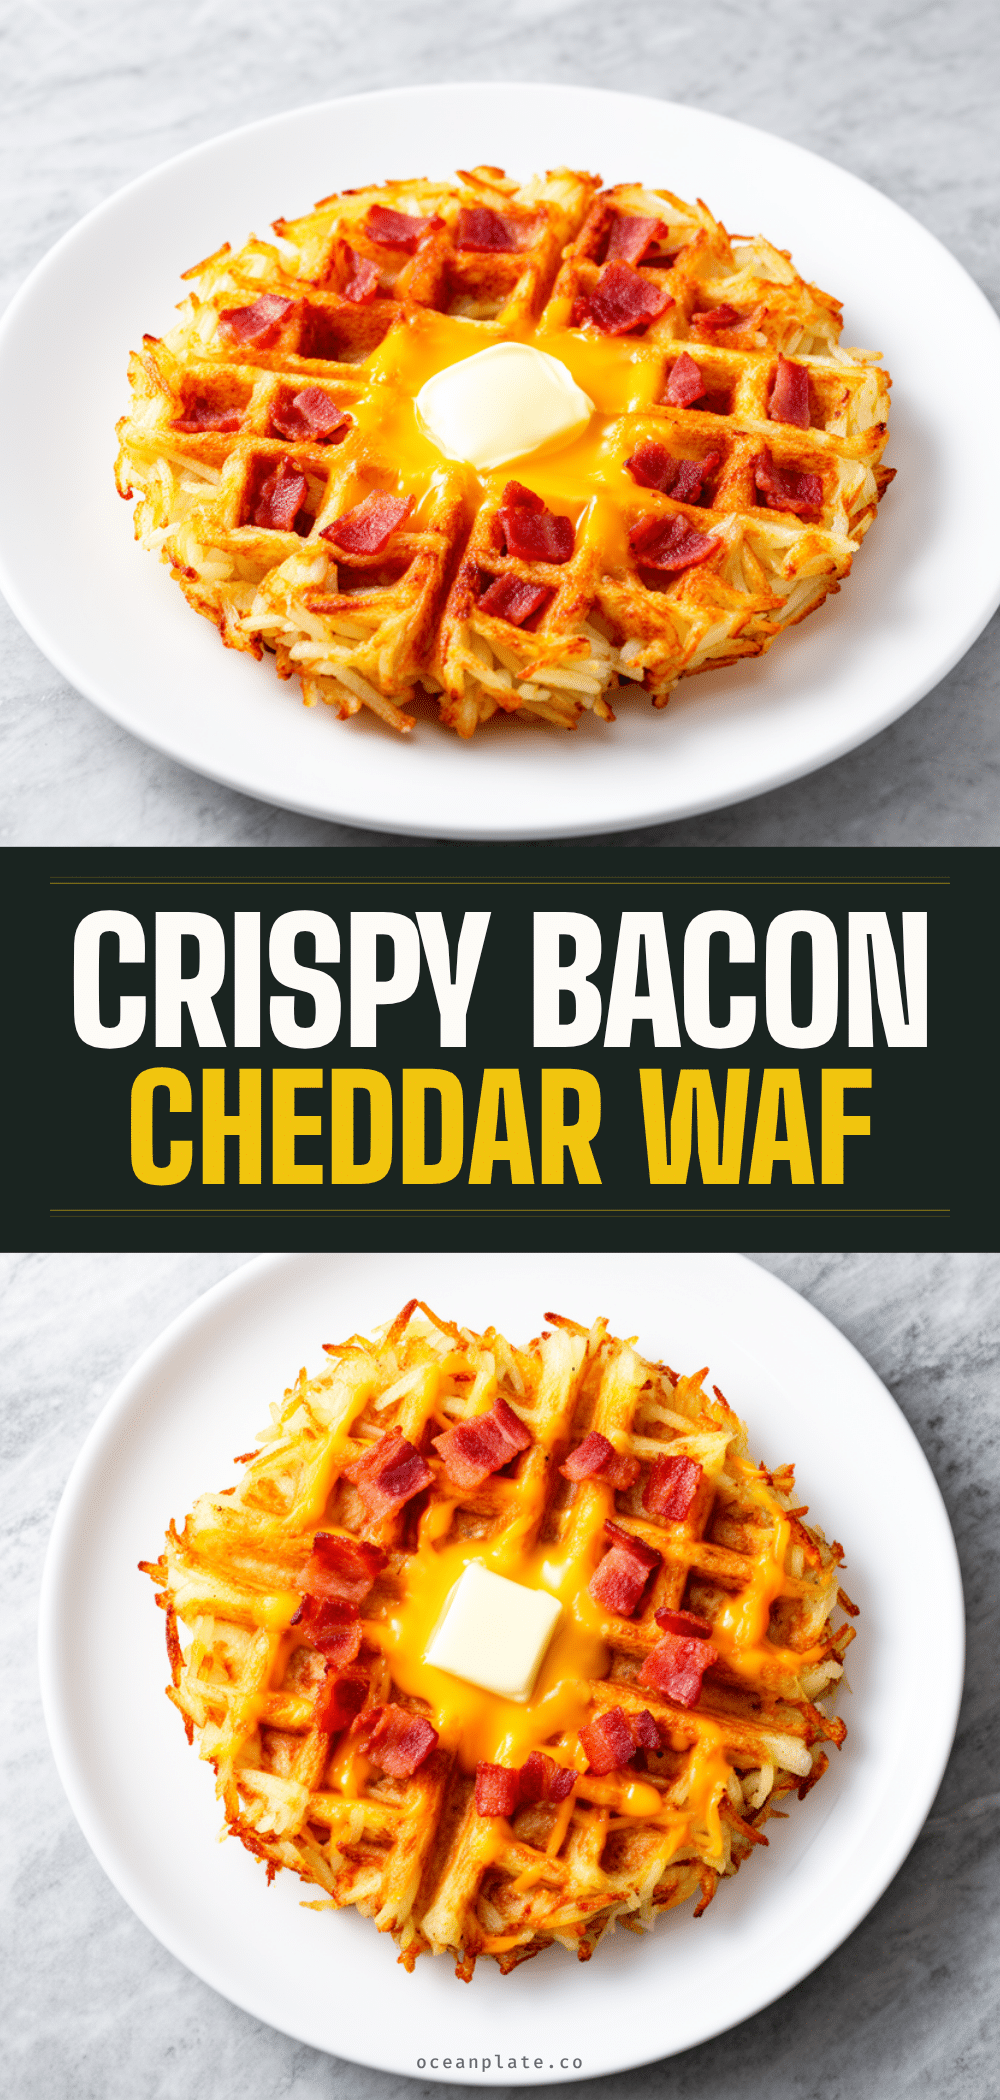

Crispy Bacon and Cheddar Hash Brown Waffles: 5-Min Breakfast
- Total Time: 10 minutes
- Yield: 4-6 servings 1x
Description
A fast, savory breakfast waffle made with frozen hash browns, crispy bacon, and sharp cheddar cheese. Crispy on the outside, soft on the inside, and perfect for busy mornings or meal prep.
Ingredients
- 16 ounces frozen shredded hash browns
- 1 cup sharp cheddar cheese, shredded
- 6–8 strips cooked bacon, crumbled
- 1 large egg
- 2 tablespoons all-purpose flour
- 1/2 teaspoon garlic powder
- 1/2 teaspoon onion powder
- Salt and black pepper to taste
- Non-stick cooking spray
Instructions
- Cook bacon in the oven at 400°F (200°C) for 15-20 minutes until crispy. Let cool and crumble into small bits.
- Thaw frozen hash browns slightly until soft enough to mix, but not completely melted.
- In a large mixing bowl, combine hash browns, shredded cheddar, crumbled bacon, egg, flour, garlic powder, onion powder, salt, and pepper. Toss until evenly distributed.
- Preheat a standard waffle iron to medium-high heat and spray generously with non-stick cooking spray.
- Scoop 1/2 to 3/4 cup of the mixture onto the center of the waffle iron. Press down into an even layer.
- Close the lid and cook for 4-5 minutes until golden brown, crispy, and steam stops escaping.
- Remove waffles carefully with a spatula. Serve immediately or place on a wire rack in a 200°F oven to keep warm while cooking the rest.
Notes
Do not use pre-shredded cheese as anti-caking agents can make waffles gummy. Ensure hash browns are not ice-cold blocks when mixing. For best crispiness, store cooked waffles on a wire rack rather than stacking them on a plate. These freeze well for up to 3 months.
- Prep Time: 5 minutes
- Cook Time: 5 minutes
- Category: Breakfast
- Cuisine: American
Nutrition
- Serving Size: 1 waffle
- Calories: 280
- Sugar: 1
- Sodium: 450
- Fat: 14
- Saturated Fat: 6
- Carbohydrates: 28
- Fiber: 2
- Protein: 12
Keywords: breakfast, waffles, hash browns, bacon, cheddar, quick breakfast, meal prep, freezer friendly, savory waffles


