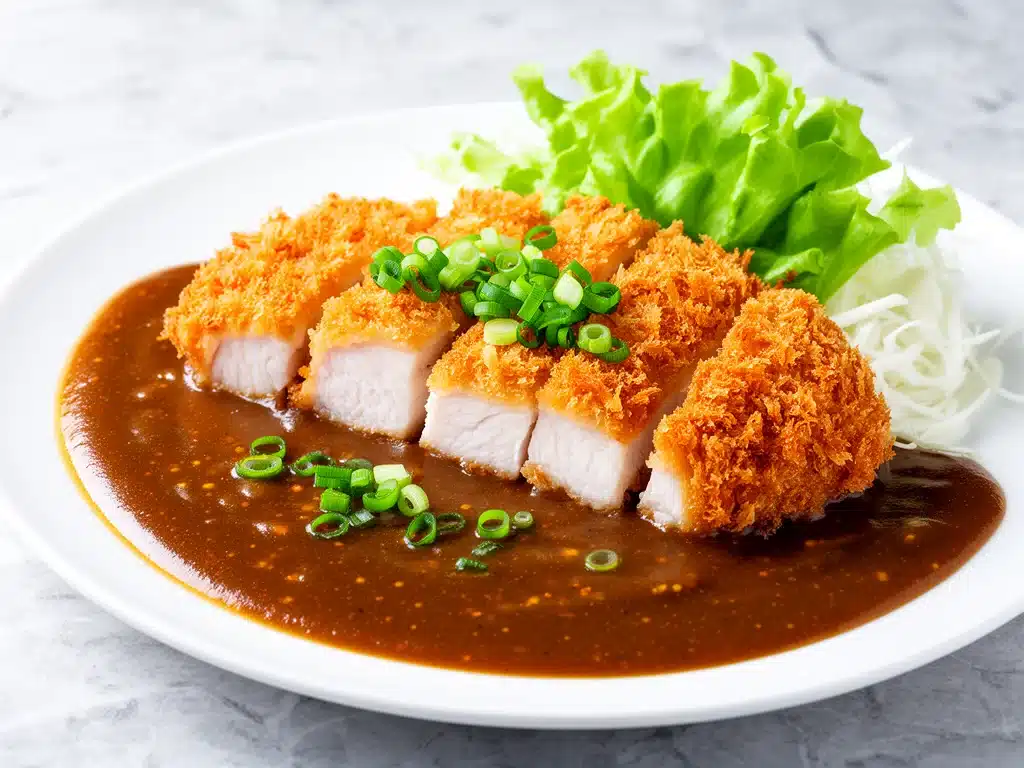
I have a confession to make. For years, I was the person who ordered delivery on rainy Sundays. You know the vibe: it’s pouring outside, I’m wearing sweatpants, and I’m scrolling through apps looking for something warm, comforting, and slightly indulgent. Usually, that meant a greasy pizza or, more often than not, a box of Japanese curry from a local spot.
I loved that curry. The thick, sweet-savory sauce. The soft potatoes and carrots. And that crunchy, breaded chicken cutlet sitting on top, slowly soaking up the gravy. But here’s the thing—every time I ordered it, I’d finish the meal feeling sluggish. The sauce was okay, but the chicken was often soggy by the time it arrived, and the curry powder tasted like it had been sitting in a jar since 1995.
Last winter, I decided I’d had enough. I was tired of paying $18 for a mediocre meal and waiting 45 minutes for it. I wanted the crunch. I wanted the depth of flavor that comes from actually building a sauce from scratch. I wanted Crispy Japanese Chicken Katsu Curry better than takeout, and I wanted it in my own kitchen.
So, I spent three weekends experimenting. I burned onions. I overcooked chicken until it was like shoe leather. I used the wrong type of panko and ended up with a dry, chalky coating. But on the fourth attempt, something clicked. I adjusted the spice blend, perfected the breading technique, and simmered the curry sauce low and slow with a secret ingredient I’ll share later. When I took that first bite—crunchy exterior giving way to juicy chicken, draped in a rich, aromatic sauce—I nearly cried. My partner looked at me like I’d just invented fire.
This isn’t just a recipe. It’s my redemption arc. It’s the dish that saved my Sunday nights. And honestly? Once you make this Crispy Japanese Chicken Katsu Curry at home, you’ll never look at a takeout box the same way again. It’s easier than you think, and the smell filling your house will make you feel like a Michelin-star chef.
Why You’ll Love This Homemade Katsu Curry
There are about ten reasons I keep making this, but let’s be real—you need the big ones to get excited. Here’s why this Crispy Japanese Chicken Katsu Curry has completely taken over our dinner rotation:
- The Crunch Is Unbeatable — Seriously. I’ve tried regular breadcrumbs, flour dredges, and even cornflake crumbs. Nothing beats properly pressed panko breadcrumbs. They stay crispy for hours, even when they sit in the sauce. I’ve served this to picky eaters and food snobs alike, and the crunch is always the first thing they comment on.
- It’s Actually Faster Than Delivery — I know, I know. “Cooking takes forever.” Not this. Between prepping the chicken and simmering the sauce, you’re looking at about 45 minutes. That’s less time than it takes for a driver to find my street. Plus, you’re doing it in your pajamas.
- The Sauce Is Deep and Complex — Store-bought curry roux blocks are convenient, sure. But homemade sauce (even with a little help from a roux block if you’re lazy) has layers of flavor. Sweet onions, earthy spices, a hint of fruitiness. It’s savory, slightly sweet, and incredibly aromatic. It tastes like you spent hours on it, but you didn’t.
- It’s a Crowd-Pleaser — This dish is universally loved. Kids love the mild sweetness and the fun “dipping” aspect. Adults love the sophistication of the spices. It’s comforting without being heavy. I’ve made this for dinner parties, and it always disappears first. Better than my creamy pumpkin alfredo pasta in terms of speed, though that one is a close second for cozy vibes.
- Leftovers Taste Even Better — The sauce thickens overnight, and the flavors meld together. By day two, the curry is richer and more cohesive. I deliberately make extra for lunch, and I’ll fight anyone who tries to steal my portion.
This is my go-to when I need dinner to just work. No complicated techniques, no weird ingredients you can’t find, just reliable, delicious food that makes everyone happy. And the best part? You control the spice level. Want it mild? Easy. Want it spicy? Add more curry powder or a dash of gochujang. It’s your curry, your rules.
Ingredients You’ll Need for the Perfect Katsu
Here’s the best part: you probably have most of the ingredients for the chicken already. For the curry, you’ll need to grab a few specific items, but they’re pantry staples that are worth keeping on hand.
For the Chicken Katsu
Chicken breasts (2 large, boneless, skinless) — I prefer chicken thighs for more flavor, but breasts are leaner and more traditional for katsu. If you use thighs, remove the skin. Pound them to an even ½-inch thickness. This is crucial for even cooking.
All-purpose flour (1 cup / 120g) — For the first dredge. It helps the egg wash stick. Don’t skip this step, or your breading will slide off.
Eggs (2 large, beaten) — Whisk them well with a fork. You want a smooth, even coating. Some people add a splash of milk, but I stick to straight egg for maximum crispiness.
Panko breadcrumbs (2 cups / 180g) — This is non-negotiable. Regular breadcrumbs are too fine and dense. Panko has those flat, flaky shards that create air pockets, resulting in that signature shattering crunch. Buy the Japanese brand if you can, like Sunflakes or Marukome.
Oil for frying (½ cup / 120ml) — I use a neutral oil with a high smoke point, like canola, vegetable, or peanut oil. Avoid olive oil here; it has a low smoke point and a strong flavor that clashes with the curry.
Salt and black pepper — To season the chicken before dredging. Keep it simple.
For the Japanese Curry Sauce
Onions (2 large, thinly sliced) — The sweet, caramelized onion is the backbone of Japanese curry. Don’t rush this. I cook mine for at least 15-20 minutes until they’re jammy and sweet.
Garlic and ginger (3 cloves garlic, 1-inch piece ginger, minced) — Fresh is best. Jarred garlic works in a pinch, but fresh ginger adds a brightness that really lifts the heavy sauce.
Chicken or vegetable broth (2 cups / 480ml) — Low-sodium is better so you can control the salt. If you don’t have broth, water works, but broth adds depth.
Japanese curry roux blocks (2 packages, 400g total) — Brands like S&B Golden Curry or Vermont Curry are standard. They come in mild, medium, and hot. I usually mix medium and hot for balance. This is the shortcut that makes this recipe easy.
Vegetables (2 carrots, 2 potatoes, 1 bell pepper) — Classic combo. Carrots for sweetness, potatoes for thickness, bell pepper for a fresh note. Cut them into 1-inch chunks. Potatoes should be soaked in water to remove excess starch, or they’ll make the sauce gloopy.
Secret Ingredient: Ketchup or Apple Sauce (1 tablespoon) — This is my trick. A spoonful of ketchup adds tang and umami, balancing the sweetness. Apple sauce adds natural fruitiness. I usually use ketchup because I always have it.
Optional Add-ins:
Apples or honey — For extra sweetness.
Soy sauce — A splash for umami.
Dark chocolate — A square of dark chocolate melted in at the end adds richness and color. Yes, really.
Equipment Needed
You don’t need fancy equipment for this. Here’s what I actually use:
Large skillet or Dutch oven — I use a 12-inch cast iron skillet for frying. It holds heat well and gives a nice crust. For the sauce, a large Dutch oven or heavy-bottomed pot is best. It needs to hold 4-6 cups of liquid and vegetables.
Cutting board and sharp knife — For slicing onions, carrots, potatoes, and pounding chicken. A sharp knife makes pounding the chicken much easier and safer.
Meat mallet or rolling pin — To pound the chicken breasts. If you don’t have a mallet, use the bottom of a heavy pan or a rolling pin. Even thickness is key.
Three shallow bowls — For the dredging station: flour, egg, panko. Wide bowls work best so you can easily coat the chicken.
Tongs and spatula — For flipping the chicken. Tongs are better for handling the breaded cutlets without breaking the coating.
Wire rack and baking sheet — Optional, but I like to place fried chicken on a wire rack instead of paper towels. It keeps the bottom crispy so it doesn’t get soggy from steam.
Whisk — For breaking up the curry roux blocks smoothly into the sauce.
How to Make It: Step-by-Step
Alright, let’s make this! I’m walking you through exactly how I do it, including the little tricks I’ve picked up over years of testing. This process might seem like a lot, but it’s mostly hands-off time.
Step 1: Prep the Vegetables and Chicken (15 minutes)
Peel and chop your carrots and potatoes into 1-inch chunks. Place them in a bowl of cold water to prevent browning and remove excess starch. Slice the onions thinly. Mince the garlic and grate the ginger. Pound the chicken breasts between plastic wrap or in a zip-top bag until they are about ½-inch thick. Season both sides generously with salt and pepper. If you’re making fluffy buttermilk pancakes for breakfast later, now is a good time to start the curry sauce so it simmers while you cook.
Step 2: Set Up the Breading Station (5 minutes)
Set up three shallow bowls. Bowl 1: flour. Bowl 2: beaten eggs. Bowl 3: panko breadcrumbs. I like to add a pinch of salt and pepper to the panko too, for extra flavor. Have your oil heating in the skillet over medium-high heat. You want it to reach 350°F (175°C). If you don’t have a thermometer, dip the handle of a wooden spoon into the oil; if bubbles form around it, it’s ready.
Step 3: Bread the Chicken (5 minutes)
Dredge each chicken breast in flour, shaking off excess. Dip it into the egg wash, ensuring it’s fully coated. Then, press it firmly into the panko breadcrumbs. Use your hands to press the crumbs into the chicken—don’t just sprinkle them on. Flip and press the other side. Place the breaded chicken on a plate. Repeat with the second breast. Let them rest for 5 minutes while the oil heats up. This helps the breading adhere.
Step 4: Fry the Katsu (8-10 minutes)
Carefully place the chicken in the hot oil. Don’t overcrowd the pan; fry one or two pieces at a time. Cook for 3-4 minutes per side, or until golden brown and crispy. The internal temperature should reach 165°F (74°C). If the browning is too fast, lower the heat. If it’s too slow, increase it. Remove the chicken and place it on a wire rack to drain. Let it rest for 5 minutes before slicing. This keeps the juices inside.
Step 5: Make the Curry Sauce (30 minutes)
In your large pot, heat a tablespoon of oil over medium heat. Add the sliced onions and cook, stirring occasionally, until they are soft and caramelized, about 15 minutes. Add the garlic and ginger and cook for 1 minute until fragrant. Add the carrots and potatoes (drained) and stir to coat. Pour in the chicken broth. Bring to a boil, then reduce heat to low, cover, and simmer for 15-20 minutes until the vegetables are tender.
Step 6: Add the Roux and Finish (5 minutes)
Turn off the heat. Break the curry roux blocks into small pieces and add them to the pot. Stir gently with a whisk until the roux is completely melted and incorporated. Turn the heat back to low and simmer for another 5 minutes, stirring frequently, until the sauce thickens. Stir in your secret ingredient (ketchup or apple sauce). Taste and adjust seasoning if needed. The sauce should be thick enough to coat the back of a spoon.
Step 7: Slice and Serve
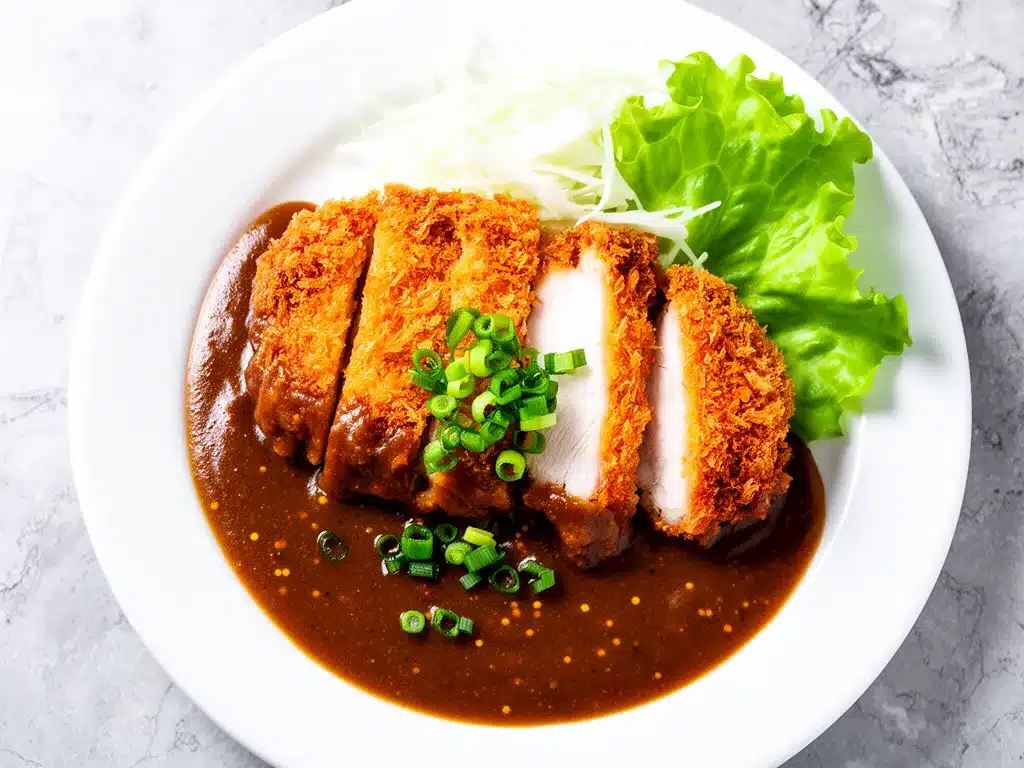
Slice the rested chicken katsu into strips. Serve over steamed Japanese short-grain rice. Ladle the hot curry sauce over the rice and chicken. Garnish with green onions or pickled ginger (beni shoga) if you have it. Eat immediately while the chicken is still crunchy.
Expert Tips & Tricks for Success
Here’s everything I’ve learned from making this dozens of times. These tips will save you from my mistakes.
Press the Panko Firmly
The number one reason katsu falls apart is loose breading. When you coat the chicken, press the panko into the meat with your fingers. You want a thick, even layer. If it looks patchy, press more. This creates a shield that stays crispy.
Rest the Fried Chicken
I know it’s tempting to slice it right away, but wait. Letting the chicken rest for 5 minutes allows the juices to redistribute. If you cut it immediately, all the juice runs out, and the chicken becomes dry. The crust also sets, staying crunchier longer.
Caramelize the Onions Properly
Japanese curry is sweet because of the onions. Don’t rush this step. Cook them on medium-low heat until they are deep golden brown and jammy. This takes time, but it’s what gives the sauce that authentic, complex flavor. If you’re in a huge hurry, you can use a food processor to soften them, but the flavor won’t be the same.
Control the Heat for Frying
If the oil is too hot, the outside burns before the inside cooks. If it’s too cool, the chicken absorbs oil and becomes greasy. Aim for 350°F. If you don’t have a thermometer, test it with a pinch of panko. If it sizzles and turns golden in 30 seconds, you’re good.
Thicken the Sauce Correctly
Japanese curry roux blocks contain flour and fat. They need time to melt and thicken. Don’t add them while the pot is boiling vigorously. Turn off the heat first, add the roux, stir until melted, then turn the heat back on low. This prevents lumps and ensures a smooth sauce.
Use Short-Grain Rice
Japanese short-grain rice is sticky and slightly sweet, which pairs perfectly with the rich curry. Long-grain rice is too fluffy and dry. If you can’t find Japanese rice, Arborio rice is a decent substitute. Don’t use basmati or jasmine.
Variations & Substitutions
Once you’ve nailed the basic version, here’s how you can mix it up. I’ve tried all of these.
Pork Katsu Curry
Swap chicken for pork loin or tenderloin. Pork is traditional in many Japanese curry houses. Pound it to ½-inch thickness and bread it the same way. Pork pairs beautifully with the sweet curry sauce.
Vegetarian Katsu Curry
Use eggplant or tofu as the main cutlet. Slice eggplant into ½-inch rounds, salt them, and let them sit for 10 minutes to draw out bitterness. Pat dry, then bread and fry. For tofu, use extra-firm tofu, press it, slice it, and bread it. The sauce remains the same.
Spicy Katsu Curry
Add 1-2 teaspoons of gochujang (Korean chili paste) or curry powder to the sauce for extra heat. You can also sprinkle Togarashi (Japanese seven-spice blend) on top before serving.
Curry Egg
A fried egg (sunny-side up) on top of the curry is a classic addition. The runny yolk mixes with the sauce for a rich, creamy texture. It’s indulgent and delicious.
Gluten-Free Option
Use gluten-free flour and gluten-free panko (available at most grocery stores). Most curry roux blocks contain wheat, so check the label. Some brands offer GF versions, or you can make your own roux with gluten-free flour and butter.
Serving & Storage
How to Serve:
I usually serve this straight from the skillet at the dinner table—it looks rustic and stays warm. But here are other ways I’ve enjoyed it:
- Sides: Simple green salad with rice vinegar dressing, pickled radish, or steamed broccoli.
- Toppings: Green onions, pickled ginger, shichimi togarashi, or a fried egg.
- Drink Pairing: Cold beer (Asahi or Sapporo) or green tea. The bitterness of green tea cuts through the richness of the curry.
Storage Instructions:
Refrigerator:
Store the curry sauce and chicken separately in airtight containers for up to 4 days. The sauce thickens in the fridge, which is normal.
Reheating:
Best method: Add a splash of water or broth to the sauce in a saucepan over low heat. Stir until heated through. Reheat the chicken in an air fryer or oven at 375°F for 5-7 minutes to keep it crispy. Do not microwave the chicken, or it will get soggy. For the chicken, you can also re-fry it briefly in oil.
Freezing:
The curry sauce freezes well for up to 3 months. Thaw in the fridge overnight and reheat with added water. Do not freeze the fried chicken; the texture will be terrible after thawing and reheating. Make the chicken fresh when you serve.
Pro tip:
If the sauce is too thick when reheating, add water a little at a time until it reaches your desired consistency. Japanese curry is meant to be thick, but it should still be ladle-able.
Nutrition Information
I’m not a nutritionist, but here’s the breakdown if you’re tracking. Keep in mind that this is a rich, indulgent meal.
Per Serving (based on 4 servings):**
- Calories: 650
- Protein: 35g
- Carbs: 70g
- Fiber: 4g
- Sugar: 12g
- Fat: 22g
- Saturated Fat: 6g
- Cholesterol: 110mg
- Sodium: 800mg
What’s Good:
Decent protein from the chicken. Vegetables add fiber and vitamins. The curry spices have anti-inflammatory properties.
What to Know:
Higher in calories and carbs due to the rice, breading, and roux. Contains gluten and dairy (in some roux brands). Moderate sodium.
My Take:
Look, this is comfort food. It’s not a diet recipe. But it’s way better than takeout, costs less, and I know exactly what’s in it. When I want to make it lighter, I use less oil for frying and more vegetables in the sauce. But usually? I just eat a reasonable portion and enjoy it. Life’s too short to skip the crunchy chicken.
Final Thoughts
So that’s my Crispy Japanese Chicken Katsu Curry! I’ve probably talked your ear off at this point, but when you make a recipe this often, you have a lot to say about it.
This has saved weeknight dinners more times than I can count. It’s my answer to “what’s for dinner” when I’m tired, don’t want takeout, and still want something that tastes really good. My kids are happy, my husband’s happy, and I’m happy because I’m not stressed about cooking.
Make it yours! Try different add-ins, swap in your favorite vegetables, adjust the spice level. The best recipes are the ones you adapt to your family’s tastes. And if you’re feeling adventurous, try making a homemade roux from scratch instead of using blocks. It’s more work, but the flavor is incredible.
If you make this, drop a comment and let me know what you think! I love hearing how recipes turn out in your kitchen. And if something doesn’t work, tell me that too—I’m here to help troubleshoot.
Happy cooking! And I hope your kitchen smells half as good as mine does right now.
Frequently Asked Questions
Can I bake the chicken instead of frying?
You can, but it won’t be as crispy. To bake, place the breaded chicken on a wire rack over a baking sheet. Brush lightly with oil. Bake at 400°F (200°C) for 20-25 minutes, flipping halfway through. It will be healthier, but the texture will be more like a breaded cutlet than a true katsu. For the best crunch, frying is the way to go.
Why is my curry sauce too thin?
Japanese curry sauce should be thick, like a stew. If it’s too thin, let it simmer uncovered for another 10-15 minutes to reduce. If it’s still too thin, you can add a slurry of 1 teaspoon cornstarch mixed with 1 tablespoon water. Stir it in and simmer for 2 minutes. Or, add another half-block of roux if you have it.
Why is my curry sauce too thick?
Add water or broth, a little at a time, while stirring. Japanese curry thickens as it cools, so keep it slightly thinner than you want it when you serve it. If it’s too thick, it will become gluey when it hits your plate.
Can I use regular curry powder instead of roux blocks?
You can make a roux from scratch using butter, flour, and curry powder, but it’s more work. If you want to skip the blocks, sauté butter and flour, add curry powder, then whisk in broth. Simmer until thick. It’s delicious, but the roux blocks are convenient and consistent. I usually use blocks for weeknights and make scratch roux for weekends.
How spicy is Japanese curry?
It’s generally mild. Most commercial roux blocks are labeled mild, medium, or hot. The “medium” spice level is similar to a mild American curry powder. If you want it spicier, add gochujang, cayenne, or fresh chili peppers. You can always add heat, but you can’t take it away.
Can I make this ahead for a dinner party?
Yes! Make the curry sauce up to 2 days ahead and store in the fridge. Cook the chicken fresh right before serving (takes 10 minutes). Reheat the sauce gently and toss with hot rice. It won’t be quite as good as fresh, but it’s close and saves you stress during the party. I do this all the time for guests.
What type of rice should I use?
Japanese short-grain rice is best. It’s sticky and slightly sweet. If you can’t find it, Arborio rice is a good substitute. Avoid long-grain rice like basmati or jasmine, as they are too dry and fluffy for this dish.
Pin This Recipe!
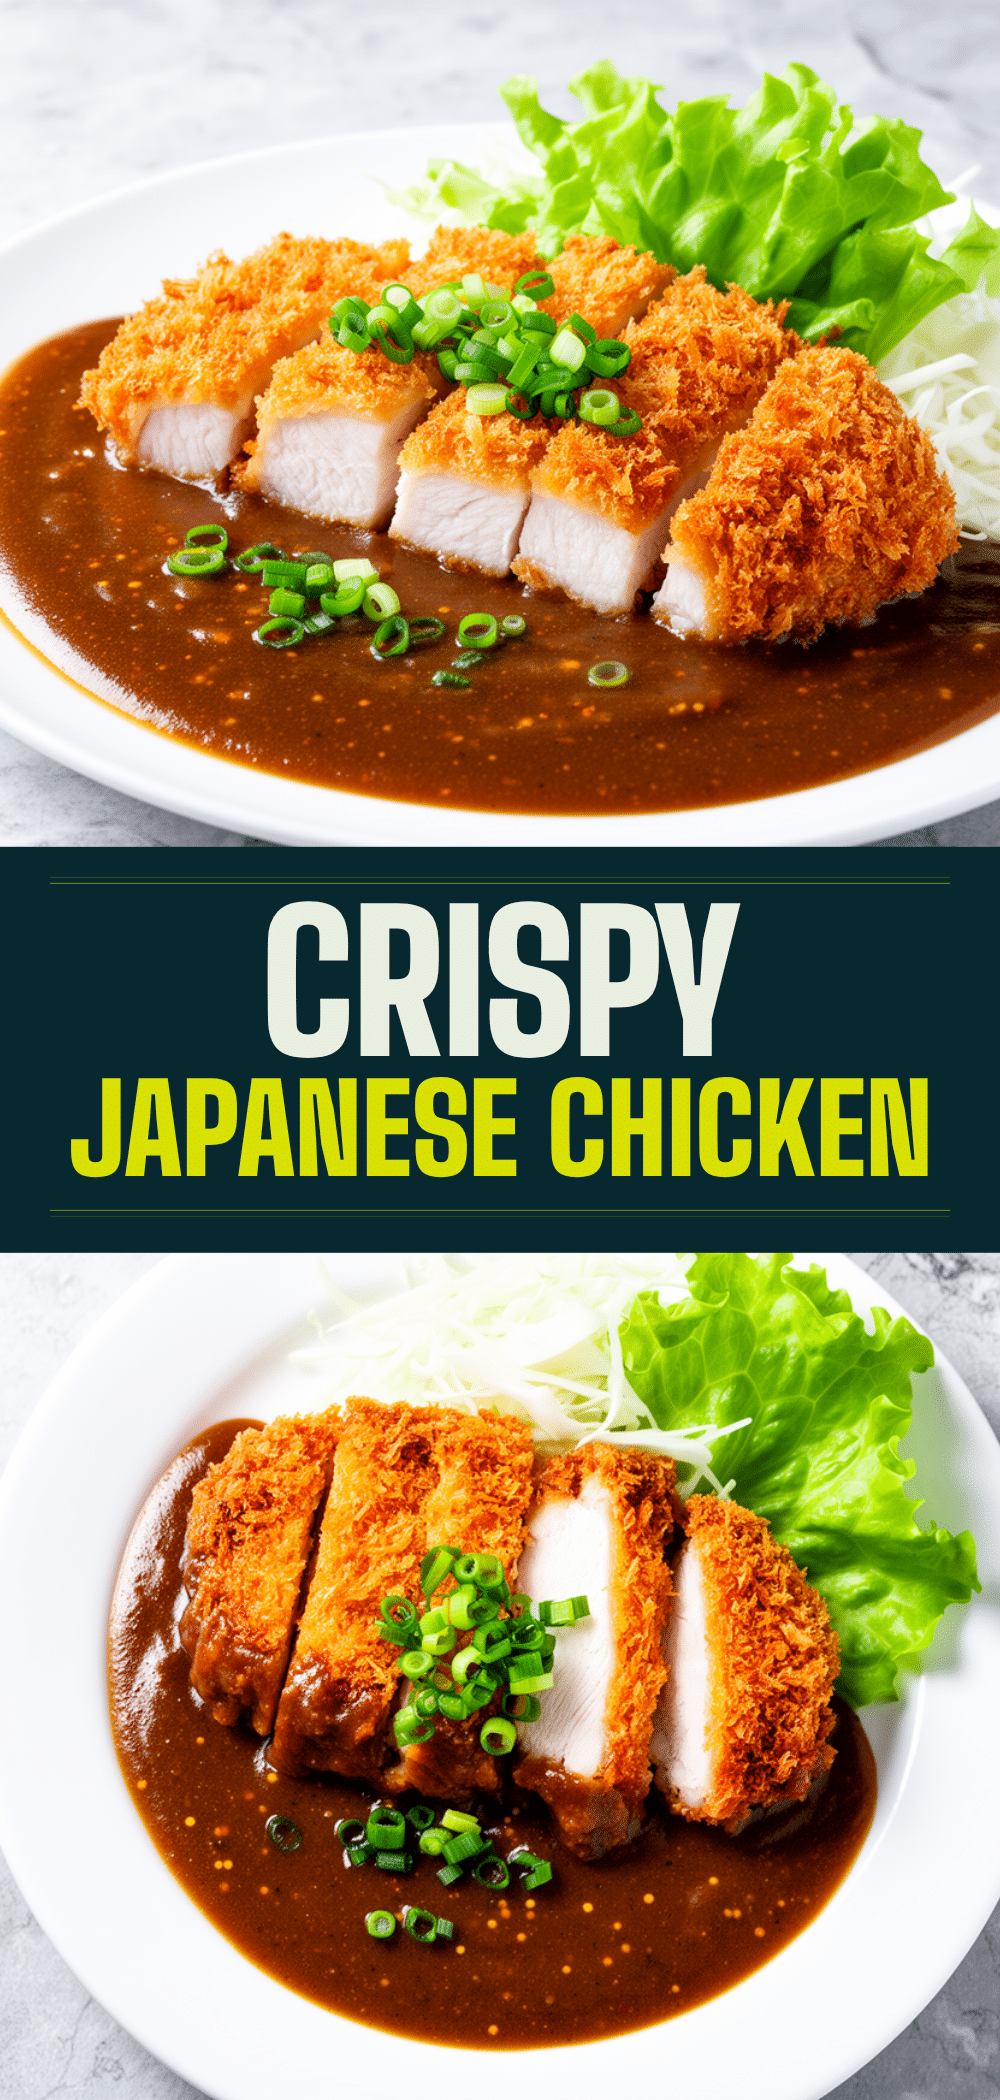
Crispy Japanese Chicken Katsu Curry: Easy Homemade Recipe
- Total Time: 45 minutes
- Yield: 4 servings 1x
Description
A homemade version of Japanese Chicken Katsu Curry featuring crispy panko-breaded chicken cutlets and a rich, sweet-savory curry sauce made with roux blocks, caramelized onions, and vegetables.
Ingredients
- 2 large boneless, skinless chicken breasts
- 1 cup all-purpose flour
- 2 large eggs, beaten
- 2 cups panko breadcrumbs
- 1/2 cup neutral oil (canola, vegetable, or peanut) for frying
- Salt and black pepper
- 2 large onions, thinly sliced
- 3 cloves garlic, minced
- 1-inch piece ginger, minced
- 2 cups chicken or vegetable broth
- 2 packages Japanese curry roux blocks (400g total)
- 2 carrots, cut into 1-inch chunks
- 2 potatoes, cut into 1-inch chunks
- 1 bell pepper, cut into 1-inch chunks
- 1 tablespoon ketchup or apple sauce
Instructions
- Peel and chop carrots and potatoes into 1-inch chunks; soak in cold water. Slice onions thinly. Mince garlic and grate ginger. Pound chicken breasts to 1/2-inch thickness and season with salt and pepper.
- Set up a breading station with three shallow bowls containing flour, beaten eggs, and panko breadcrumbs. Heat oil in a large skillet to 350°F (175°C).
- Dredge chicken in flour, dip in egg, then press firmly into panko breadcrumbs. Let rest for 5 minutes.
- Fry chicken in hot oil for 3-4 minutes per side until golden brown and internal temperature reaches 165°F (74°C). Place on a wire rack to rest for 5 minutes.
- In a large pot, sauté onions until caramelized (15-20 minutes). Add garlic and ginger, cook for 1 minute. Add carrots, potatoes, and broth. Simmer covered for 15-20 minutes until vegetables are tender.
- Turn off heat. Break curry roux blocks into pieces and whisk into the pot until melted. Return to low heat and simmer for 5 minutes until thickened. Stir in ketchup or apple sauce.
- Slice the rested chicken katsu into strips. Serve over steamed Japanese short-grain rice, ladle curry sauce over the top, and garnish with green onions or pickled ginger.
Notes
Press panko firmly onto chicken to ensure it stays crispy. Rest fried chicken for 5 minutes to keep juices in. Caramelize onions slowly for authentic flavor. Use Japanese short-grain rice for best texture. Store sauce and chicken separately; reheat chicken in air fryer or oven to maintain crispiness.
- Prep Time: 15 minutes
- Cook Time: 30 minutes
- Category: Main Course
- Cuisine: Japanese
Nutrition
- Serving Size: 1 chicken cutlet wit
- Calories: 650
- Sugar: 12
- Sodium: 800
- Fat: 22
- Saturated Fat: 6
- Carbohydrates: 70
- Fiber: 4
- Protein: 35
Keywords: Japanese curry, chicken katsu, homemade curry, crispy chicken, comfort food, weeknight dinner, panko chicken


