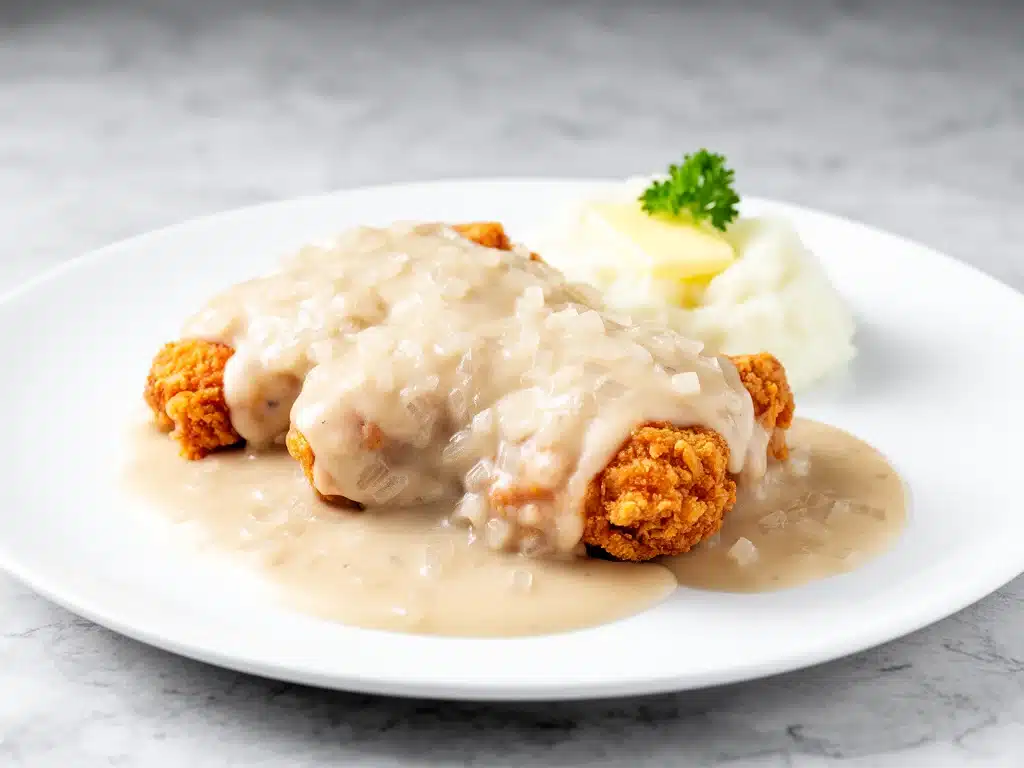
My husband has a specific look he gives me when I say, “I’m making something quick for dinner.” It’s a mix of hope and deep, skeptical exhaustion. Because let’s be honest, on weeknights, “quick” usually means cereal or whatever is left in the freezer from a grocery trip three weeks ago. But last Tuesday, I pulled this smothered chicken out of the oven, and that look vanished instantly. He took one bite, closed his eyes, and actually said, “Can we have this every week?”
I’m not promising we can have it every week (he’d probably revolt after three days), but I am promising that this smothered chicken with creamy onion gravy is the kind of dish that turns a chaotic Tuesday into a memory. It’s the kind of meal that smells like a hug from your grandmother. It’s hearty, it’s rich, and it’s incredibly forgiving if you’re tired.
I’ve tested this smothered chicken recipe at least a dozen times over the last few years. I’ve tried boneless breasts, I’ve tried thighs, I’ve tried different onions, and I’ve even tried skipping the browning step (big mistake). What you’re getting here is the perfected version—the one that gives you that perfect golden crust, tender meat, and a gravy so thick and flavorful you’ll want to drink it. This smothered chicken is hands-down the best way to use up those chicken thighs, and it pairs beautifully with something like fluffy buttermilk pancakes if you’re doing a massive Sunday brunch spread, though it’s definitely a dinner hero.
Why You’ll Love This Smothered Chicken
There are about ten reasons I keep making this recipe, but here are the big ones that keep it in our regular rotation.
It’s Pure Comfort Food — Seriously, there is nothing else like it. The combination of savory browned chicken and that sweet, caramelized onion gravy hits every single comfort food button. I’ve served this to my picky 10-year-old, and he asked for the “sauce for his rice” three times. That’s the highest praise I can give.
Uses Affordable Cuts — We’re using bone-in, skin-on chicken thighs. They’re cheaper than breasts, they don’t dry out in the oven, and they stay juicy even if you’re running late. Plus, the skin crisps up beautifully under the gravy.
One-Pan Wonder — You brown the chicken, you sauté the onions in the same pan, you make the gravy in the same pan, and you bake it all in the same dish. Cleanup is a breeze. I love a recipe that doesn’t require a mountain of dirty dishes.
Meal Prep Friendly — This tastes even better the next day. The flavors meld together overnight. I deliberately make a double batch on Sundays so I have lunch sorted for Monday and Tuesday. It reheats perfectly in the microwave or on the stovetop.
Gluten-Free Option — If you swap the flour for a gluten-free blend or cornstarch, this becomes a naturally gluten-free meal. No one in my family needs to know it’s GF; they just think it’s really good smothered chicken.
This is my go-to when I need dinner to just work. No fancy techniques, no weird ingredients, just reliable, delicious food that makes everyone happy. It’s rustic, it’s hearty, and it’s the smothered chicken your family will crave.
Ingredients You’ll Need
Here’s the best part: you probably have most of this already. This isn’t a recipe that requires a specialty trip to the store. It’s pantry staples and fresh basics.
Chicken Thighs (6-8 pieces, bone-in and skin-on) — This is non-negotiable. Boneless breasts will turn into rubbery hockey pucks in this long bake. Skin-on thighs stay juicy and get crispy. If you must use breasts, use boneless and reduce the baking time, but thighs are superior here.
Yellow Onions (3 large, sliced thin) — Don’t skimp on the onions. You want a full pound. Yellow onions are sweet when cooked down and savory when raw. I slice them paper-thin so they melt into the gravy.
Butter (3 tablespoons) — For browning the chicken and sautéing the onions. It adds flavor that oil just can’t match. Unsalted is best so you control the salt.
All-Purpose Flour (3 tablespoons) — This is what thickens the gravy. Dusting the chicken in flour before browning helps create a crust, and the leftover flour in the pan helps thicken the sauce.
Chicken Broth (2 cups, low-sodium) — I always use low-sodium so I can control the saltiness. If you don’t have broth, water with bouillon cubes works in a pinch.
Heavy Cream (½ cup) — This is what makes the gravy “creamy.” It adds richness and stops the gravy from being too thin. You can use half-and-half if you want it slightly lighter, but heavy cream is the gold standard.
Garlic Powder & Onion Powder (1 teaspoon each) — These add a deep, savory backbone that fresh garlic alone can’t always achieve in a long bake.
Dried Thyme (1 teaspoon) — Thyme and chicken are best friends. It adds an earthy, herbal note that cuts through the richness of the gravy.
Salt & Black Pepper — Generous amounts. The flour dusting needs to be seasoned well so the chicken isn’t bland.
Optional Add-ins: I sometimes throw in 4-5 strips of bacon, cooked crispy and crumbled on top right before serving. It adds a smoky crunch that is amazing. Or, if you want to add some color, toss in a handful of fresh parsley at the end.
Equipment Needed
You don’t need fancy equipment for this. Here’s what I actually use.
Large Cast Iron Skillet — I prefer cast iron for browning because it holds heat well and creates that perfect crust. Stainless steel works too, but avoid non-stick if you want that deep browning. My cast iron skillet is well-seasoned and just perfect for this.
9×13 Inch Baking Dish — You need something that can go from the stovetop (if you want to transfer everything) or just be filled with the chicken and gravy. A ceramic or glass dish works great.
Sharp Knife & Cutting Board — For slicing those onions. A sharp knife makes quick work of it. Dull knives are a pain.
Wooden Spoon — For stirring the onions and scraping up those browned bits (the fond) from the bottom of the pan. Those bits are flavor gold.
Measuring Cups and Spoons — Pretty standard stuff. Dollar store versions work fine.
Whisk — To mix the flour and broth smoothly so you don’t get lumps in your gravy.
How to Make It: Step-by-Step
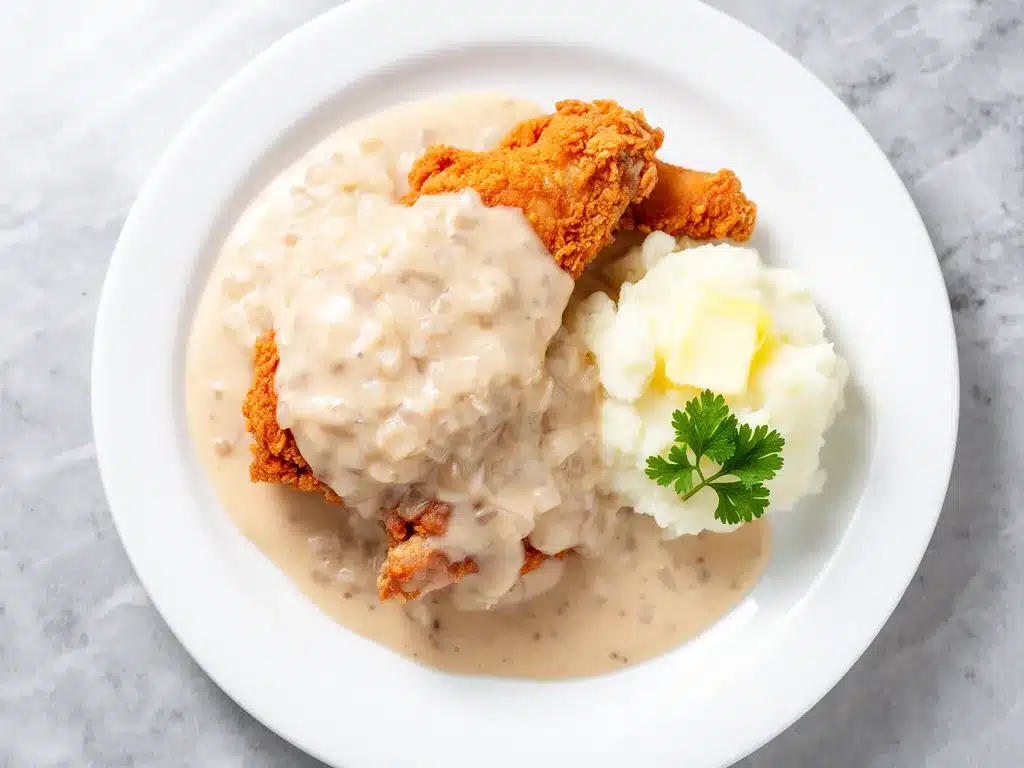
Alright, let’s make this! I’m walking you through exactly how I do it, including the little tricks I’ve picked up. This smothered chicken recipe is simple, but attention to detail makes all the difference.
Step 1: Prep the Chicken (5 minutes)
Preheat your oven to 375°F (190°C). Pat the chicken thighs completely dry with paper towels. This is crucial. If the chicken is wet, it will steam instead of brown. Season the chicken generously with salt, pepper, garlic powder, onion powder, and dried thyme. Then, lightly dust each piece with flour, shaking off any excess. You want a thin coat, not a thick batter.
Step 2: Brown the Chicken (10 minutes)
Heat the butter in your large skillet over medium-high heat. Once the butter is foaming and hot, add the chicken pieces skin-side down. Don’t crowd the pan—do this in two batches if your skillet isn’t huge. Let them cook undisturbed for 4-5 minutes until the skin is deep golden brown and crispy. Flip and cook for another 2-3 minutes on the other side. Remove the chicken and set it aside on a plate. Don’t clean the pan! Those brown bits are flavor.
Step 3: Sauté the Onions (10 minutes)
Reduce the heat to medium. Add the sliced onions to the same skillet. They’ll sizzle in the leftover chicken fat and butter. Cook them for 8-10 minutes, stirring occasionally, until they are soft, translucent, and starting to caramelize. This step builds the sweet base for the gravy. If the pan gets too dry, add a splash of broth.
Step 4: Make the Gravy Base (5 minutes)
Once the onions are soft, sprinkle the remaining flour over them. Stir constantly for 1 minute to cook off the raw flour taste. Then, slowly pour in the chicken broth while whisking continuously. This prevents lumps. Scrape up all those browned bits from the bottom of the pan. Let the mixture simmer for 2-3 minutes until it thickens slightly. Stir in the heavy cream.
Step 5: Assemble and Bake (45-50 minutes)
Place the browned chicken pieces into your 9×13 baking dish. Pour the onion gravy over the chicken, making sure to get lots of onions on top of each piece. Cover the dish tightly with foil. This traps the steam and keeps the chicken moist. Bake for 30 minutes. Then, remove the foil and bake for another 15-20 minutes to crisp up the skin and thicken the gravy. The chicken is done when it reaches an internal temperature of 165°F (74°C) and the juices run clear.
Total Time: About 1 hour and 15 minutes. Active time is only about 25 minutes. The rest is hands-off baking.
Expert Tips & Tricks
Here’s everything I’ve learned from making this dozens of times. These tips will save you from my mistakes.
Dry That Chicken
I can’t stress this enough. Wet chicken = steamed chicken. Use paper towels and really pat it dry. The skin needs to be dry to get crispy.
Don’t Skip the Browning
It’s tempting to just put raw chicken in the dish, but browning creates Maillard reaction flavors that make the dish taste rich and savory. The gravy will be bland without it.
Low-Sodium Broth is Key
Chicken broth varies wildly in salt content. If you use regular broth, taste the gravy before adding extra salt. Low-sodium gives you control.
Rest Before Serving
Let the dish rest for 5-10 minutes after taking it out of the oven. This allows the gravy to thicken up a bit more and the juices to redistribute in the chicken.
Crispy Skin Hack
If you want extra-crispy skin, broil for the last 2 minutes of cooking. Watch it like a hawk—it goes from golden to burnt in seconds.
Common Mistakes (and how to avoid them):
Mistake: Gravy is too thin
Fix: Simmer the gravy on the stovetop for a few more minutes before pouring it over the chicken. Or, leave the foil off during baking to let excess moisture evaporate.
Mistake: Chicken is dry
Fix: You likely overcooked it. Use a meat thermometer. Take it out at 165°F. Also, make sure you’re using thighs, not breasts.
Pro Tricks I’ve Learned:
For Extra Depth
Add a splash of Worcestershire sauce to the gravy. It adds a umami kick that makes the onion flavor pop.
For Better Texture
If you like a thicker gravy, mix 1 teaspoon of cornstarch with 1 tablespoon of cold water and stir it into the simmering gravy before pouring it over the chicken.
Variations & Substitutions
Once you’ve nailed the basic version, here’s how you can mix it up. I’ve tried all of these.
Chicken Breast Version
You can use boneless, skinless chicken breasts, but reduce the baking time to 25-30 minutes total. They cook faster and can dry out, so keep a close eye on them.
Bacon Lover’s
Cook 4-5 strips of bacon in the skillet before browning the chicken. Remove the bacon, cook the chicken in the bacon fat, and crumble the bacon on top at the end. Smoky and delicious.
Mushroom Twist
Add 8 ounces of sliced mushrooms to the onions. They soak up the onion flavor and add a meaty texture. Great for vegetarians if you use veggie broth.
Spicy Kick
Add ½ teaspoon of cayenne pepper or red pepper flakes to the flour dusting. It adds a subtle heat that balances the sweet onions.
Gluten-Free
Use a 1:1 gluten-free flour blend or cornstarch instead of all-purpose flour. The result is the same creamy texture.
Dairy-Free
Replace the butter with olive oil or dairy-free butter, and swap the heavy cream for full-fat coconut cream. It changes the flavor slightly but still tastes great.
Serving & Storage
How to Serve:
“I usually serve this straight from the baking dish at the dinner table—it looks rustic and stays warm. But here are other ways I’ve enjoyed it:”
Side Dishes:
– Mashed potatoes (obviously, to soak up the gravy)
– Egg noodles
– Steamed green beans or broccoli
– Crusty bread for dipping
– A simple green salad with a vinaigrette to cut the richness
Toppings Bar:
When I have guests, I put out: fresh chopped parsley, extra black pepper, and maybe some hot sauce if people want heat.
Storage Instructions:
Refrigerator:
Store in an airtight container for up to 4 days. The gravy will thicken in the fridge—totally normal. The chicken will absorb some of the sauce, which is actually delicious.
Reheating:
Best method: Add a splash of broth or water to a skillet, add your leftover chicken and gravy, and heat gently over low heat, stirring frequently. This brings back the creamy texture.
Microwave method: Heat in 30-second intervals, stirring between. Add a splash of liquid if it’s too thick. Never works: Trying to reheat in the pot you cooked it in without liquid. It always burns on the bottom. Ask me how I know.
Freezing:
Honestly, this doesn’t freeze well because of the dairy. The sauce can separate when thawed. Make it fresh or store in the fridge for up to 4 days. If you must freeze, freeze the chicken and gravy separately, and add fresh cream when reheating.
Pro tip: If leftovers are drying out, stir in a tablespoon of butter and a splash of milk when reheating. Brings back that creamy texture.
Nutrition Information
I’m not a nutritionist, but here’s the breakdown if you’re tracking. Please note that this is an estimate and can vary based on specific brands and portion sizes.
Per Serving (based on 2 pieces of chicken and ½ cup gravy):
| Nutrient | Amount |
|---|---|
| Calories | 480 |
| Protein | 35g |
| Carbs | 12g |
| Fat | 32g |
| Fiber | 3g |
| Sodium | 650mg |
What’s Good:
– High protein from the chicken
– Satisfying and filling
– Can be made gluten-free
– Rich in vitamins from the onions
What to Know:
– Higher in calories from the cream and butter
– Contains dairy and gluten (unless modified)
– Moderate sodium (use low-sodium broth to reduce)
My Take:
“Look, this is comfort food with cream and butter. It’s not a diet recipe. But it’s way better than takeout, costs less, and I know exactly what’s in it. When I want to make it lighter, I use half-and-half and less butter. But usually? I just eat a reasonable portion and enjoy it. Life’s too short to skip the gravy.”
Final Thoughts
So that’s my go-to smothered chicken with creamy onion gravy! I’ve probably talked your ear off at this point, but when you make a recipe this often, you have a lot to say about it.
This has saved weeknight dinners more times than I can count. It’s my answer to “what’s for dinner” when I’m tired, don’t want takeout, and still want something that tastes really good. My kids are happy, my husband’s happy, and I’m happy because I’m not stressed about cooking.
Make it yours! Try different add-ins, swap in your favorite vegetables, adjust the garlic (though more is always better in my opinion). The best recipes are the ones you adapt to your family’s tastes. If you make this, drop a comment and let me know what you think! I love hearing how recipes turn out in your kitchen. And if something doesn’t work, tell me that too—I’m here to help troubleshoot.
Happy cooking! And I hope your kitchen smells half as good as mine does right now.
Frequently Asked Questions
Q: Can I use chicken breasts instead of thighs?
A: You can, but thighs are much better for this recipe. Breasts dry out easily in a long bake. If you must use breasts, use boneless and reduce the baking time to 25-30 minutes. Keep a close eye on them so they don’t overcook.
Q: Why is my gravy too thin?
A: Usually, this means you didn’t simmer the gravy enough on the stovetop before baking, or there was too much liquid in the chicken. Let the gravy simmer for a few more minutes to reduce. You can also mix 1 teaspoon of cornstarch with 1 tablespoon of cold water and stir it into the gravy before baking.
Q: Can I make this ahead for a dinner party?
A: Yes! You can brown the chicken and make the onion gravy up to 2 days ahead. Store them separately in the fridge. When ready to serve, assemble in the baking dish and bake as directed. It might need an extra 5-10 minutes since it’s cold from the fridge.
Q: Why did my chicken skin get soggy?
A: This usually happens if the chicken wasn’t patted dry before browning, or if the pan was too crowded. Make sure to brown the chicken in batches so it gets that crispy skin. Also, removing the foil for the last 15 minutes of baking helps crisp it up.
Q: Can I freeze this recipe?
A: It’s not recommended. The cream in the gravy can separate when frozen and thawed, leading to a grainy texture. It’s best enjoyed fresh or stored in the fridge for up to 4 days.
Q: What can I serve with smothered chicken?
A: Mashed potatoes are the classic choice. Egg noodles, rice, or crusty bread are also great for soaking up the gravy. For a lighter option, serve with steamed green beans or a simple salad.
Q: Can I use onion soup mix instead of fresh onions?
A: You can, but fresh onions provide a better texture and natural sweetness. If you’re in a huge hurry, you can use a packet of onion soup mix, but you’ll need to adjust the salt in the recipe since the mix is very salty.
Pin This Recipe!


Smothered Chicken: 5-Step Easy Creamy Onion Gravy
- Total Time: 75 minutes
- Yield: 4 servings 1x
Description
A hearty, one-pan comfort food dish featuring bone-in, skin-on chicken thighs baked in a rich, creamy onion gravy. This recipe is forgiving, meal-prep friendly, and delivers a perfect golden crust with tender meat.
Ingredients
- 6–8 bone-in, skin-on chicken thighs
- 3 large yellow onions, sliced thin
- 3 tablespoons unsalted butter
- 3 tablespoons all-purpose flour (divided)
- 2 cups low-sodium chicken broth
- ½ cup heavy cream
- 1 teaspoon garlic powder
- 1 teaspoon onion powder
- 1 teaspoon dried thyme
- Salt and black pepper to taste
Instructions
- Preheat oven to 375°F (190°C). Pat chicken thighs dry with paper towels and season generously with salt, pepper, garlic powder, onion powder, and thyme. Lightly dust with flour, shaking off excess.
- Heat butter in a large cast iron skillet over medium-high heat. Brown chicken skin-side down for 4-5 minutes until crispy, then flip and cook 2-3 minutes more. Remove chicken and set aside.
- Reduce heat to medium. Add sliced onions to the same skillet and sauté for 8-10 minutes until soft and caramelized.
- Sprinkle remaining flour over onions and stir for 1 minute. Slowly whisk in chicken broth, scraping up browned bits. Simmer for 2-3 minutes, then stir in heavy cream.
- Place browned chicken in a 9×13 baking dish. Pour gravy over chicken, ensuring onions cover the meat. Cover tightly with foil and bake for 30 minutes. Remove foil and bake 15-20 minutes more until internal temperature reaches 165°F (74°C).
- Let rest for 5-10 minutes before serving.
Notes
Pat chicken dry for crispy skin. Use low-sodium broth to control saltiness. For extra crispy skin, broil for the last 2 minutes. This dish does not freeze well due to the dairy; store in fridge for up to 4 days. Reheat gently with a splash of broth or water.
- Prep Time: 15 minutes
- Cook Time: 60 minutes
- Category: Main Course
- Cuisine: American
Nutrition
- Serving Size: 2 pieces of chicken
- Calories: 480
- Sugar: 5
- Sodium: 650
- Fat: 32
- Saturated Fat: 16
- Carbohydrates: 12
- Fiber: 3
- Protein: 35
Keywords: smothered chicken, creamy onion gravy, one-pan dinner, comfort food, chicken thighs, easy weeknight dinner, gluten-free option


