I have a confession to make. For years, I was a fryer-hater. I hated the smell of old oil lingering in the kitchen for days. I hated the danger of splattering grease on my arms. And I definitely hated the cleanup. So when my kids started asking for “fried chicken” every Friday night, I felt trapped. I didn’t want to buy the frozen stuff, and I sure as hell didn’t want to stand over a pot of oil.
Then I tried baking chicken in the oven. It was… fine. Tender, yes. Crispy? Absolutely not. It was more like “warm roasted chicken with a dusty coating.” My kids took one bite and went back to their cereal. That stung.
But here’s the thing: I refused to give up. I wanted that shatteringly crisp crust without the grease. I wanted the juicy, buttermilk-tender meat inside without the health guilt. I spent the next six months testing batter after batter, temperature after temperature. I tried panko (too messy). I tried cornflakes (too sweet). I tried just flour (too bland).
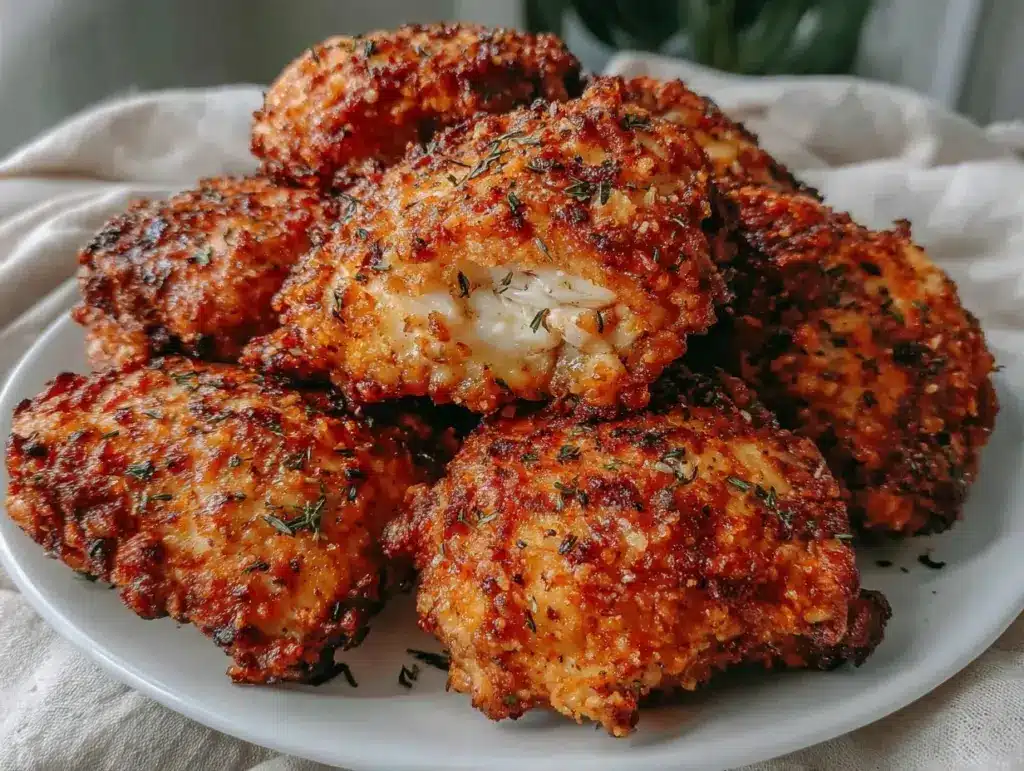
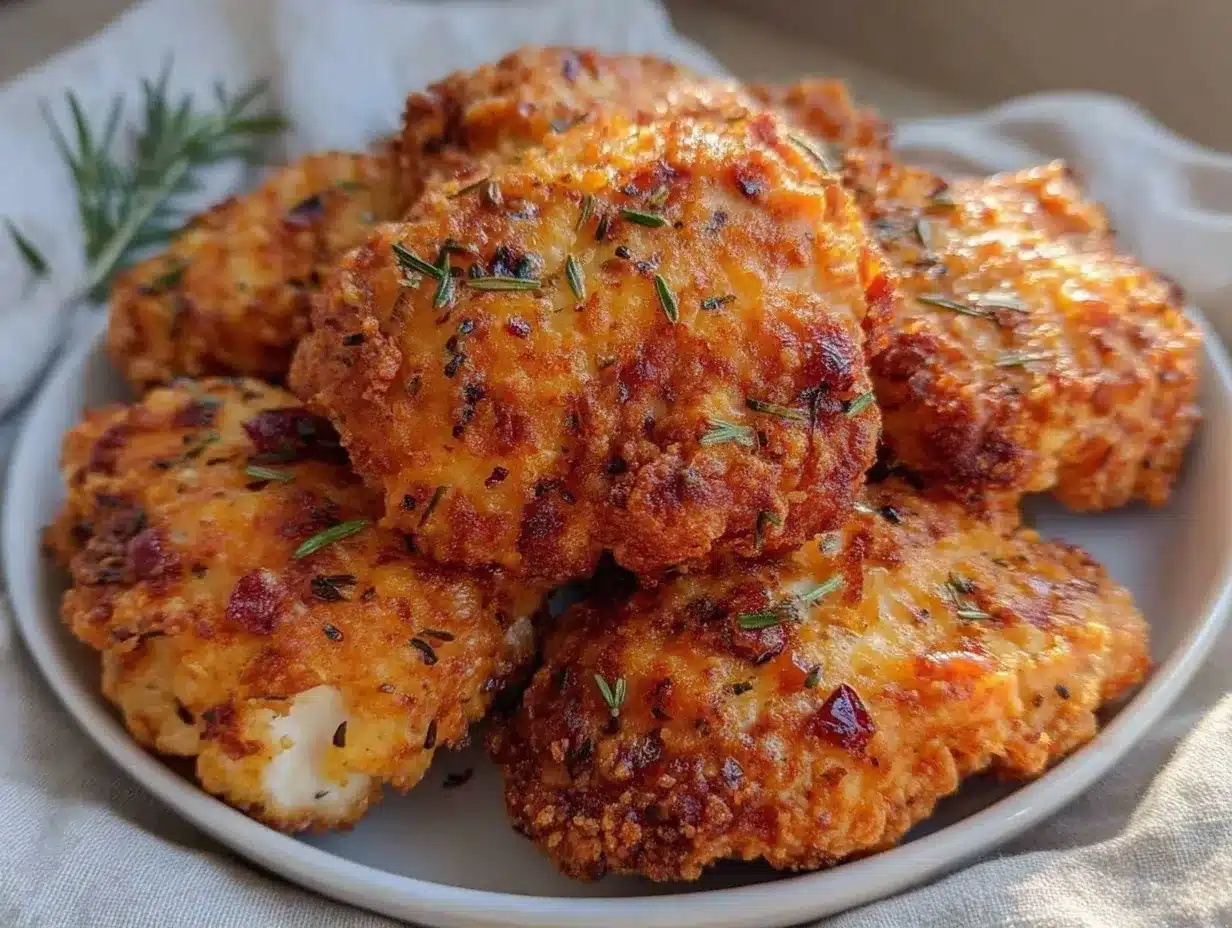
Finally, I cracked the code. It wasn’t about fancy ingredients. It was about technique. Specifically, the buttermilk marinade and a very specific way to arrange the chicken on the rack. The result? Extra-Crispy Oven-Fried Chicken that actually sounds like it’s been deep-fried when you bite into it. It’s golden, crunchy, and so juicy that I’ve made this smothered chicken with gravy for special occasions, but this is my everyday hero.
If you’re looking for a way to get perfect chicken dinner results without the hassle, this is it. You really can’t mess this up. Once you taste this, you’ll never go back to frying again.
Why You’ll Love This Recipe
This isn’t just another chicken recipe. It’s the one that solves the biggest problem home cooks have: getting crispy texture from the oven. Here’s why this extra-crispy oven-fried chicken has earned a permanent spot in my weekly rotation:
- Actually Crispy — I’m not talking about “soft and chewy.” I mean shatteringly crunchy. The secret is a double-dust technique that creates layers of crunch. My husband literally crunches so loud it wakes the dog.
- Zero Grease Mess — No splatter guards. No filtering oil later. Just a baking sheet and a rack. The cleanup takes about 30 seconds. That’s it.
- Buttermilk Magic — The marinade does the heavy lifting. It tenderizes the meat (even breast meat, which usually dries out) and adds that tangy, savory flavor that makes you crave more.
- Foolproof for Beginners — You don’t need to be a chef. If you can dip chicken in a bowl and put it in the oven, you can make this. I’ve taught my teenagers to make this while I’m on the phone.
- Family-Approved — My picky eater who only eats bread and cheese actually asks for seconds of this. That’s the ultimate test.
This is my go-to when I want comfort food that feels indulgent but doesn’t leave me feeling sluggish. It’s simple, reliable, and delicious.
Ingredients You’ll Need
Here’s the best part: you probably have most of this already. This extra-crispy oven-fried chicken relies on pantry staples and one key ingredient that does all the work. No weird spices you’ll use once and forget.
For the Buttermilk Marinade
Buttermilk (2 cups / 480ml) — This is non-negotiable. The acidity breaks down the proteins, making the chicken tender. If you don’t have buttermilk, mix 2 tablespoons of lemon juice or vinegar into 2 cups of whole milk and let it sit for 10 minutes. It works just as well.
Eggs (2 large) — They help the coating stick. Don’t skip them. Crack them into the buttermilk and whisk.
Hot Sauce (1 tablespoon) — I use Frank’s RedHot. It adds a subtle kick and enhances the savory flavor without making it spicy-hot. If you don’t like heat, use water or extra milk.
Garlic Powder (1 teaspoon) — Fresh garlic burns in the oven. Powder gives you that flavor safely.
Onion Powder (1 teaspoon) — Adds depth. Again, powder is better than fresh here.
For the Crispy Coating
All-Purpose Flour (1 cup / 120g) — The base of the crust. It creates that classic fried chicken texture.
Cornstarch (2 tablespoons) — This is the secret weapon. Cornstarch gets crispier than flour alone. It creates that shatteringly crunchy exterior. Don’t swap it for more flour.
Smoked Paprika (1 teaspoon) — Adds a beautiful color and a hint of smokiness. Regular paprika works if you don’t have smoked.
Garlic Powder (1 teaspoon) — We’re using it twice for extra flavor punch.
Onion Powder (1 teaspoon) — Same here. Double the powder, double the flavor.
Salt (1 teaspoon) — Adjust to taste. Buttermilk is salty, so start here and add more if needed.
Black Pepper (½ teaspoon) — Freshly cracked is best.
Cayenne Pepper (¼ teaspoon) — Optional, but I like a little heat. Start with less if you’re sensitive.
Chicken Pieces (3 pounds) — I use a mix of drumsticks, thighs, and breasts. Thighs stay juicier, breasts are leaner. Both work great.
Pro Tips for Ingredients
- Room Temperature Chicken: Take your chicken out of the fridge 20 minutes before marinating. Cold chicken drops the oven temp and can lead to uneven cooking.
- Buttermilk Quality: Use full-fat buttermilk if you can find it. Low-fat works, but the fat helps with browning.
- Flour Blend: I keep my flour and cornstarch pre-mixed in a jar. It saves time when I’m coating chicken.
Equipment Needed
You don’t need fancy gadgets for this. Here’s what I actually use:
Two Large Bowls — One for the buttermilk marinade, one for the flour mixture. I use glass bowls because they’re easy to clean.
Wire Rack — This is crucial. Place a wire rack over a baking sheet. This allows air to circulate underneath the chicken, so the bottom gets crispy too. I use a standard cookie sheet with a rack that fits inside.
Baking Sheet — A standard 13×9 inch sheet pan. Line it with foil for easy cleanup, though the rack does most of the work.
Whisk — For mixing the marinade and flour.
Tongs — For handling the chicken. Keeps your hands clean and helps you turn the pieces easily.
Instant-Read Thermometer — Not strictly necessary, but it guarantees perfect doneness. Chicken is safe at 165°F (74°C).
How to Make It: Step-by-Step
Alright, let’s make this! I’m walking you through exactly how I do it. It’s simple, but the order matters.
Step 1: Marinate the Chicken (30 minutes to 24 hours)
In a large bowl, whisk together the buttermilk, eggs, hot sauce, garlic powder, and onion powder. Add the chicken pieces, making sure they’re fully submerged. If you need to, do this in batches. Cover the bowl with plastic wrap and refrigerate. I like to marinate for at least 30 minutes, but overnight is best. The longer it sits, the more tender and flavorful it gets.
Step 2: Prep the Oven and Rack
Preheat your oven to 400°F (200°C). Place a wire rack inside a baking sheet. This setup is key for even browning. Sprinkle a tiny bit of the flour mixture on the rack so the chicken doesn’t stick.
Step 3: Mix the Dry Coating
In a shallow dish or large bowl, whisk together the flour, cornstarch, smoked paprika, garlic powder, onion powder, salt, black pepper, and cayenne. Make sure there are no lumps. This mixture is your seasoning base.
Step 4: The Double-Dust Technique
This is the secret to extra crunch. Take a piece of chicken out of the buttermilk, letting the excess drip off. Dredge it in the flour mixture, pressing firmly to coat all sides. Shake off the excess. Now, dip it back into the buttermilk for just a second—just a quick dip. Then dredge it in the flour mixture again, pressing hard this time. You want a thick, shaggy coating. Place it on the wire rack. Repeat with all chicken pieces.
Why do this? The first layer sticks, the second layer creates texture, and the tiny bit of buttermilk in between bakes into crunchy peaks.
Step 5: Bake the Chicken
Place the baking sheet with the chicken in the preheated oven. Bake for 25-30 minutes. Then, flip the chicken pieces over. Bake for another 20-25 minutes, or until the internal temperature reaches 165°F (74°C) for breasts and 175°F (80°C) for thighs. The coating should be deep golden brown and crispy.
Tip: If the tops are browning too fast but the chicken isn’t done, loosely tent with foil.
Step 6: Rest and Serve
Remove the chicken from the oven and let it rest for 5 minutes. This allows the juices to redistribute. Serve immediately while the crust is still shatteringly crisp.
Expert Tips & Tricks
Here’s everything I’ve learned from making this dozens of times. These tips will save you from my mistakes.
Don’t Crowd the Pan
If you pack the chicken too tightly, the steam gets trapped and the coating gets soggy. Give each piece some space. If you’re cooking a large batch, do two sheets.
The Rack is Non-Negotiable
I tried baking directly on the sheet once. The bottoms got soggy. The rack allows heat to circulate all around. It’s the difference between “okay” and “amazing.”
Press the Flour
When you dredge the chicken, press the flour into the meat. Use your fingers. If the coating isn’t pressed on, it’ll fall off in the oven. You want it to feel like it’s part of the chicken.
Check the Temp
Ovens vary. Use a thermometer. Pull the chicken at 165°F for breasts and 175°F for thighs. Thighs need a higher temp to break down connective tissue and become tender.
Keep It Warm
If you’re serving a crowd, keep the cooked chicken warm in a 200°F oven while you finish the rest. Don’t leave it on the counter; it’ll lose its crunch.
Variations & Substitutions
Once you’ve nailed the basic version, here’s how you can mix it up. I’ve tried all of these.
Spicy Kick
Add 1 teaspoon of cayenne or chili powder to the flour mixture. Or use spicy hot sauce in the marinade. This is my favorite version.
Herb-Crusted
Add 1 tablespoon of dried parsley, thyme, or oregano to the flour. Adds a nice earthy flavor.
Paprika Swap
Use sweet paprika for a milder flavor, or chipotle powder for a smoky heat. Smoked paprika is my go-to for that BBQ vibe.
Gluten-Free
Swap the all-purpose flour for a 1:1 gluten-free flour blend. The cornstarch helps keep it crisp. I’ve used King Arthur Measure for Measure with great results.
Dairy-Free
Use dairy-free buttermilk (mix plant milk with vinegar) and ensure your hot sauce is dairy-free (most are). The rest of the ingredients are naturally dairy-free.
Other Proteins
This works great for pork chops, tofu cubes, or even cauliflower florets. Adjust cooking times accordingly. For tofu, press it first and marinate for 2 hours.
Serving & Storage
How to Serve:
I serve this with loaded bacon ranch potato salad for a classic Southern-style meal. Or pair it with mac and cheese, collard greens, or a simple green salad. It’s versatile.
Leftovers:
Store leftovers in an airtight container in the fridge for up to 4 days. The chicken stays juicy for days.
Reheating:
To keep the crunch, reheat in the oven at 375°F for 10-15 minutes. Avoid the microwave—it makes the coating soggy. If you must use the microwave, do it for 30 seconds and then finish in a toaster oven or air fryer.
Freezing:
You can freeze cooked chicken for up to 3 months. Thaw in the fridge and reheat in the oven. For uncooked marinated chicken, freeze it in the marinade (in a freezer bag) and cook later. Just thaw first.
Nutrition Information
I’m not a nutritionist, but here’s the breakdown if you’re tracking. This is per serving (based on 4 servings, using 1 thigh and 1 breast per person).
| Nutrient | Amount |
|---|---|
| Calories | 450 |
| Protein | 35g |
| Carbs | 12g |
| Fat | 28g |
| Fiber | 1g |
| Sugar | 2g |
| Sodium | 650mg |
It’s higher in protein and lower in carbs than deep-fried chicken because you’re not absorbing oil. The buttermilk adds calcium and probiotics. It’s a smarter way to enjoy fried chicken flavor.
Final Thoughts
So that’s my extra-crispy oven-fried chicken! I’ve talked your ear off, but when you find a recipe this good, you want to share it. This has saved my weeknight dinners more times than I can count. It’s my answer to “what’s for dinner” when I want something comforting but don’t want to deal with the mess of frying.
My kids love it, my husband loves it, and I love it because it’s easy. Make it yours! Try different spices, add some heat, or serve it with your favorite sides. The best recipes are the ones you adapt.
If you make this, drop a comment and let me know what you think! I love hearing how recipes turn out in your kitchen. And if something doesn’t work, tell me that too—I’m here to help troubleshoot.
Happy cooking! And I hope your kitchen smells half as good as mine does right now.
Frequently Asked Questions
Can I use chicken breasts?
Yes! Breast meat is leaner, so it can dry out if overcooked. I recommend pounding them to an even thickness so they cook evenly. Cook until they reach 165°F, not a degree more. Thighs are more forgiving, but breasts work great if you watch the temp.
Why is my chicken not crispy?
Usually, this means the chicken wasn’t placed on a rack, or the oven wasn’t hot enough. 400°F is the sweet spot. Also, make sure you’re pressing the flour onto the chicken firmly. If the coating is too thin, it won’t get crunchy.
Can I air fry this?
Absolutely! Air fry at 375°F for 15-20 minutes, flipping halfway. The air circulation makes it even crispier. You might need to spray the chicken with a little oil before cooking to help browning.
What if I don’t have buttermilk?
Make your own! Add 1 tablespoon of lemon juice or white vinegar to 1 cup of milk. Let it sit for 5-10 minutes until it curdles slightly. It works perfectly as a substitute.
How do I keep the chicken warm for a party?
Place the cooked chicken on a rack in a 200°F oven. This keeps it warm without continuing to cook it or making it soggy. Don’t cover it with foil; that traps steam and ruins the crunch.
Can I marinate the chicken overnight?
Yes, and I actually recommend it. The longer it marinates, the more tender and flavorful it becomes. Just keep it in the fridge. If you leave it out for more than 2 hours, it’s not safe.
Pin This Recipe!

Extra-Crispy Oven-Fried Chicken: The Only Recipe You Need
- Total Time: 80 minutes
- Yield: 4 servings 1x
Description
Achieve shatteringly crispy, juicy oven-fried chicken without the grease or mess. This foolproof recipe uses a buttermilk marinade and a double-dust coating technique for perfect texture every time.
Ingredients
- 2 cups buttermilk
- 2 large eggs
- 1 tablespoon hot sauce (e.g., Frank’s RedHot)
- 1 teaspoon garlic powder
- 1 teaspoon onion powder
- 1 cup all-purpose flour
- 2 tablespoons cornstarch
- 1 teaspoon smoked paprika
- 1 teaspoon salt
- 1/2 teaspoon black pepper
- 1/4 teaspoon cayenne pepper (optional)
- 3 pounds chicken pieces (drumsticks, thighs, and breasts)
Instructions
- Whisk together buttermilk, eggs, hot sauce, garlic powder, and onion powder in a large bowl.
- Add chicken pieces to the marinade, ensuring they are fully submerged. Cover and refrigerate for at least 30 minutes or up to 24 hours.
- Preheat oven to 400°F (200°C). Place a wire rack inside a baking sheet and lightly sprinkle with flour mixture to prevent sticking.
- In a shallow dish, whisk together flour, cornstarch, smoked paprika, garlic powder, onion powder, salt, black pepper, and cayenne.
- Remove a chicken piece from the marinade, letting excess drip off. Dredge in the flour mixture, pressing firmly to coat. Shake off excess.
- Dip the chicken back into the buttermilk for a second, then dredge in the flour mixture again, pressing hard to create a thick, shaggy coating. Place on the wire rack.
- Repeat with all chicken pieces.
- Bake for 25-30 minutes, then flip the chicken. Bake for another 20-25 minutes until internal temperature reaches 165°F for breasts and 175°F for thighs.
- Remove from oven and let rest for 5 minutes before serving.
Notes
For best results, use a wire rack to allow air circulation. Ensure chicken is at room temperature before marinating. If browning too fast, tent loosely with foil. To keep warm for a party, place cooked chicken on a rack in a 200°F oven.
- Prep Time: 30 minutes
- Cook Time: 50 minutes
- Category: Main Course
- Cuisine: American
Nutrition
- Serving Size: 1 thigh and 1 breast
- Calories: 450
- Sugar: 2
- Sodium: 650
- Fat: 28
- Carbohydrates: 12
- Fiber: 1
- Protein: 35
Keywords: oven fried chicken, crispy chicken, buttermilk chicken, easy chicken recipe, healthy fried chicken, weeknight dinner


